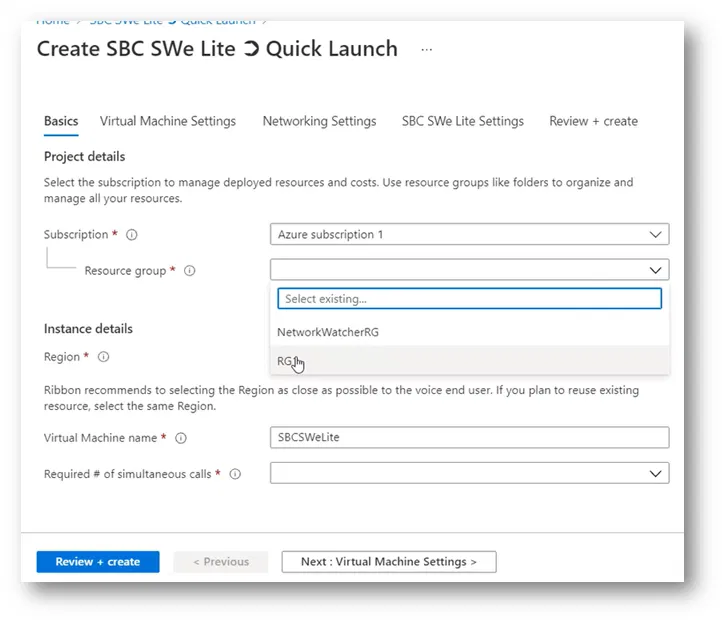
Part 2: Checking the resulting VM and Accessing the Web Interface of the SBC
On Azure Admin Portal, to access the resulting VM network settings by going to Virtual machine Name > Networking

When you check the networking of the resulting VM, you will see the two network interfaces of the VM
One dedicated to the Management of SBC. And the other is for Signaling and Media traffic
Signaling Network Interface
Below is an image that shows the details of the Signaling network interface (the first interface)
Notice that the Inbound port rules include only the ports of HTTP and HTTPS (also ports to be used by Azure)

Signaling and Media Interface
Click on the interface of Signaling and Media traffic to view its details

The below shows the details of the Signaling and Media interface

Below, I am copying the public IP address for this interface so that I can use it to access the web interface of the SBC

About Accessing the Web Interface
Ideally, to manage the SBC, you will be connected to the SBC VM Web Interface through the IP address of the management interface.
Probably you will connect a machine to the management subnet. Or you will connect the management interface to your usual Azure management network
Note:
Note that although both interfaces have a public IP assigned to them, only the public IP address of the second interface (Signaling and Media Interface) is accessible over the internet. That is because only the second interface (Signaling and Media Interface) is routed to the internet.
To simplify our configuration, I will keep the HTTPS port to the second interface (Signaling and Media Interface) opened and I will access the SBC Web Interface through its public IP
Accessing the Web Interface of SBC
In the browser of your computer, access the public IP of the Signaling and Media Interface

Once you pass the certificate warning, you will get the web interface as shown below
(The public certificate is not yet installed)

Logging On to The Web Interface
Click on the “Enter” button

You will access the login page

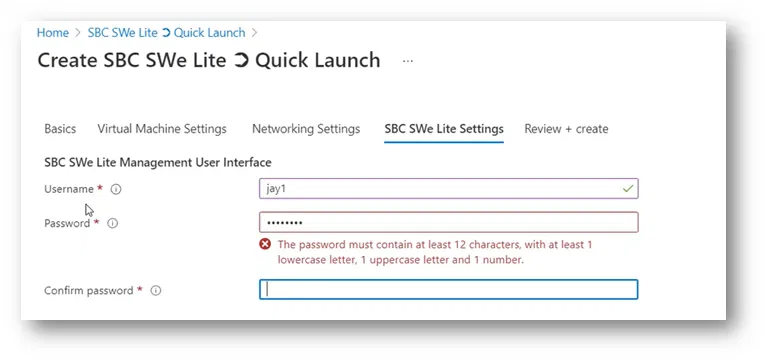
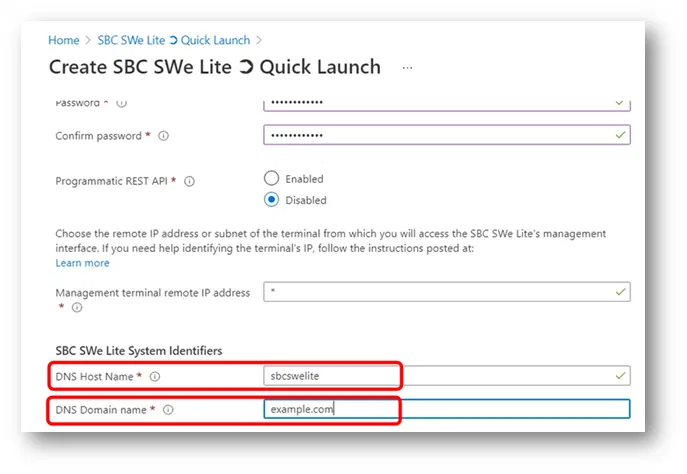
Type the User Name and Password you have specified while creating the VM (We have specify them on the “SBC SWe Lite settings” tab)

The credentials are correct, you will be asked to put a different password and to confirm it

Click on the “Apply” button

It will show you a message indicating that the password got changed

It will take you back again to login page

Type the User Name and the new Password and Login

Below is the Web Interface after logging on