SWe Lite

SIP-TLS Server Handshake Failure/SIP-TLS Handshake Negotiation Start Failure warnings/errors on Monitor Tab of SBC Edge

If you are using Ribbon SBC Edge (SBC 1000 / SBC 2000 / SBC SWe Lite) that is integrated with Teams Direct Routing, you noticed on your SBC Edge repeated warnings/errors under the Alarm View on the Monitor tab like the following:

SIP-TLS Server Handshake Failure

SIP-TLS Handshake Negotiation Start Failure

You might have different causes of the alarm (the cause is inside the description of the alarm)

Graphical user interface, text, application

Description automatically generated

Graphical user interface, text, application

Description automatically generated

Reason for these Warnings and Errors:

The reason for these warnings and errors is that there are many machines on the net that keeps scanning SIP servers on well know SIP ports trying to hack them to make calls.

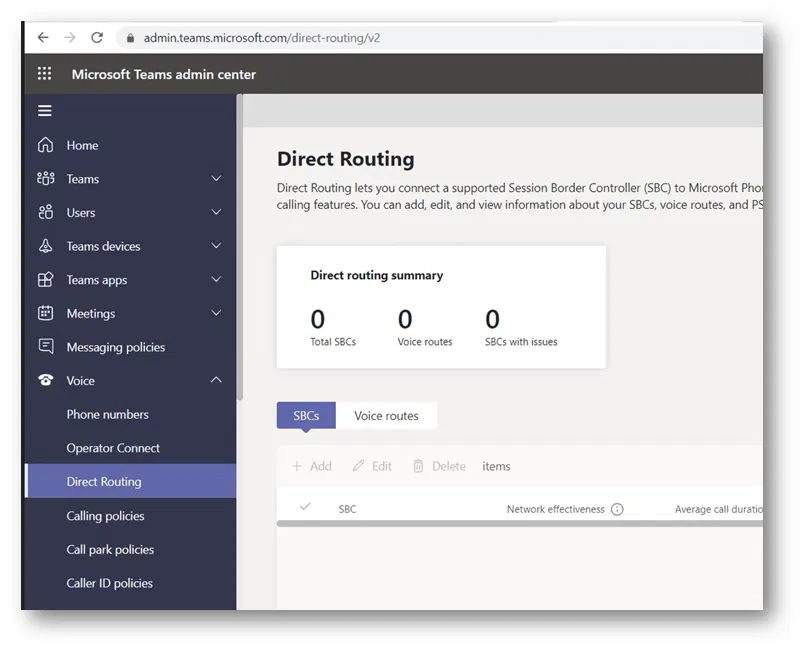
To avoid these machines from scanning your SBC, you need to limit SIP communication only with Microsoft Teams server (SIP Proxy) which consists of these two ranges (52.112.0.0/14 and 52.120.0.0/14) as explained in the link:

https://learn.microsoft.com/en-us/microsoftteams/direct-routing-plan-media-bypass

Under the section “SIP Signaling: Ports”

The following is from the above link

Graphical user interface, text, application, email

Description automatically generated

Using Firewall

If your SBC is behind a firewall, you can simply configure the firewall to limit SIP communication to only (52.112.0.0/14 and 52.120.0.0/14)

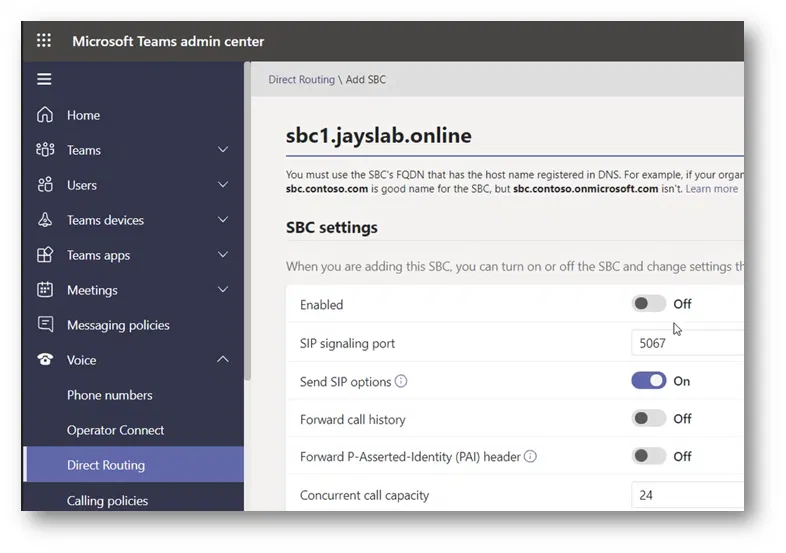
Using SBC Edge Access Control List (ACL)

Another method is to utilize applying Access Control List (ACL) on the “Logical Interface” of SBC that is connected to the internet.

You can create your own ACL or you can utilize the existing ACL created by running “Easy Config Wizard” and selecting Teams as a scenario

Notes About Using Access Control List (ACL):

  • You need to allow HTTPS allowed on the interface to control the SBC if you have the same interface for both managing the SBC and for SIP and Media communication
  • If you configured allowing HTTPS incorrectly in the ACL, you will lose access to the Web Interface of the SBC
  • It is better to have an additional interface enabled with the correct IP and connected to the network. This would help in case you have applied an ACL that is incorrectly not allowing HTTPS. This way, you will not end up with your SBC Web Interface inaccessible
  • In the case of SBC 2000, the Admin Port is usually configured by default and has the default IP of 192.168.128.2.
  • Do a backup of your SBC before applying changes

Part 11: Testing Outgoing and Incoming Calls

Testing Outgoing Calls

The following shows dialing a number to make an outgoing call

The following image shows Teams is calling the number

The call is established

If you check the Monitoring Tab of the SBC Web Interface while making a call, you will see something like the following image when the call is ringing

When the call is established, you will something like the image below.

Testing Incoming call

When making incoming calls, I managed to see the notification pop up of Teams client on the Desktop of Windows

The following call shows that the incoming call is established

Part 10: Enable users for Direct Routing, voice, and voicemail

In this article, we will enable a user for Teams Direct Routing setup that we have created in the previous steps

Connect a Microsoft Teams PowerShell session

This will ask you to authenticate with a user that has the proper permissions to enable a user and prepare the PowerShell session. You might need to install the Teams PowerShell module if you didn’t do that earlier.

Connect-MicrosoftTeams

Configure The Phone Number and Enable Enterprise Voice and Voicemail Online

The following command is an example of how to assign a number, and enable Enterprise Voice and Voice Mail. Both assigning a number and enabling Enterprise Voice are required to enable a user to use Teams Direct Routing

Set-CsUser -Identity User1@jayslab.online -OnPremLineURI “tel:+17124584557;ext=557” -EnterpriseVoiceEnabled $true -HostedVoiceMail $true

Assign The Voice Routing Policy to a User

This command will assign the Voice Routing Policy that we have created earlier

Grant-CsOnlineVoiceRoutingPolicy -PolicyName “PassAll” -Identity User1@jayslab.online

Assign a Teams Calling Policy

Turning this on will allow users to make calls

Grant-CsTeamsCallingPolicy -PolicyName AllowCalling -Identity User1@jayslab.online

Assign Teams Only mode to users to ensure calls land in Microsoft Teams

This is needed to make sure that the call will land

Grant-CsTeamsUpgradePolicy -PolicyName UpgradeToTeams -Identity User1@jayslab.online

Assign a Dial Plan

Usually, you assign a dial plan to a user to translate dial phone numbers that are being dialed by the user to E.164 format that is required by Teams Telephony. For simplicity and to complete the setup, I am assigning the existing default Dial Plan that doesn’t change any number being dialed.

Grant-CsTenantDialPlan -Identity User1@jayslab.online -PolicyName Global

Part 9: Teams Direct Routing Call Routing

In this part, we will create an Online Voice Routing Policy and the needed components. You can assign this policy to the users to allow them to make outgoing calls using the on-premise SBC.

For simplicity and to complete the setup. We are creating:

  • A “Usage”
  • An “Online Voice Route” that is associated with the new Usage and uses our SBC for all outgoing calls
  • An “Online Voice Routing Policy” that uses the Usage (this way it will use the new SBC for outgoing calls)

You can improve this configuration by creating more of these 3 voice elements (I cannot explain this part better than Microsoft documentation)

For simplicity also, I am calling each of these components “PassAall”

Preparing the Session

Before you can use any of Teams PowerShell commands, you need to connect the PowerShell to Microsoft Teams Online using the command:

Connect-MicrosoftTeams

Creating a usage

This is how to create a new usage

Set-CsOnlinePstnUsage -Identity global -Usage @{Add=”PassAll”}

Creating an Online Voice Route

The below shows how to create a new Route (Online Voice Route) and associate it with the usage “PassAll” that we have created above

New-CsOnlineVoiceRoute -Identity “PassAll” -Description “PassAll” -NumberPattern “.*” -OnlinePstnGatewayList sbc1.jayslab.online -Priority 1 -OnlinePstnUsages “PassAll”

Creating a new Online Voice Routing Policy

The below shows the creation of a new Online Voice Routing Policy that uses the “PassAll” usage that we have created earlier. This way, this Policy will use the route (Online Voice Route) that we have just created.

New-CsOnlineVoiceRoutingPolicy “PassAll” -OnlinePstnUsages “PassAll”

Now, this “Online Voice Route” is read and can be assigned to the user(s)

Viewing The Newly Created Components on Teams Admin Center

Teams admin center > Voice Routing Policies

You will see the policy “PassAll” that we have created earlier. Click on the “PassAll” policy to open it

The details of the policy will be shown. Under “PSTN usage records”, you will see the usage named “PassAll” is listed

Viewing Voice Routes

Teams Admin Center > Voice > Direct Routing

Click on “PassAll” to view its properties

Under “SBCs enrolled”, which shows the list of SBCs that this route use you will see our SBC list

Scroll Down to view the list of “PSTN usage records”

Click on Cancel to get out of the details of the Voice Route

Part 8: Running Easy Config Wizard

In this step, we will configure the SBC to support Teams Direct Routing. The configuration will be done with the help of “Easy Config Wizard”

On the Tasks tab of the Web Interface of the SBC, expand “SBC Easy Setup” and click on “Easy Config Wizard”

The Wizard will start and Step 1 will be shown

Make sure “SIP Trunk <-> Microsoft Teams” is selected as “Application” (on the current version of SBC it is the default option)

Type a name for the “Scenario Description”. Configuration elements that will be created, some of them will start with the name of the scenario

Select “Telephone Country” of your SIP Trunk

Unser SIP Sessions, type the number of SIP sessions that you have purchased from the SIP Trunk provider (for me it is just 4 sessions)

Click on the “Next” button

This will take you to “Step 2”

Under “User Secondary Border Element Server” I selected “Disabled”. You can enable this if your SIP Trunk provider has more than one SIP Server

Under “Border Element Server”, type the FQDN or the IP of the SIP Server of your SIP Trunk provider

You can change the “Protocol” or/and the “Port Number” to match the ones that your SIP Trunk provider use

Under NAT Public IP (Signaling/Media), type the public IP of the Signaling/Media interface (second interface) of the SBC/VM

Click on the “Next” button

In “Step 3”, the wizard will show you the summary of your choices and settings of the previous two steps. Of course, you can go back and change them.

Click on “Finish”

A message will be shown asking if you want to continue applying the settings

Click on the “OK” button

The wizard will work on applying the settings

After applying the settings, you can check the “Monitor” tab to check if the signaling groups are up (they will be shown as green)

Remember that you need to have the following in order to “Teams Direct Routing” signaling group up:

  • A valid certificate installed on the SBC that matches
  • A correct DNS record of type A that points to the SBC
  • Register the Domain Name of the SBC as a domain on Microsoft 365 and created a user with Telephony License
  • Connected the SBC to Teams Direct Routing (using PowerShell or Teams Admin Center)
  • The required ports are opened

The signaling group for “Teams Direct Routing” might appear as down as shown below

In that case, you need to troubleshoot and find the reason why it is down and fix it

About “Transformation Tables”

The wizard configured the SBC to pass the called number and the calling number as they are

My SIP Trunk provider accepts E.164 format which is the same format Teams Direct Routing uses.

However, the ending part of LineURI of the user “;ext=xxx” (which is the extension of the user) cannot be used as the calling number when sent to my SIP Trunk (“;ext=xxx” is not E.164 format)

(LineURI represents the number the telephone number of the user)

That is why I made a change is my Transformation Table of outgoing calls to remove the “;ext=xxx” in order to make my outgoing calls accepted by my SIP Trunk provider

The following image shows the transformation table entry in more clear way

The settings:

For “Input Filed Type” select “Calling Extension”

For “Input Filed Value” type (.*) to catch all

For “Output Filed Type” select “Calling Extension”

Keep “Output Filed Value” empty to remove the extension

As I explained, this will make the calling number go to the SIP Trunk without the “;ext=xxx” part

Note:

The calling number should be part of the numbers that are allocated by the SIP Trunk provider to be used by you like the telephone numbers of the users. If you use any number that is not part of these numbers, the outgoing call will be rejected by the SIP Trunk (the call will fail).

Part 7: Installing Certificates on the SBC

Accessing Certificates page

On the Web Interface of the SBC, go to the “Tasks” tab

On the “Tasks” tab and expand “SBC Easy Setup”

Click on “Certificates”

This will take you to the “Certificates” page where you can manage the certificates of the SBC

Importing Root CA, Issuing CA, and Baltimore CA

On the Trusted CAs tab (which is the first tab on this page)

Click on the import button

The “Import Trusted CA Certificate” box will be shown

On the Mode, select “File Upload” (you can use Copy and Paste mode if you want to import the certificate as a Base64 text)

Click on Choose File

Select the file of the Root Certificate and click on Open

The filename of the certificate will be shown. Click on the “OK” button

The Web Interface will show you a message that says it will trust a CA. Click on the “OK” button

The newly imported certificate will be listed under the “Trusted CAs” list

Do the same thing to import the issuing CA (both the root and the issue CAs are on the same table and managed in the same way). The only difference is that you need to import the root CA first then the issue CA

Use the same thing to import the “Baltimore” CA certificate (which is required to communicate with Teams Direct Routing servers on Microsoft 365)

The below image shows the root, the issuing CA and “Baltimore” certificates under “Trusted CAs”

Importing SBC Primary Certificate with Its Private Key

Because I have a certificate with its private key with me (already requested and generated on some other system), I am using the option to import it. It is usually with the (*.pfx file) extension

(If you don’t have a certificate, you can generate it using the “Generate CSR” tab)

To import the certificate with its private key, go to the “SBC Primary Certificate” tab

Click on “Import” and select “PKCS12 Certificate and Key” (to import the *.pfx file)

The “Import PKCS12 Server Certificate” will be shown

Click on “Choose File”

Select the file that contains the certificate with its private key and click on Open

Type the “Password” that is used to protect the content of the *.pfx file and then click on the “OK” button

A message will be shown to inform you that you are going to import the certificate. Click on the “OK” button

The certificate will be imported, and its details will be shown

Part 6: Changing the Host Name and Domain Name of SBC

You need to select the correct “host name” and “domain name” that you will be using in your DNS A record (also will be used in the name of the certificate of the SBC. Remember that the domain name part should be a domain that is added to Microsoft 365 tenant.

If you want to change the host name of the SBC, it is better to do that before running the “Easy Config Wizard”. That is because the wizard will create some components that use that name in their config.

For me, I have selected a temporary “host name” and “domain name” during the creation of the SBC earlier. So, I must change them before running the wizard.

Below are the steps to change the “host name” and “domain name”

On the “Setting” tab of the Web Interface of the SBC, go to System > Node-Level Setting

Under “Host Information”, you will see the current “Host Name” and “Domain Name” of the SBC

Change the “Host Name” and “Domain Name”

Click on the “Apply” button

Note:

It is better to restart the SBC after changing the “host name” and/or “domain name”

Part 5: Connecting the SBC SWe Lite to Teams Direct Routing

After completing the previous two steps:

  • Add the domain that will contain the SBC to Microsoft 365 (for example, add the domain example.com if your SBC name will be SBC1.example.com)
  • Enabling a user in that domain

You can now successfully connect the SBC to Teams Direct Routing

Connecting the SBC using Admin Center

Open “Microsoft Teams admin center”

On the menu on the left side of the portal, expand “Voice”

On the “Voice” menu, select “Direct Routing”

This will take you “Direct Routing” settings page

Click on “SBCs”

Click on the “Add” button

This will take you “Direct Routing\ Add SBC” page where you can define a new SBC with its settings

Type the name of your SBC

Under the SIP signaling port, the port number there is “5067”

I am changing the port to 5061. Which is the default port number that is usually created by the “Easy Setup” wizard of Ribbon SBC when you select the Direct Routing option

Under “Concurrent call capacity”, specify the number of channels you will select in “Easy Setup” wizard.

This number usually equals the maximum number of SIP sessions to your SIP provider.

Don’t forget to turn on the “Enabled” button

Click on the “Save” button at the end of the page

If you haven’t added the domain to Microsoft 365 and enabled a user under that domain, you will get a message similar to the one below

We can’t use the “sbc.domain.com” domain as it hasn’t been set up in the organization. Please try again. If you continue to have problems, contact Microsoft customer support.

As the image below shows

However, if everything is correct, you will get the message “Item was created” as the image below shows

The name of the newly registered SBC will be under the list of SBCs

Note:

The SBC would be shown to have errors because it is not yet configured to work with Direct Routing or the DNS record of type A that should point to its IP has not yet been created

Registering the SBC using PowerShell

Alternatively, you can register the SBC using New-CsOnlinePSTNGateway PowerShell command as the example below shows

New-CsOnlinePSTNGateway -Identity sbc1.jayslab.online -Enabled $true -SIPSignalingPort 5061 -MaxConcurrentSessions 4


Part 4: Adding A User Account to The Domain That Will Be Used for the SBC

After you have registered a domain name, you need to add at least one user with a Phone System license (in my case I am using an E5 license which includes Phone System) and the SIP address of that user should have the FQDN portion of the SIP address matching the created base domain. This is needed to complete the registration of the SBC.

On Microsoft 365 admin center, expand Users > Active users

Click on Add a user

The “Add a user” wizard will be started

Fill in the details of that user, the most important part is that under “Domain” you make sure that you have selected the domain which will be used for registering the SBC

I cleared “Automatically create a password” this allows me to enter the password myself (that is just my personal preference)

I typed the password

I cleared “Require this user to change their password when they first sign in” (that is also my personal preference).

I typed the password and clicked on Next

The user needs to have a Phone System license. In my trial tenant, I have “Office 365 E5”, so I am assigning this type of license to this user

Click on Next

This will take you to Review and finish the page. Where you can check the settings that you have selected

Click on “Finish adding”

The wizard will work on adding the user

The wizard will confirm that the user is added

Click on Close

Now you will be able to see the user in the list of “Active users”. You might need to search the user if you have a big number of users

Part 3: Adding a Domain to Microsoft 365

To Connect the SBC SWe Lite to Teams Direct Routing the following needs to be done:

  • Add the domain that will contain the SBC to Microsoft 365 (for example, add the domain example.com if your SBC name will be SBC1.example.com)
  • Enable a user in that domain (for example enable the user user1@example.com)
  • Finally, you can connect the SBC to Direct Routing: Select a name to the SBC (with the domain part as one of the registered domains on Microsoft 365) and register that name of the SBC (for example, register the SBC with the name SBC1.example.com)

In this part of the series, we will do the first step from the above steps, we will add the domain to Microsoft 365

Adding the domain

On the “Microsoft 365 Admin Center” main page, expand “Settings ”

The “Settings” menu will be expanded. Select “Domain”

This will open Domains’ settings. Click on “Add domain”

The “Add Domain” wizard will be started. Type the name of your domain

Click on “Use this domain” button

This wizard has the capability to detect some well-known DNS registrars and it can automatically do the configuration by adding the needed DNS records.

Note:

If your DNS registrar is not one of the DNS registrars that the wizard can detect and configure, you will need to add the DNS records manually to your domain.

For me, my DNS registrar is GoDaddy (the wizard has detected it) as the image below shows

I clicked on the “Verify” button

The wizard popped up a mini-browser window to “Confirm Access” and to get connected to GoDaddy

I clicked on the “Connect” button

The Wizard will ask you if you want to let to add the needed DNS records

Click on “Continue”

On the “Add DNS records” page, it will explain to you the records needed

For me, I had to scroll down to view all the needed records

I have clicked on “Advanced Options” to view all the records that the wizard is going to add

Below images shows all the records

At the end of the page, click on “Add DNS records”

For me, it showed me the GoDaddy “Confirm Access” mini page again

I clicked on Connect

The wizard started “Configuring domain”

The final page indicates that “Domain setup is complete”

Click on “View all domains” to go back to the “Domains” page

Under the “Domains” page in the admin center, the newly added domain is shown

Viewing The Details of the Added Domain

On the Domains page, click on the domain to view its details

Click on DNS records

This will show the DNS records. The images below show the DNS records of my domain

Viewing DNS records on DNS domain provider

The images below show what the Add domain wizard has added to my DNS on GoDaddy