Direct Routing

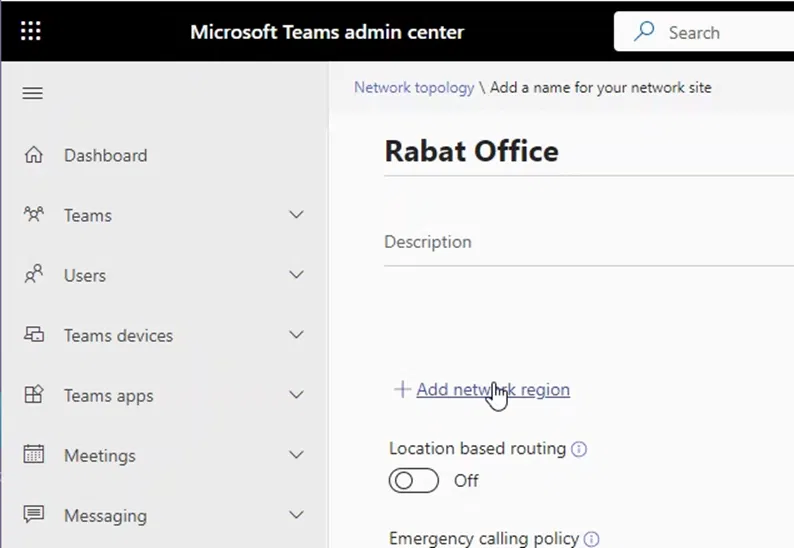
Checking SIP Messages to Verify the Local Media Optimization Between Teams Client and SBC

Why Do You Need to Check SIP Messages

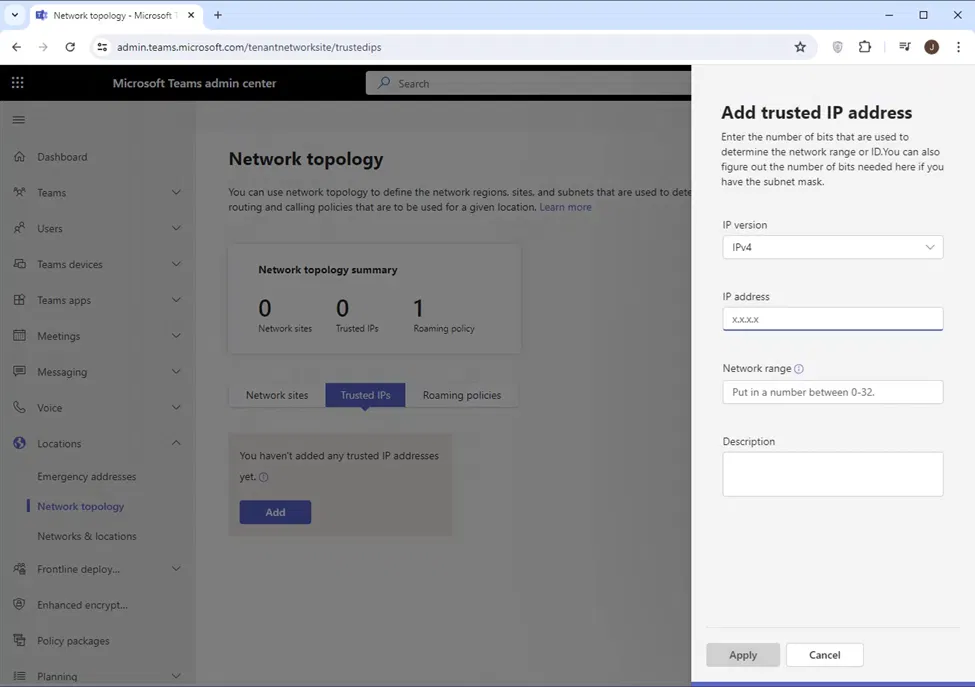
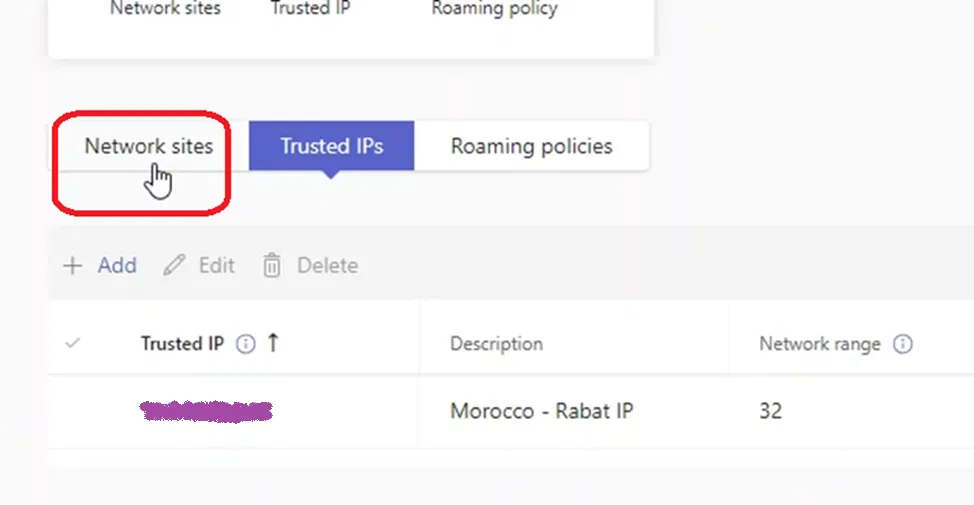
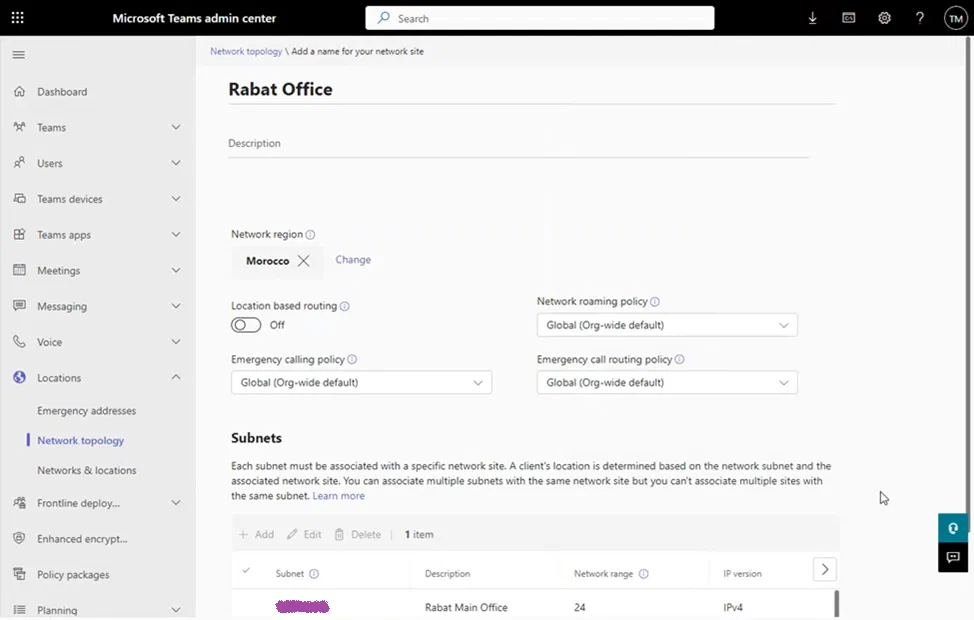
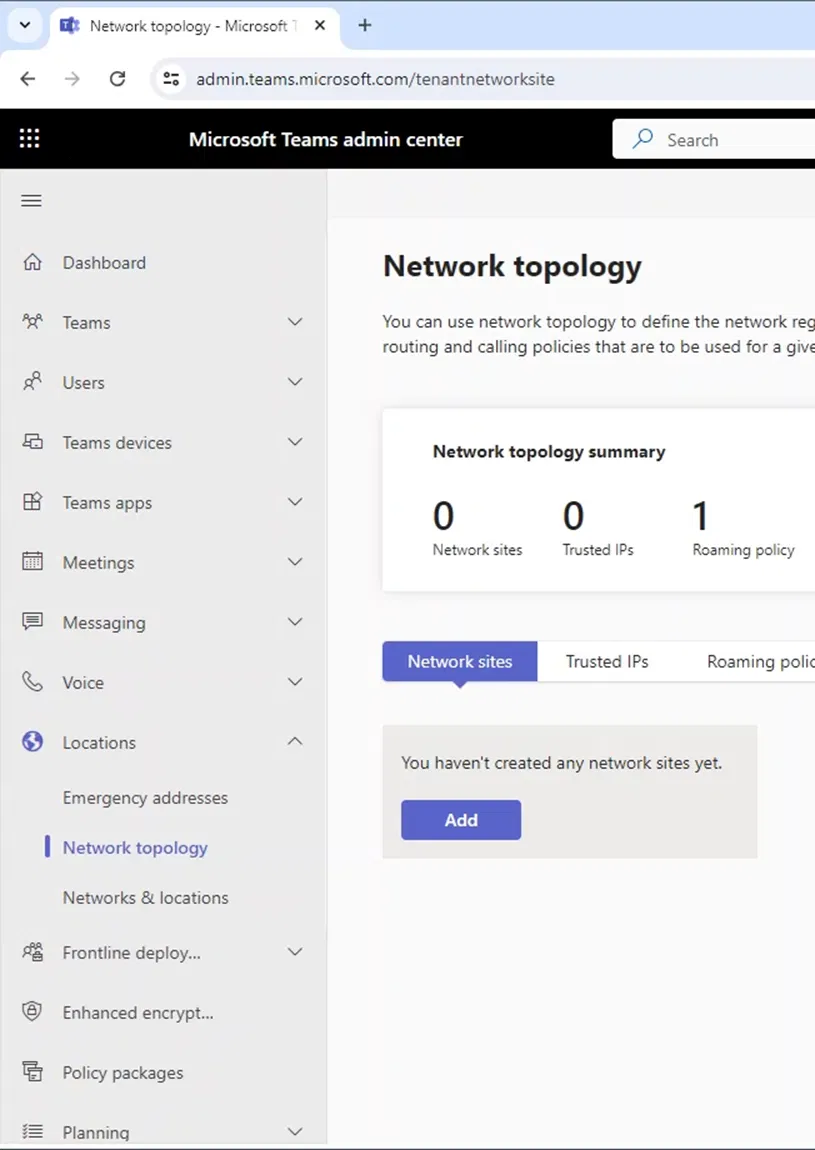
After configuring Direct Routing with Local Media Optimization, you need to check that Local Media Optimization is working correctly

One way to verify that Local Media Optimization is working correctly is to check the headers in the invite SIP message to examine whether the headers contain the correct values.

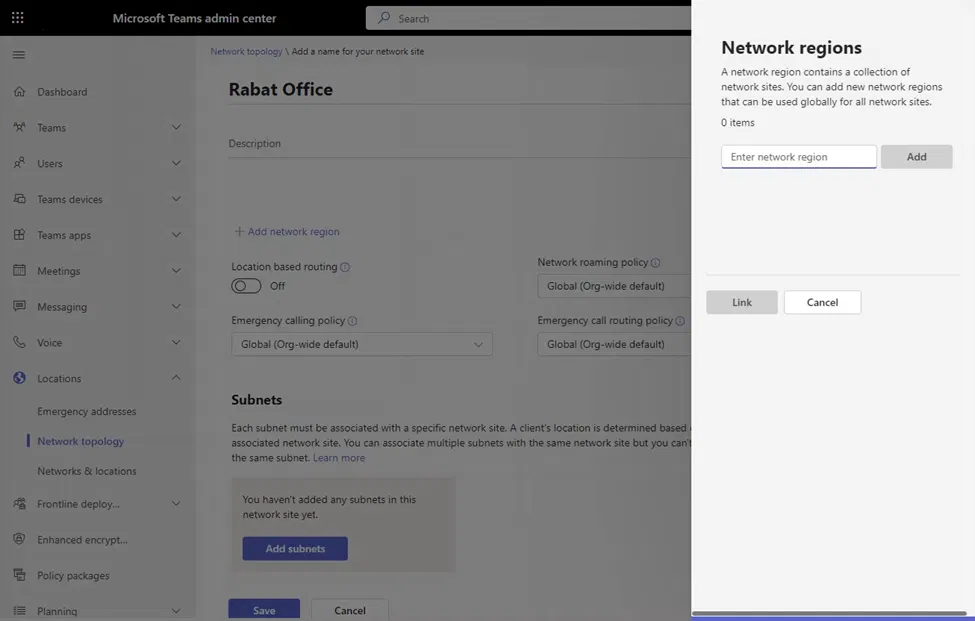
Tool Used to Capture SIP Messages (LX Tool from Ribbon)

Ribbon SBC Edge family of products sends the logs using the Syslog protocol.

These logs can include SIP messages and other types of logs depending on the level and settings of logging.

To capture the logs from my Ribbon SBC 1000 (a member of the SBC Edge family), I am using the LX Tool from Ribbon to capture the SIP messages

The LX tool captures the logs by acting as a Syslog server to capture the logs.

After capturing the logs, I have used this tool to verify the header of the invite message

Teams Client Detects That It Is External

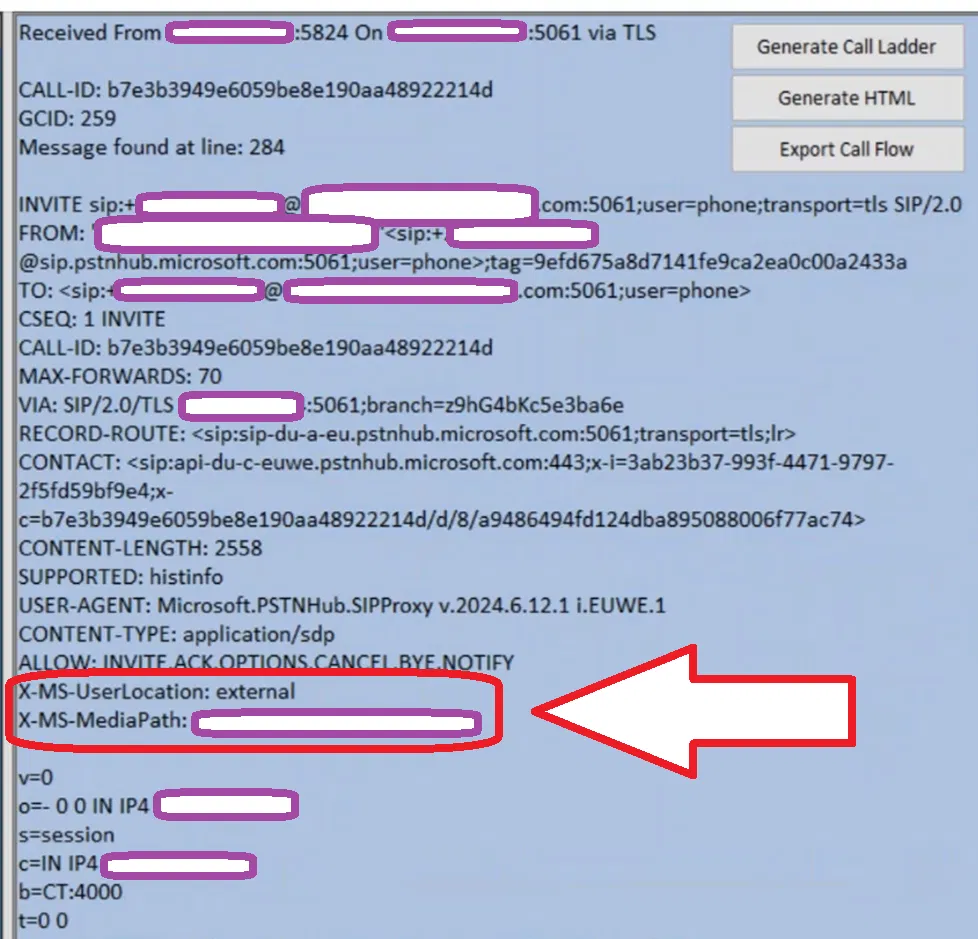
When Teams Client is inside the internal network, but the Direct Routing with Local Media Optimization is not configured correctly (or the Teams Client is external)

  • The X-MS-UserLocation header is set to external. In the invite message (as the image below shows)
  • X-MS-MediaPath is set to the SBC FQDN (this is a single SBC setup)

Note:

When Teams Client is really in the external network, the X-MS-UserLocation is set to external (which is the correct setting)

The image below shows the invite message between Teams Client and Ribbon SBC 1000 captured using the LX tool (Ribbon tool to capture Syslog we discussed above). The headers mentioned above are in a red box.

Teams Client Detects That It Is Internal

When the Teams client is inside the internal and Direct Routing with Local Media Optimization is configured correctly,

  • The Invite message will have the X-MS-UserLocation header set to internal.
  • X-MS-UserSite header will appear in the invite message and will be set to the site of the Teams Client
  • X-MS-MediaPath is set to the SBCs FQDN in the correct order (In the example below, X-MS-MediaPath shows only one SBC, since we have only one SBC in our setup)

The image below shows the invite message between Teams Client and Ribbon SBC 1000 captured using the LX tool. It contains the three headers we mentioned (The headers are in a red box)

Configuring Direct Routing Local Media Optimization for Single-Site and Single SBC (Using Teams Admin Center)

You can use Local Media Optimization with a single site with a single SBC only. This is useful for keeping media traffic inside the internal network (without using Media Bypass). In a previous post, I explained how to configure such a setup using PowerShell. In this post, I will show how to do such configurations using the Teams Admin Center.

My previous post is found on:

Direct Routing Local Media Optimization for Single-Site and Single SBC – Jay’s Lab (jayslab.online)

How Teams Client Determines Whether It Is Going To Use Local Media Optimization

When a Teams Client starts, it will do the following:

  • It will try to determine if it is external or internal by checking if its public IP is in the list of Trusted IPs
  • If it is internal, it will try to determine to which site it belongs to based on its subnets
  • It will communicate with the internal interface of the SBC for the audio of PSTN calls

The last is based on the following note:

Which is from the following Microsoft link:

Configure Local Media Optimization for Direct Routing – Microsoft Teams | Microsoft Learn

Network Topology Page

Configuring Trusted IP, Region, Site, and Subnet is done under the Network Topology page.

Network Topology page can be accessed through Teams Admin Center > Location > Network Topology.

Go to Location > Network topology.

The following shows the Network topology page.

Adding a Trusted IP

Trusted IP is the fixed IP that clients use to access the internet. It is used by Teams to determine if the client is inside the internal network. Local Media Optimization will be utilized by the client when it determines that it is connected to Microsoft servers using a Trusted IP. If you cannot have a fixed IP to access the internet, you will not be able to configure a Trusted IP and in this case you can use Local Media Optimization.

To configure a Trusted IP, on Teams Admin Center go to Location > Network topology and click on Trusted IPs

Click on Add

`

The “Add trusted IP address” pane will appear on the right side

Add the IP address, network range (number of network bits), and description for this IP. Note that the network range is 32 if it is a single IP (which is more of the cases)

Click on Apply

The newly configured Trusted IP will be under the list of Trusted IPs

Adding and a Network Site

When Teams Client stats and it notices that it is internal (communicating with Teams servers using a Trusted IP), it will try to determine to which sites it belongs to (by checking it is in one of the subnets of that site)

To configure a Trusted IP, on Teams Admin Center go to Location > Network Topology, and click on “Network sites”

Click on “Add”

Type the name for the network site you ar creating

Adding A Region and Linking It to The Site

Each site should belong to a region. A region is a geographical location that contains multiple site. You can associate the site you are creating to a region or add a new region as shown below

To add a new region to the network site, click on “+Add network region”

The “Network regions” pane will appear on the right side

Type the name of the region

Click on “Add”

After that, you will see the name of the newly added region. Click on it to select it (this is the list of all network regions in the environment)

After making sure that you have selected the region, click on “Link” and that will link your site to the region and close the “Network regions” pane

The newly linked network region will be shown under the details of the site

Adding a Subnet to The Site

Each site has subnets that belong to it. When a Teams Client starts and finds out that it is internal (based on Trusted ID), it will try to search to which subnet it belongs, and from that it will determine to which site it belongs

On the site properties page, under “Subnets”, click on “Add subnets”

A pane will appear on the right side that allows you to add a subnet

Add the IP address, network range (number of network bits), and description for this subnet

Click on Apply

The site properties page will show the newly added subnet

Click on “Save” on the Site properties page

You will get back to the main Network topology page and it will show the newly created network site

Teams’ Call Queues and Auto Attendants – Creating an Auto Attendant

What Is an Auto Attendant

  • A person can call this an auto attendant (via Teams client or a PSTN number)
  • The caller can hear a menu and set of messages to direct him/her to which key on the dial pad to press
  • Based on the key the caller pressed on the dial pad of their phone (or Team client), the callers will reach a call queue, a person, or an operator
  • The callers will reach their destination quickly, without relying on a human operator to handle incoming calls.

About The Steps Below

  • In the steps below, I will show how to link a new auto attendant with 2 call queues (we created 2 call queues in the previous steps)
  • The auto attendant will ask the caller to press 1 for Sales or press 2 for Support
  • Based on the caller selection (key pressed on the dial pad of the caller’s phone), it will forward the call to the corresponding Call Queue (Sales or Support)
  • Each of the call queues that I created earlier will forward the call to a specific channel in a specific team
  • This will form a simple IVR (Interactive Voice Response)
  • Although this IVR is simple, it will demonstrate how to create a functional IVR that can be easily improved and expanded

Auto Attendants Pane

Starting Auto Attendant Wizard

On Teams Admin Center, expand the “Voice” menu and select “Auto attendants”

To add a new “Auto Attendant” click on Add

The “Add a call queue” wizard will appear, and it will start with the General info page

General Info Page

On the “General info page” Type the name of the Call Queue. For me, the name is “Main Auto Attendant” (there is no other Auto Attendant, I have just called it “Main” since it will be the first thing the PSTN call will be routed to)

On this page, I have selected my time zone (This is useful for the “Set business hours” page on “Advanced settings”)

Graphical user interface, application, Teams

Description automatically generated


Scroll down until you reach “Language”. This is where you specify the language that will be used for the automatically generated voice messages. I have set my language to “English”

Graphical user interface, text, application

Description automatically generated

Click on the “Next” button

Call Flow Page

The next page is “Call Flow”

Under “Greeting options”, I have selected “Add a greeting message”. And I have typed a simple message “Welcome to our company”

When the call gets connected, the calling user will hear this greeting message

Graphical user interface, application, Teams

Description automatically generated

For “Call routing options”, scroll down to see the details and select “Play menu option” to put your voice menu options and actions

For my menu, I have added a greeting message (this message to inform the caller which phone key should be pressed)


Below images show my “greeting message” which is “Select 1 for Sales or 2 for Support”

Background pattern

Description automatically generated

Under “Set menu options”, click on “Assign a dial key”

An empty menu entry will be added


In the new menu entry/option, select the key the caller will click to select this menu option

I am selecting 1 for the first entry

The following shows that key 1 is selected

Click the menu for “Redirect to”

Select “Voice app” (since we want to redirect the call to the call queue that was created earlier)

Graphical user interface, application, website

Description automatically generated


Graphical user interface, application, website

Description automatically generated

The following shows “Redirect to” is set to “Voice app” which means it will redirect the call to another Call Queue or Auto Attendant

Graphical user interface, application

Description automatically generated

Under “Destination”, I am searching for the “Sales Call Queue” by typing the word “sale”

Graphical user interface, application, Teams

Description automatically generated

I am selecting the “Sales Call Queue” that I have created earlier

Graphical user interface, application

Description automatically generated

This menu entry/option is completed

Graphical user interface, application

Description automatically generated

Using similar steps, I have added a menu entry/option for “Support Call Queue” when the caller clicks on “2” on his/her dial pad
Graphical user interface

Description automatically generated

Under “Directory search”, I am selecting “None”. Since I don’t need the caller to call internal users of the organization

Adding a Resource Account to Our Auto Attendant

For simplicity, I am keeping “Advance setting (optional)” as default and I kept clicking next until I reached the “Resource account” page (the last page).

To add a Resource account, click on the “Add” button

The “Add account” pane will appear on the right side, I searched and added the resource account for this auto attendant as the image below shows

Click on “Add” at the bottom of the pane

When you back to the “Resource accounts” page, you will see the resource account(s) that you have added

Submitting the changes

Click on the Submit button at the bottom of the Wizard to save the changes of the new auto attendant

The auto attendant will be created, and it will be listed on the main page “Auto attendants”

SIP/2.0 488 Not Acceptable Here – Warning: 304 sbc1.example.com “Media type not available” (adding additional codec/media profile on Ribbon SBC Edge (SBC 1000 / SBC 2000 / SBC SWe Lite))

With one of our clients, we are integrating an SBC 1000 with Direct Routing and a SIP Trunk (the SIP Trunk provides PSTN connectivity and is connected to the telephone company).

The issue we faced was that incoming calls were failing

After checking the logs, we found out that the calls are being rejected with “SIP/2.0 488 Not Acceptable Here” and also, a warning saying that “Media type not available”. This indicates that there is a possible problem with the codecs.

(For convenience, I am providing both an image containing the logs and also the text of the logs)

SIP/2.0 488 Not Acceptable Here
Allow: INVITE, ACK, CANCEL, BYE, NOTIFY, OPTIONS, REFER, REGISTER, INFO, UPDATE, PRACK
Call-ID: isbckl2i30jzkn3czcnz1m3kml1nlk84pnc4@X.X.X.X
Content-Length: 0
CSeq: 1 INVITE
From: “XXXXXXXXXXXX” <sip:+ XXXXXXXXXXXX@X.X.X.X;transport=udp;user=phone>;tag=sbc0905pmpcszls-CC-31
Reason: Q.850;cause=129;text=”Call Failed”
Server: SONUS SBC1000 11.0.1v634 Ribbon
To: “XXXXXXXXXXXX” <sip: XXXXXXXXXXXX@X.X.X.X;transport=udp;user=phone>;tag=6440136a-4d02;sgid=2
Via: SIP/2.0/UDP X.X.X.X:5060;branch=z9hG4bK4ncc44jimjim824lz0cz0ip20T31190
Warning: 304 sbc1.example.com “Media type not available”
X-Sonus-Diagnostics: SBCInternal;cid=22;media-mode=”audio:DSP video:N/A”


G.729 Codec Is Needed

We also found out inside the invite message that SIP Trunk of the telephone company is using codecs G.729 as shown below. (Easy Config Wizard of the SBC configure only G. 711)

INVITE sip: XXXXXXXXXXXX@X.X.X.X;user=phone SIP/2.0
Via: SIP/2.0/UDP X.X.X.X:5060;branch=z9hG4bK4ncc44jimjim824lz0cz0ip20T31190
Call-ID: isbckl2i30jzkn3czcnz1m3kml1nlk84pnc4@X.X.X.X
From: “XXXXXXXXXXXX”<sip:+ XXXXXXXXXXXX@X.X.X.X;transport=udp;user=phone>;tag=sbc0905pmpcszls-CC-31
To: “XXXXXXXXXXXX”<sip: XXXXXXXXXXXX@X.X.X.X;transport=udp;user=phone>
CSeq: 1 INVITE
Max-Forwards: 70
Contact: <sip: X.X.X.X:5060>
Allow: INVITE,ACK,OPTIONS,BYE,CANCEL,INFO,PRACK,NOTIFY,MESSAGE,UPDATE
P-Asserted-Identity: <tel:+ XXXXXXXXXXXX>
Supported: 100rel,histinfo,precondition
P-Early-Media: supported
Content-Length: 328
Content-Type: application/sdp

v=0
o=- 1122594334 1122594335 IN IP4 X.X.X.X
s=SBC call
c=IN IP4 X.X.X.X
t=0 0
m=audio 55926 RTP/AVP 18 116
a=rtpmap:18 G729/8000
a=rtpmap:116 telephone-event/8000
a=ptime:20
a=curr:qos local none
a=curr:qos remote none
a=des:qos mandatory local sendrecv
a=des:qos optional remot
X.X.X.X:60238 <==> <134>[2022-12-29 17:01:24,566] 5667 001d
e sendrecv
a=3gOoBTC

Adding G.729 Codec to Media List

Notes: These steps were done on SBC 1000. They are valid for all of Ribbon SBC Edge (SBC 1000 / SBC 2000 / SBC SWe Lite)

The list of codecs being used was configured by the Easy Config Wizard and it didn’t include G.729. The image below shows the details of the media list used. Somethingsfsdfsdf

So, I clicked on Add/Edit button and added G.729 to the media list

Graphical user interface, text, application, email

Description automatically generated

And moved G.729 to up to make it the first

Graphical user interface, text, application

Description automatically generated

(I kept both G711 a-law and μ-law but with less priority)

And I clicked on the “Apply” button

After that, the incoming calls wear reaching Teams Direct Routing users successfully (calls were ringing, connected and voice is heard)

How To Find the Media List Being Used

For simplicity, in the upper steps, I showed how to change the media list. To know which Media List is used you need to check the route from SIP Trunk to Teams Direct Routing as shown below

Scroll down to find the Media List being used:

Then, you can modify this media list as explained in the steps above.

SIP-TLS Server Handshake Failure/SIP-TLS Handshake Negotiation Start Failure warnings/errors on Monitor Tab of SBC Edge

If you are using Ribbon SBC Edge (SBC 1000 / SBC 2000 / SBC SWe Lite) that is integrated with Teams Direct Routing, you noticed on your SBC Edge repeated warnings/errors under the Alarm View on the Monitor tab like the following:

SIP-TLS Server Handshake Failure

SIP-TLS Handshake Negotiation Start Failure

You might have different causes of the alarm (the cause is inside the description of the alarm)

Graphical user interface, text, application

Description automatically generated

Graphical user interface, text, application

Description automatically generated

Reason for these Warnings and Errors:

The reason for these warnings and errors is that there are many machines on the net that keeps scanning SIP servers on well know SIP ports trying to hack them to make calls.

To avoid these machines from scanning your SBC, you need to limit SIP communication only with Microsoft Teams server (SIP Proxy) which consists of these two ranges (52.112.0.0/14 and 52.120.0.0/14) as explained in the link:

https://learn.microsoft.com/en-us/microsoftteams/direct-routing-plan-media-bypass

Under the section “SIP Signaling: Ports”

The following is from the above link

Graphical user interface, text, application, email

Description automatically generated

Using Firewall

If your SBC is behind a firewall, you can simply configure the firewall to limit SIP communication to only (52.112.0.0/14 and 52.120.0.0/14)

Using SBC Edge Access Control List (ACL)

Another method is to utilize applying Access Control List (ACL) on the “Logical Interface” of SBC that is connected to the internet.

You can create your own ACL or you can utilize the existing ACL created by running “Easy Config Wizard” and selecting Teams as a scenario

Notes About Using Access Control List (ACL):

  • You need to allow HTTPS allowed on the interface to control the SBC if you have the same interface for both managing the SBC and for SIP and Media communication
  • If you configured allowing HTTPS incorrectly in the ACL, you will lose access to the Web Interface of the SBC
  • It is better to have an additional interface enabled with the correct IP and connected to the network. This would help in case you have applied an ACL that is incorrectly not allowing HTTPS. This way, you will not end up with your SBC Web Interface inaccessible
  • In the case of SBC 2000, the Admin Port is usually configured by default and has the default IP of 192.168.128.2.
  • Do a backup of your SBC before applying changes