You can use Microsoft Teams Client to test the Auto Attendant or the Call Queue without the need to use the telephony (PSTN). With this method, you bypass the telephony (PSTN) settings. This is useful if you are unsure if the issue is with Auto Attendant / Call Queue or with the telephony settings such as the SBC Gateway. Or even the telephony settings are not configured or implemented yet.
I am illustrating these steps with elaboration and using detailed screen captures.
Calling Auto Attendant or the Call Queue Using Teams Client
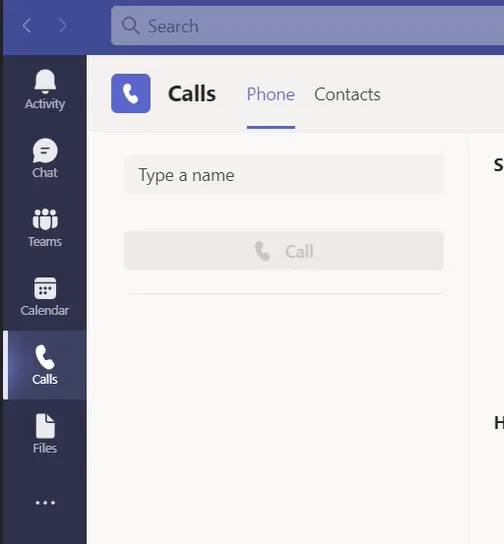
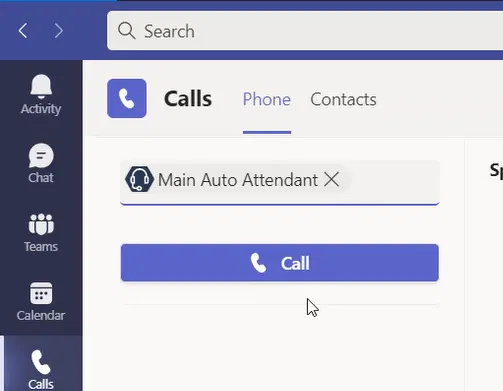
On Teams client, go to the “Calls”
Select “Type a name” box
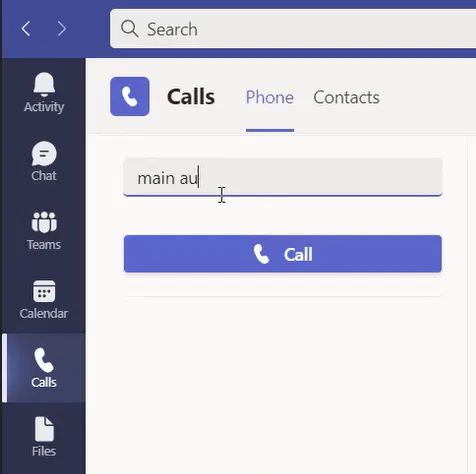
Type the name of the Auto Attendant or the Call Queue you want to test or type the first few letters of its name
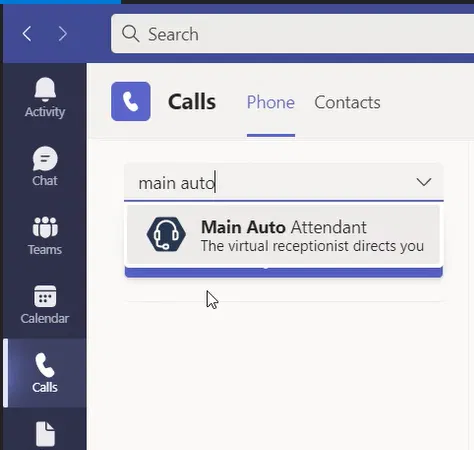
The full name of the Auto Attendant or Call Queue will appear below the “Type a name” box
Select the name of the Auto Attendant or Call Queue
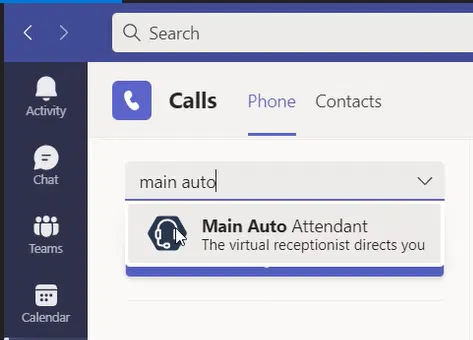
The name of the selected “Auto Attendant or Call Queue” will appear under the “Type a name” box which means you can call it
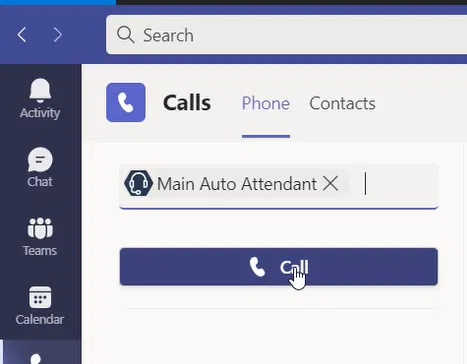
Click on the “Call” button
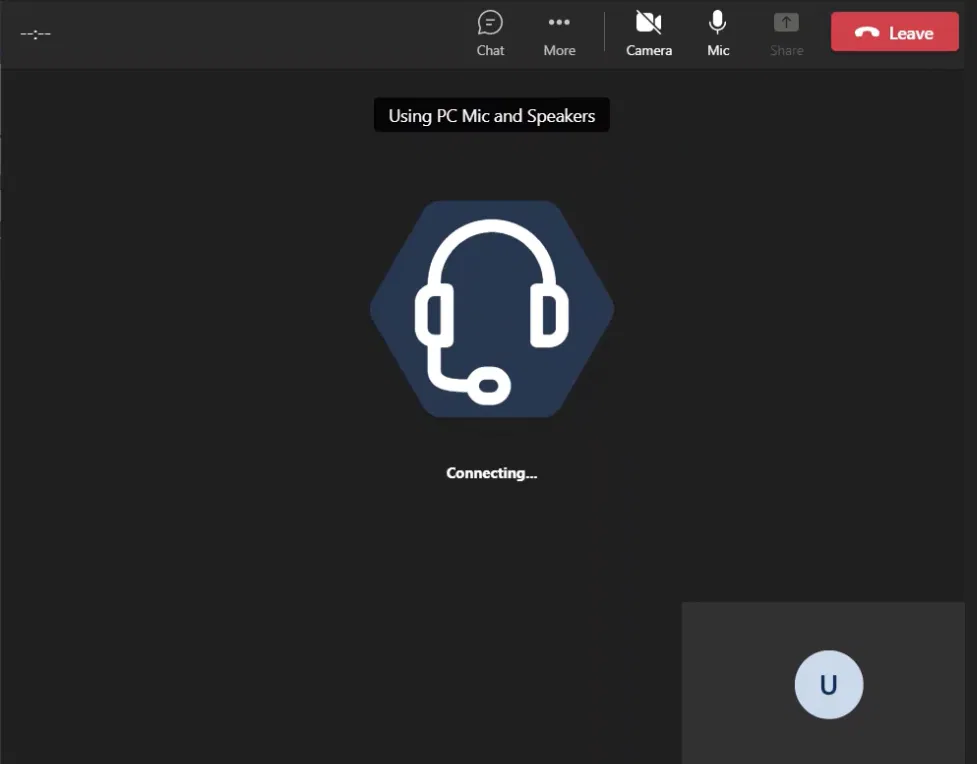
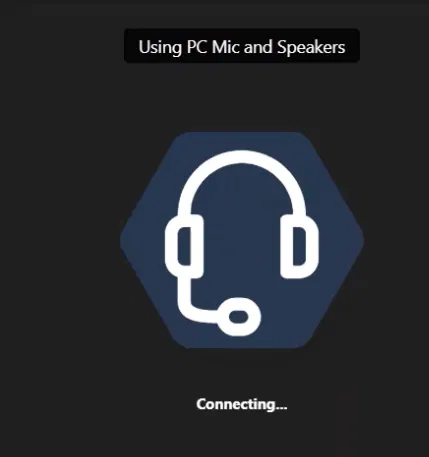
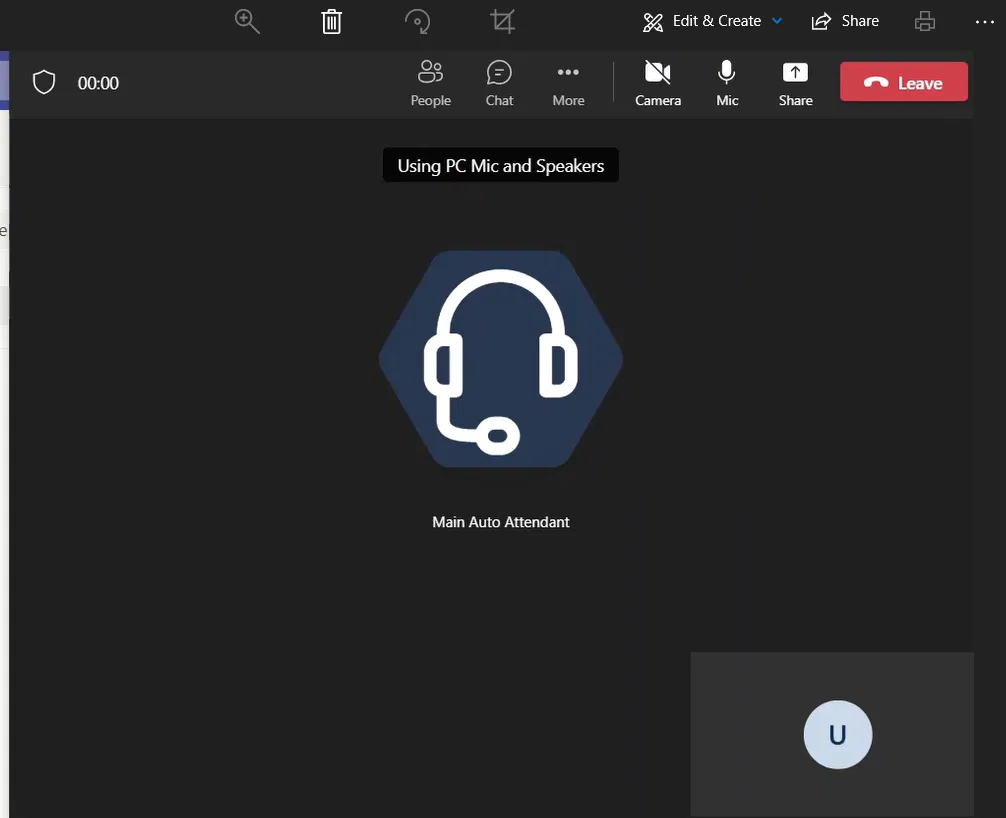
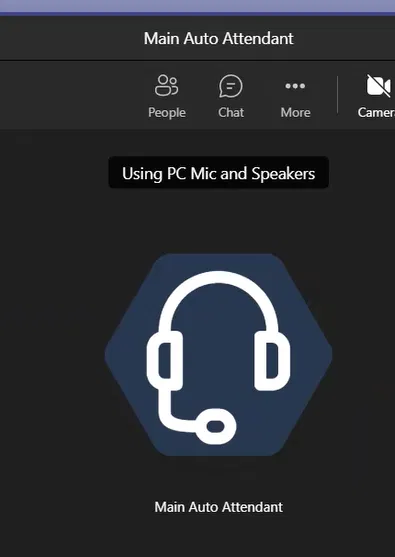
A new window will show you the call to that “Auto Attendant or Call Queue”
It will start with “Connecting” like any other regular call as the image below shows
The blow shows a connected call to the Auto Attendant
You should be able to hear the greeting message and menu options message on your PC
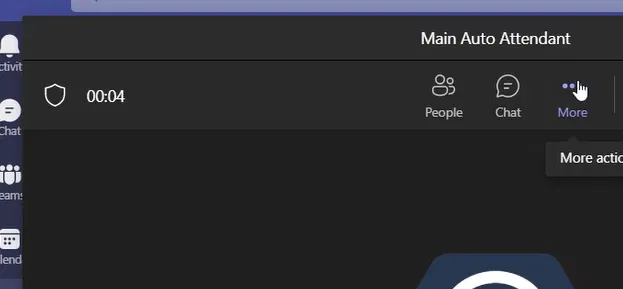
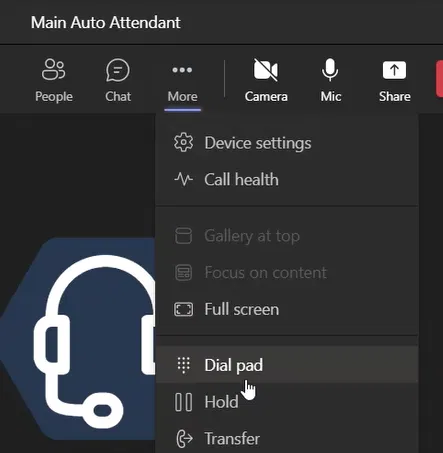
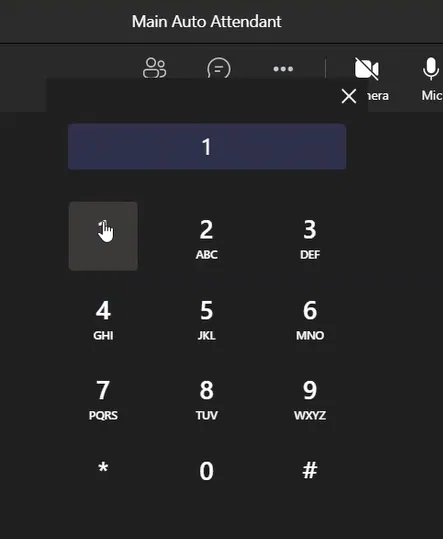
Accessing Dial Pad
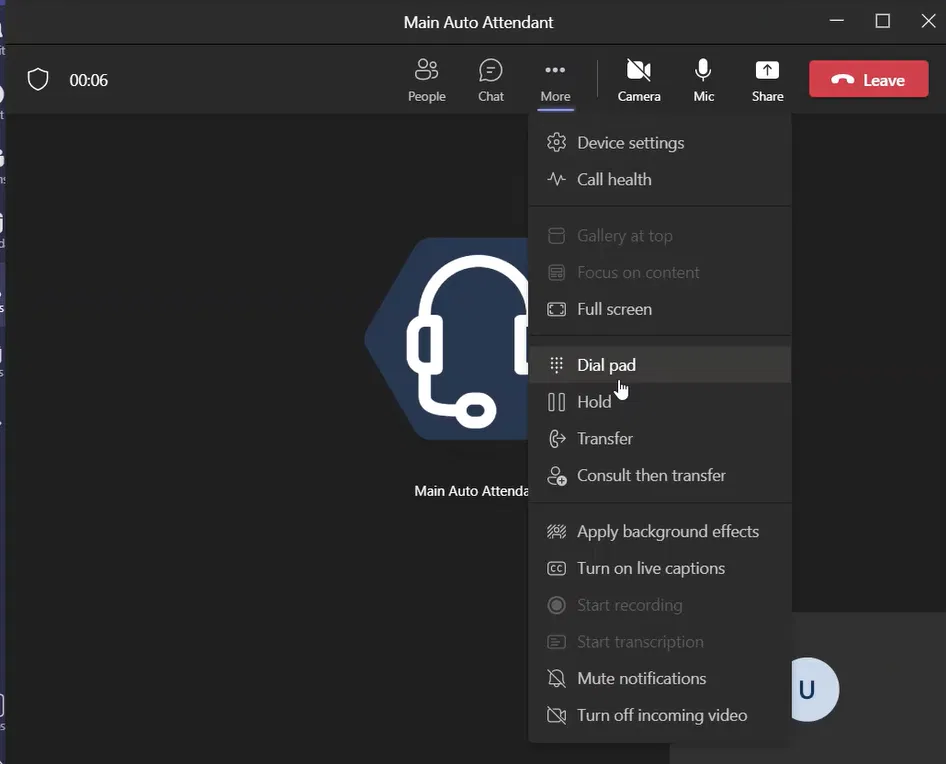
In order to access the dial pad to select the menu option, on the call window, click on more as the image below shows
Under the menu that appears, select “Dial pas”
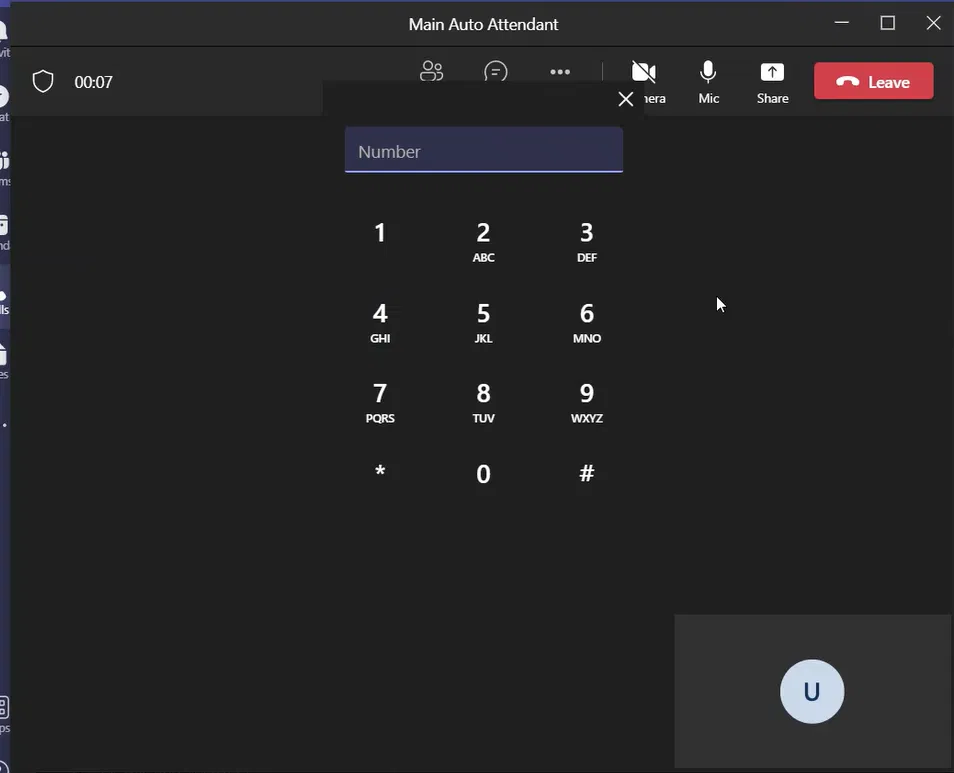
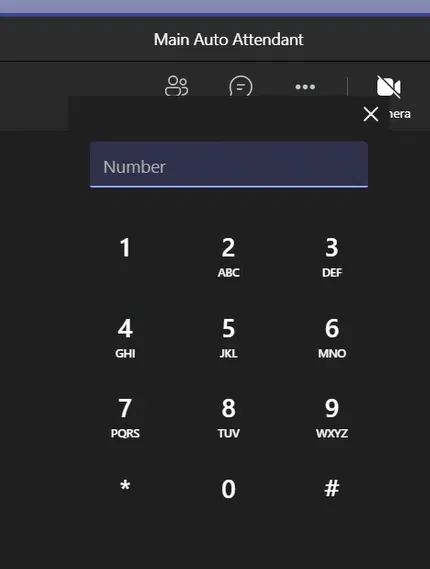
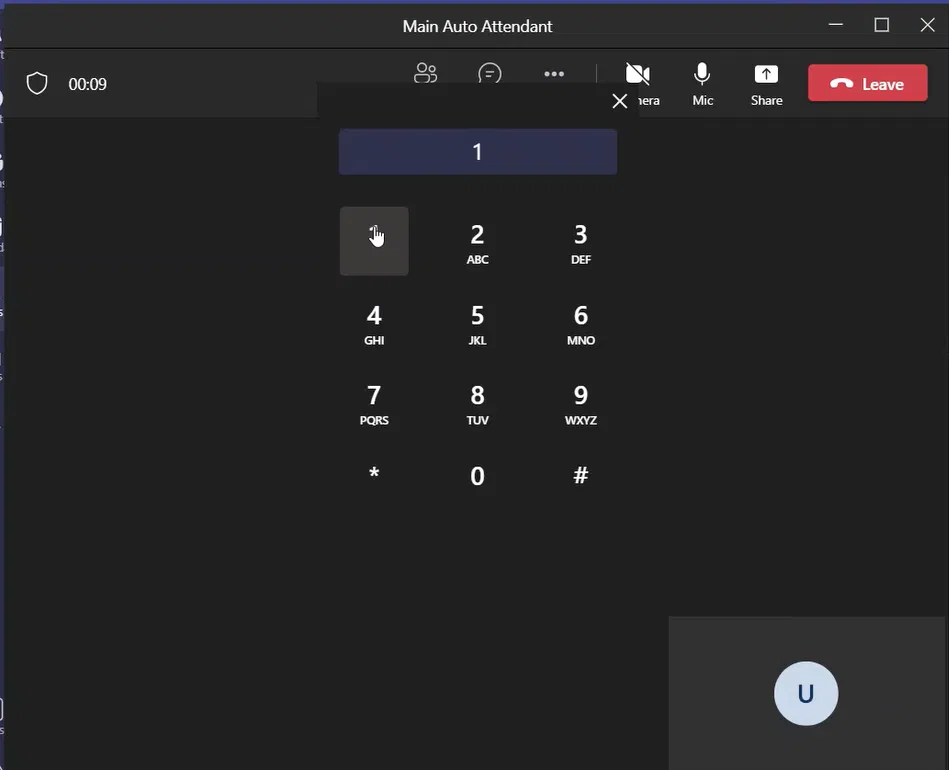
The dial pad will appear
Click on the dial pad to select the option you want to access
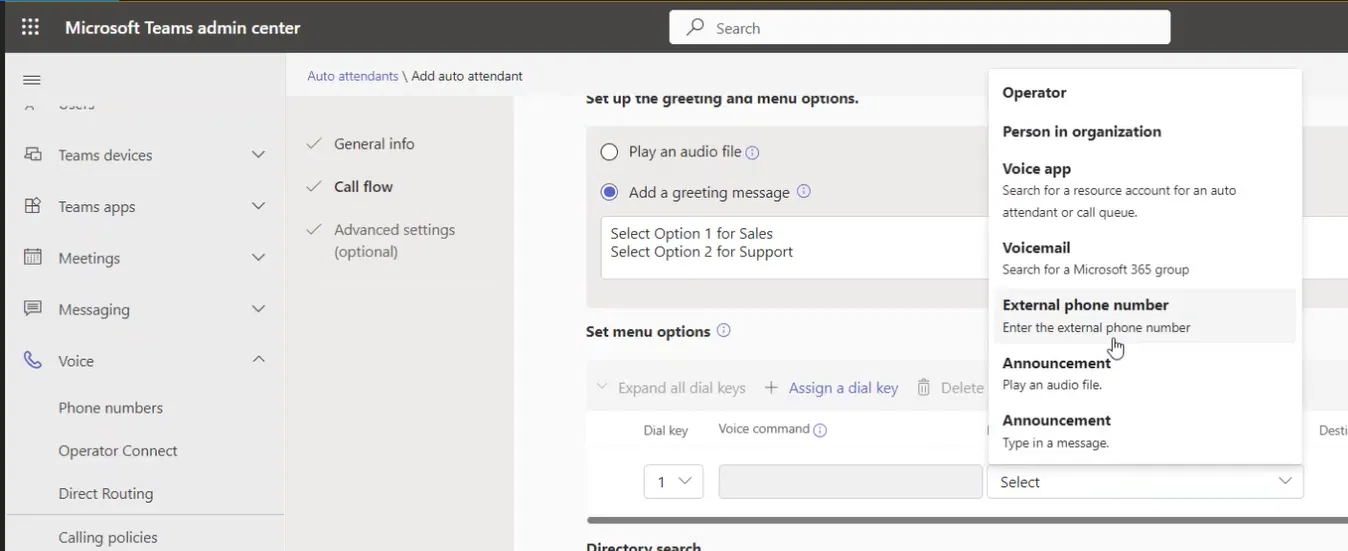
One of the options for a Teams Auto Attendant is to redirect the incoming call to a PSTN number (called external number inside Auto Attendant settings). Based on the menu option the caller has selected.
If a such setting is selected for one or more menu options, you need to assign the “Resource Account” of that Auto Attendant a “Voice Routing Policy” in order to make it able to call the PSTN number mentioned as “External phone number” in the menu option.
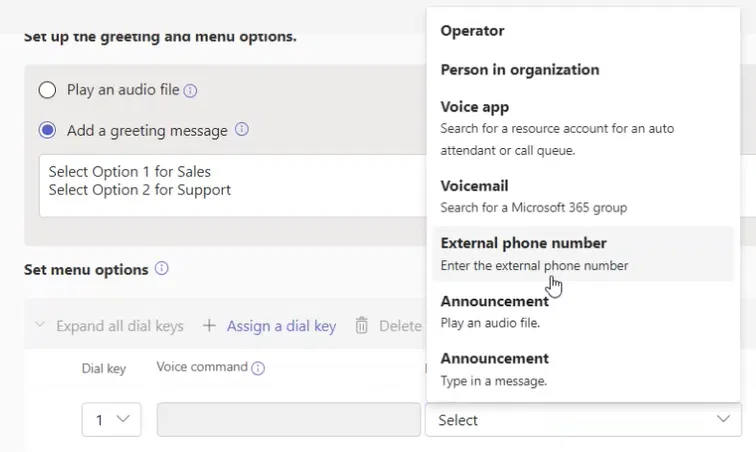
How To Setup the Menu Option to Redirect the Call to an External Number (PSTN Number)
In the menu option settings, set the “Redirect to” field to “External phone number” as shown below
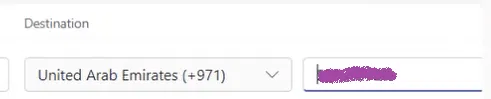
Specify the PSTN phone number (which is of course not part of your organization) under the “Destination” fields (you need to select the country code). The number could be a landline, or mobile number and it could be local, national, or even international.
The below shows two different external phone numbers (PSTN numbers).
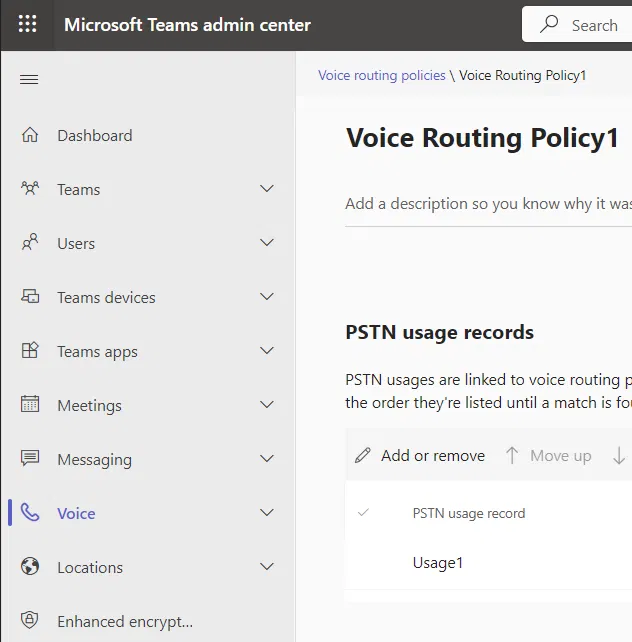
About The “Voice Routing Policy”
The “Voice Routing Policy” should allow calling the number mentioned. For example, if the number is international, the policy should allow calling that international number (by containing a usage that allows that number pattern). It should specify which SBC Gateway should be used (the usage should be associated with a route that uses that SBC Gateway)
The Voice Policy
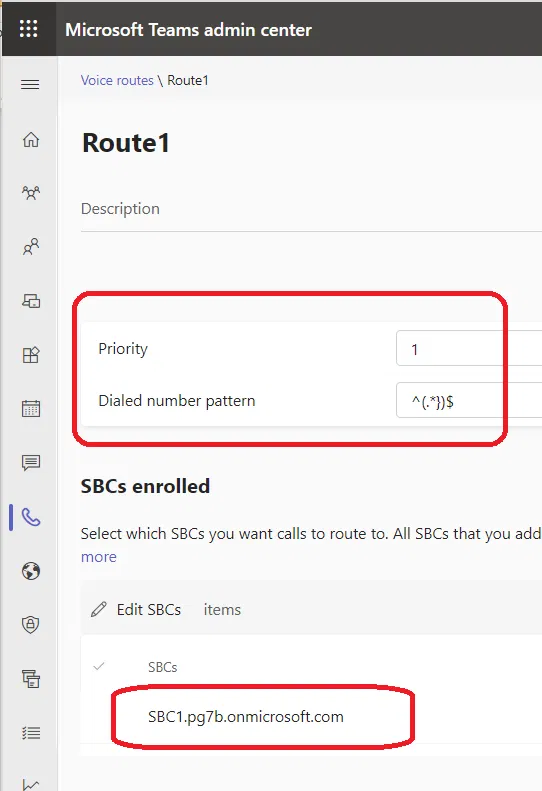
The Route Details Containing the Number Pattern and SBC Gateway
Below are the Route details in the “Admin Centre” and it shows the Number Pattern and the SBC Gateway associated with it
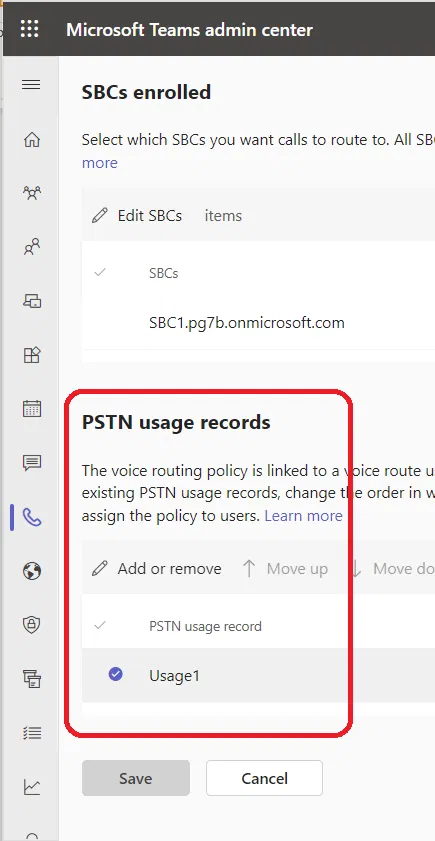
The Route Details Containing the PSTN Usage Associated with It
I have scrolled down to the Route details to show the PSTN Usage
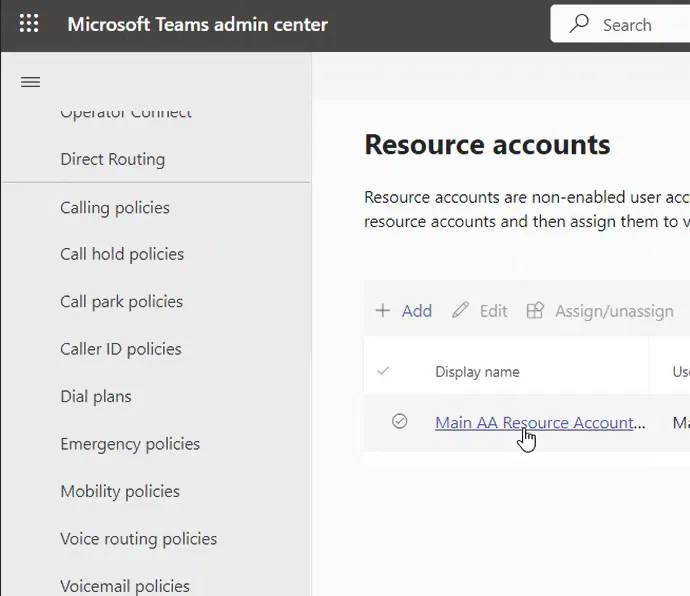
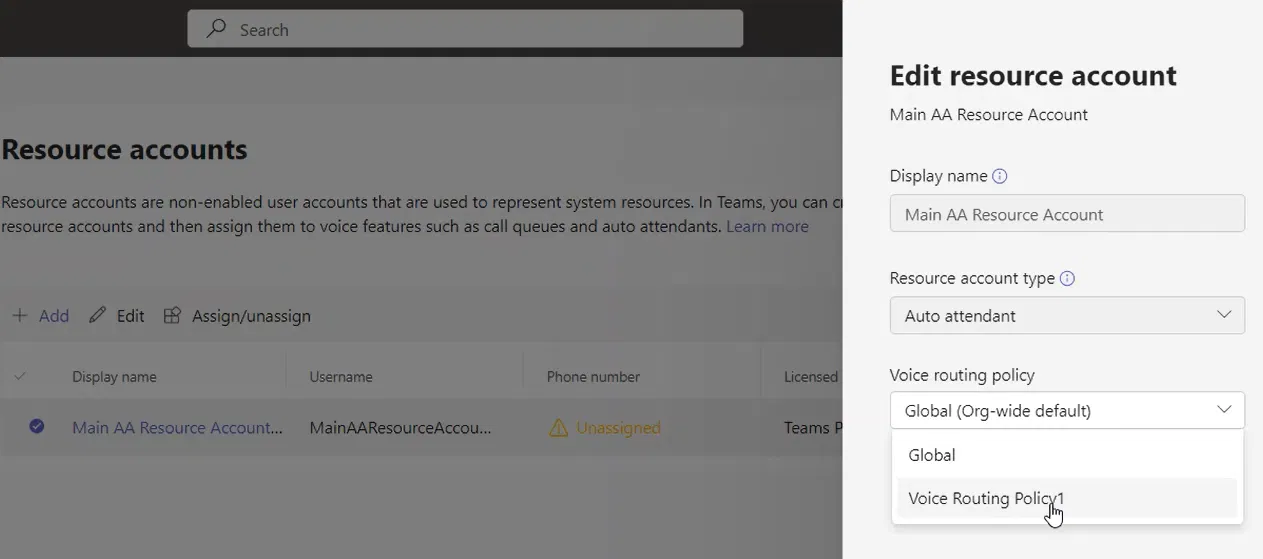
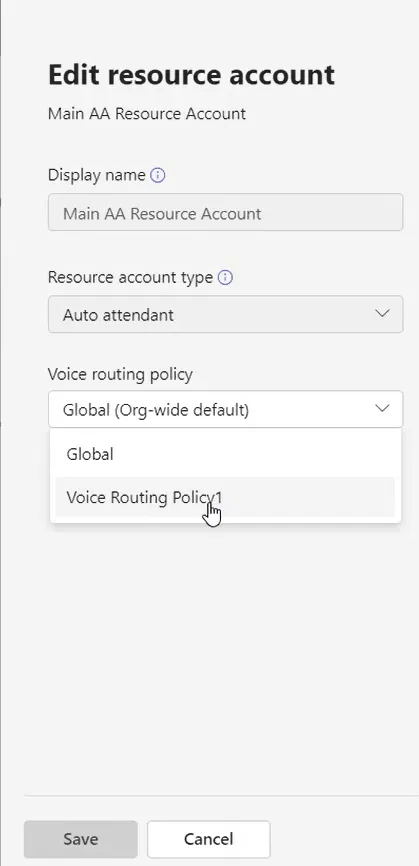
How To Assign The “Voice Routing Policy”
Go to the “Resource Accounts” page and click on the Resource Account to Edit it
Select the “Voice Routing Policy” and click on save.
In this article, I am improving my Auto Attendant by adding an option to reach the operator. The operator in my case is accessed by clicking on 0 on the dial pad when calling the Auto Attendant.
My operator is a Teams user (Person in organization) named User5. But you have the option to send the call to another Auto Attendant or Call Queue (Voice app). You can also send the call to an external PSTN number.
Go to
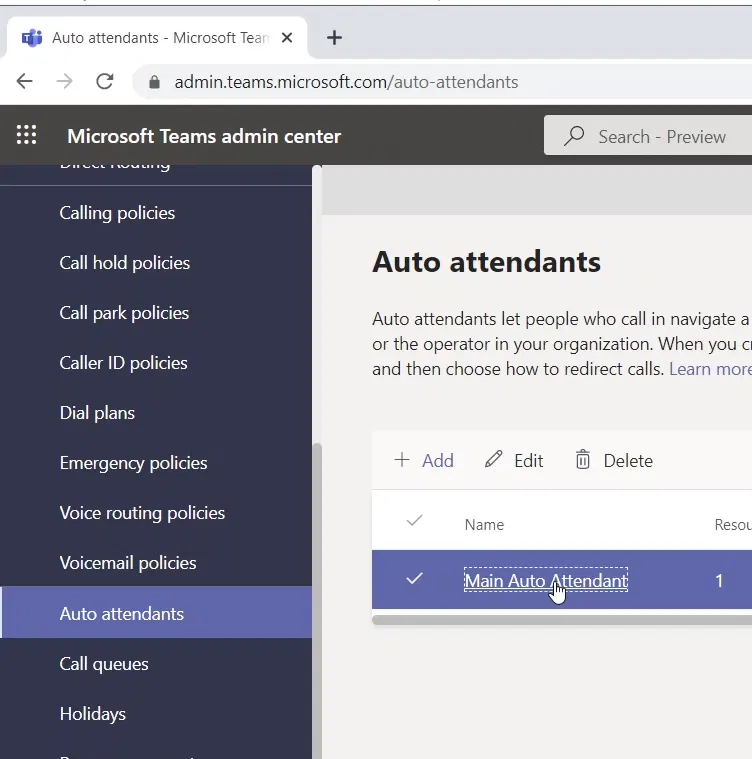
Teams Admin Center > Auto attendants > Click on the Auto Attendant that you want to modify. This will open the Auto Attendant Wizard
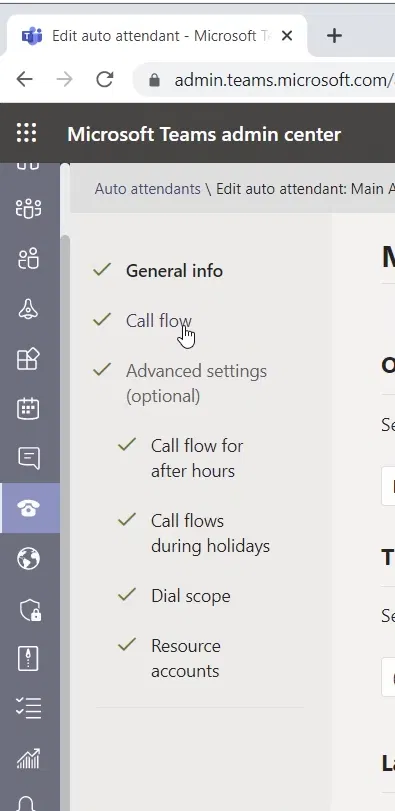
Part 1 – Adding an operator
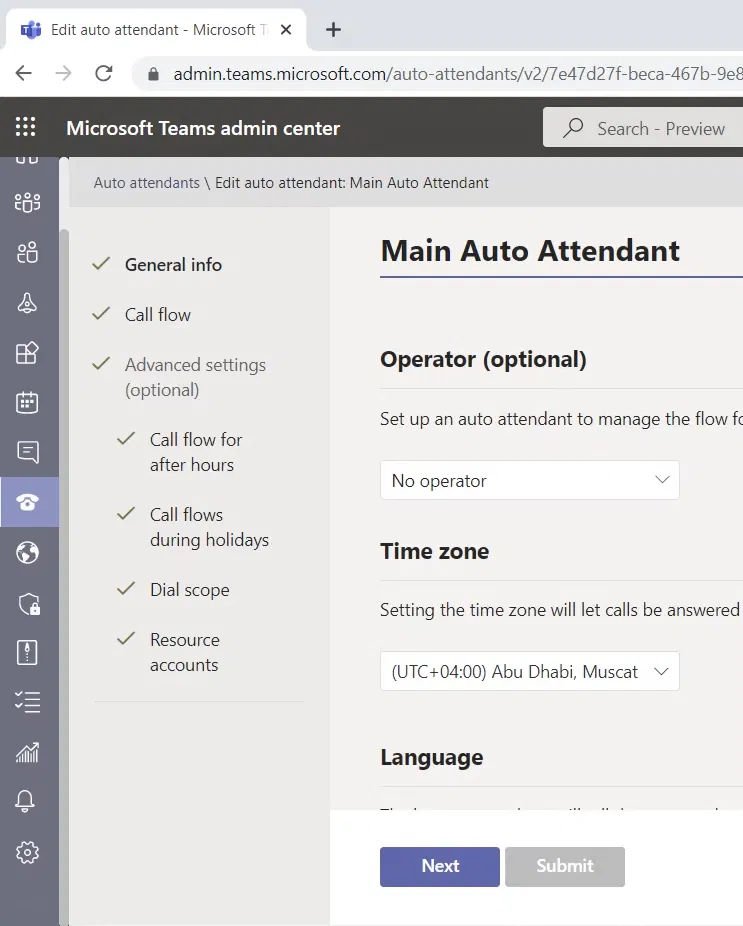
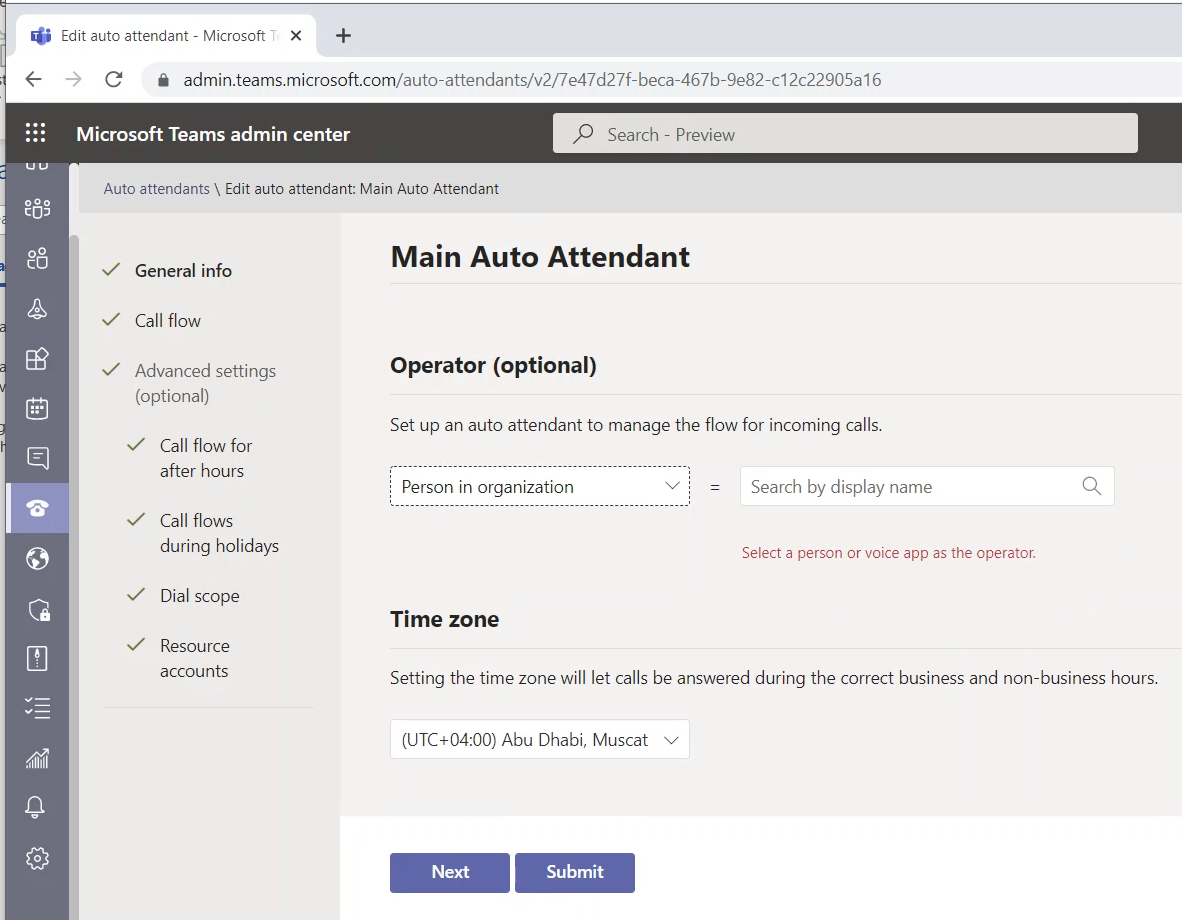
On the “General Info” page, you will see the “Operator (optional)” setting
Open the box and select “Person in organization”
It will give you a place to “Search by display name” filed
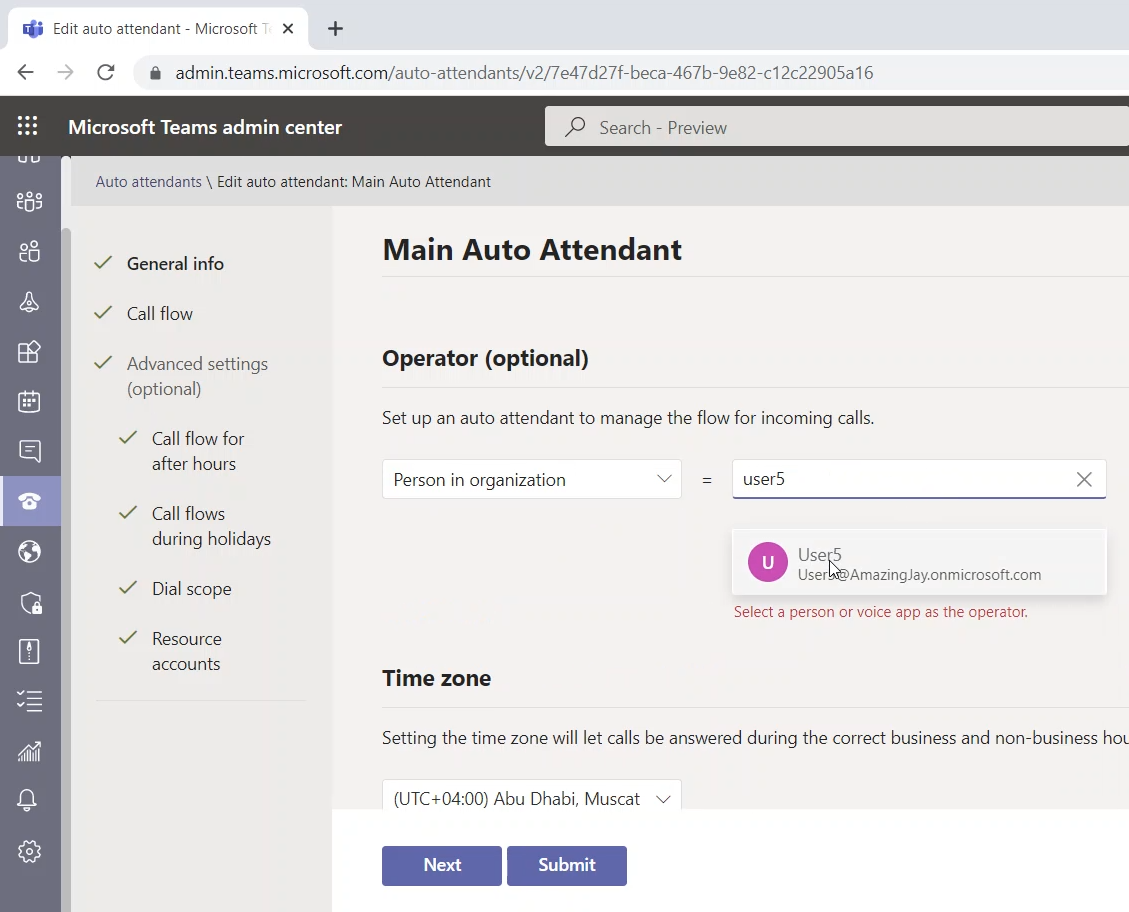
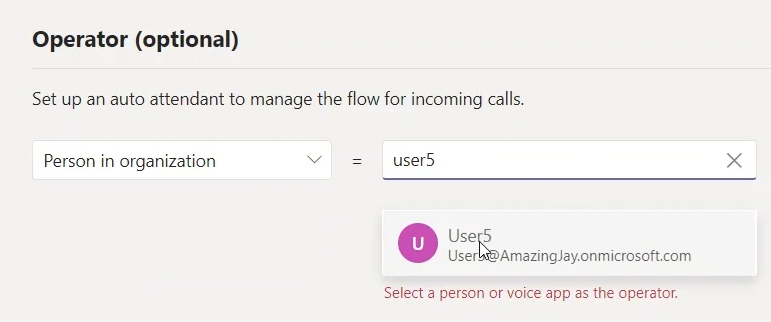
Type the display name or at least the first 3 letters, and select (click) the user name
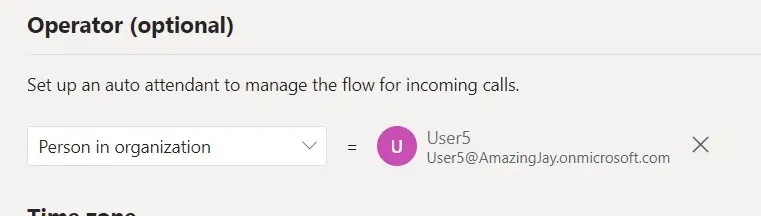
The username will be selected and will be designated as the operator
Now we can use the operator in the Call flow for this Auto Attendant as I am showing in the next part.
Part 2 – Making the operator a Call Flow Destination (reached when clicking)
Go to the “Call flow” page (on the settings of the Auto Attendant you are modifying)
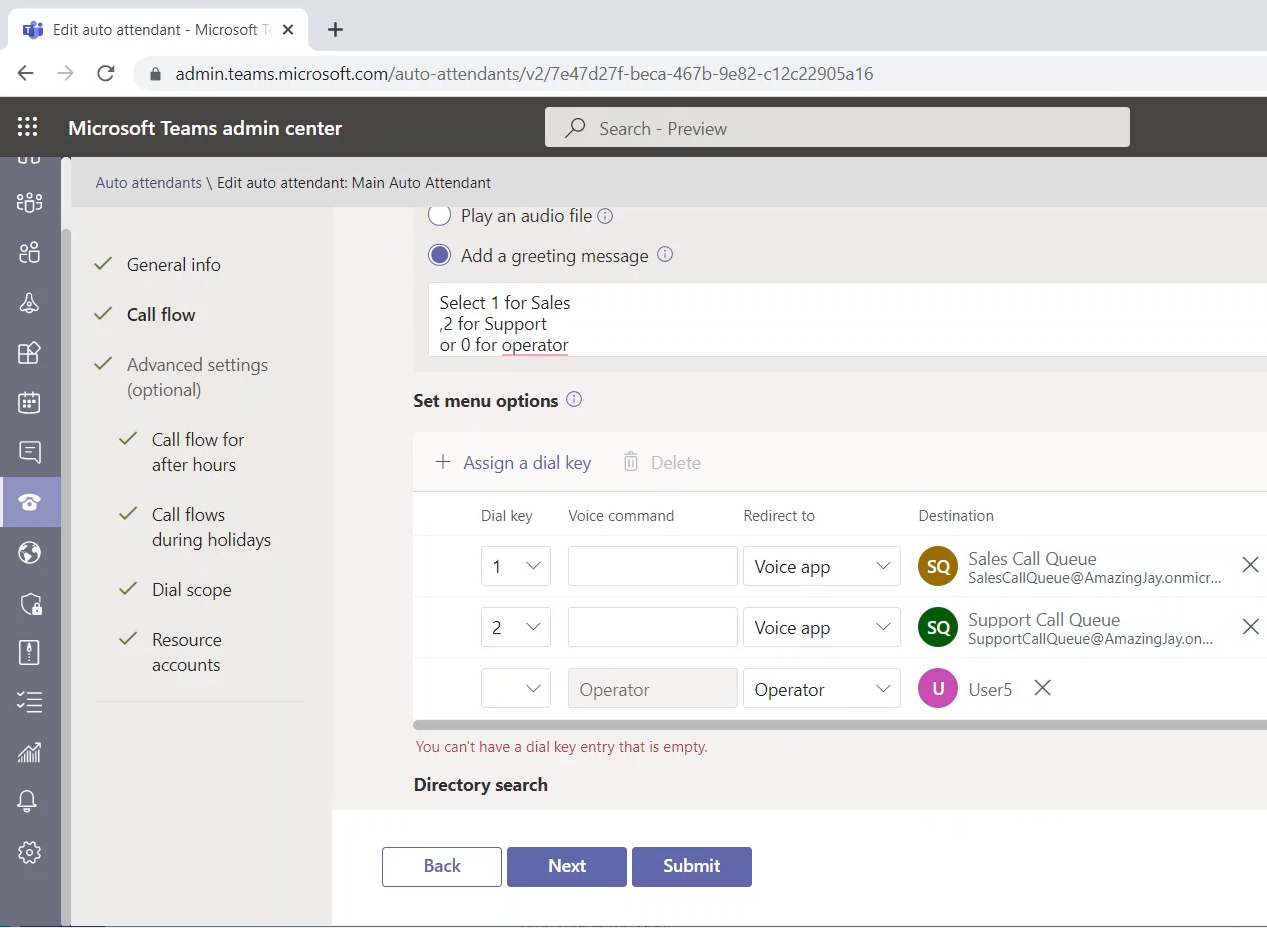
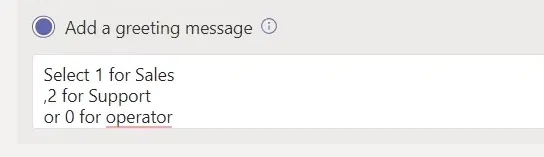
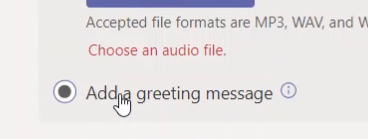
Modify the Greeting Message of the Auto Attendant to let the caller hear the option about the operator
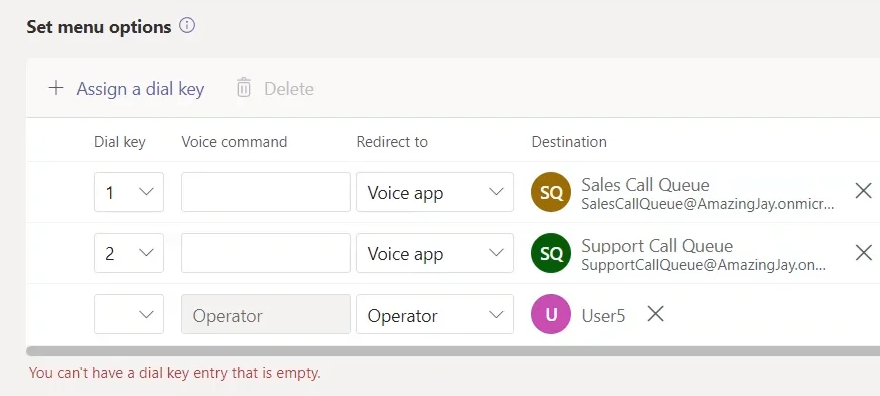
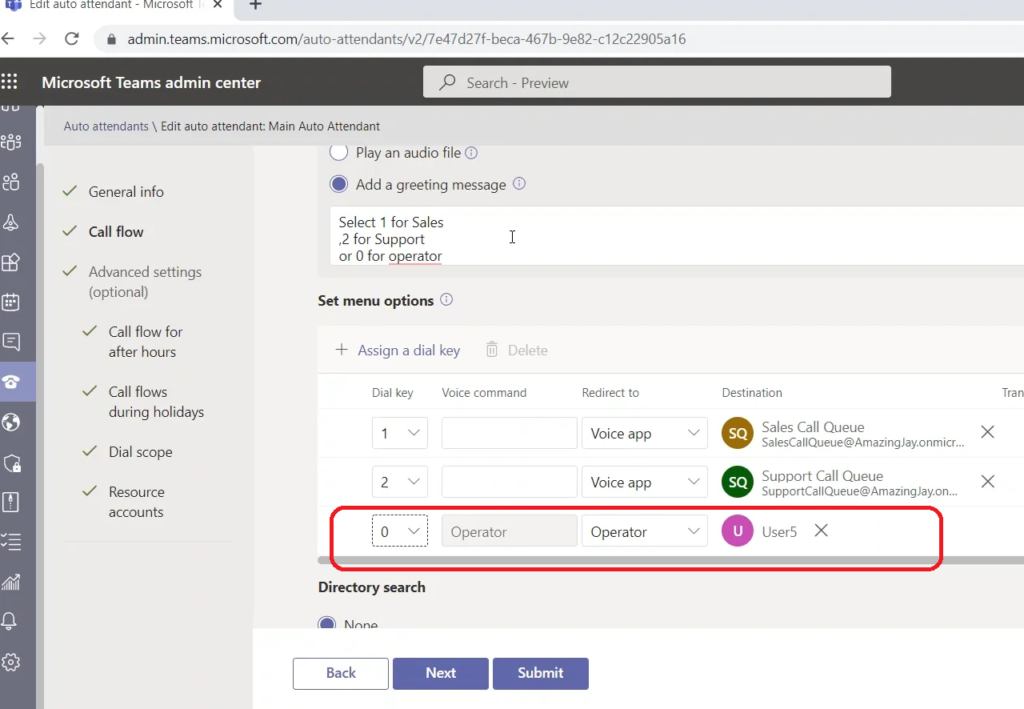
Click on “Assign a dial key”. This will add a new “dial key” option the caller can dial
The default option for the new key is Operator and it will automatically configure the call to be redirected to User5 (which is the operator that we have selected in the previous step)
A person can call this an auto attendant (via Teams client or a PSTN number)
The caller can hear a menu and set of messages to direct him/her to which key on the dial pad to press
Based on the key the caller pressed on the dial pad of their phone (or Team client), the callers will reach a call queue, a person, or an operator
The callers will reach their destination quickly, without relying on a human operator to handle incoming calls.
About The Steps Below
In the steps below, I will show how to link a new auto attendant with 2 call queues (we created 2 call queues in the previous steps)
The auto attendant will ask the caller to press 1 for Sales or press 2 for Support
Based on the caller selection (key pressed on the dial pad of the caller’s phone), it will forward the call to the corresponding Call Queue (Sales or Support)
Each of the call queues that I created earlier will forward the call to a specific channel in a specific team
This will form a simple IVR (Interactive Voice Response)
Although this IVR is simple, it will demonstrate how to create a functional IVR that can be easily improved and expanded
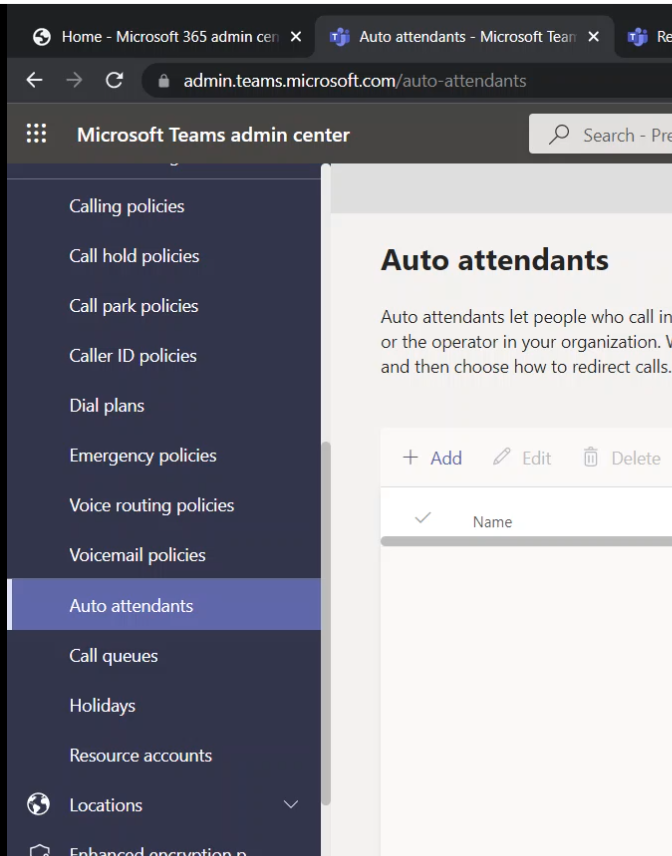
Auto Attendants Pane
Starting Auto Attendant Wizard
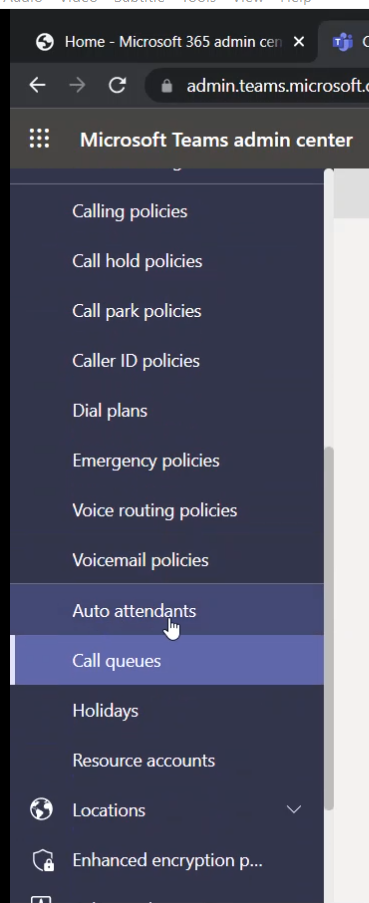
On Teams Admin Center, expand the “Voice” menu and select “Auto attendants”
To add a new “Auto Attendant” click on Add
The “Add a call queue” wizard will appear, and it will start with the General info page
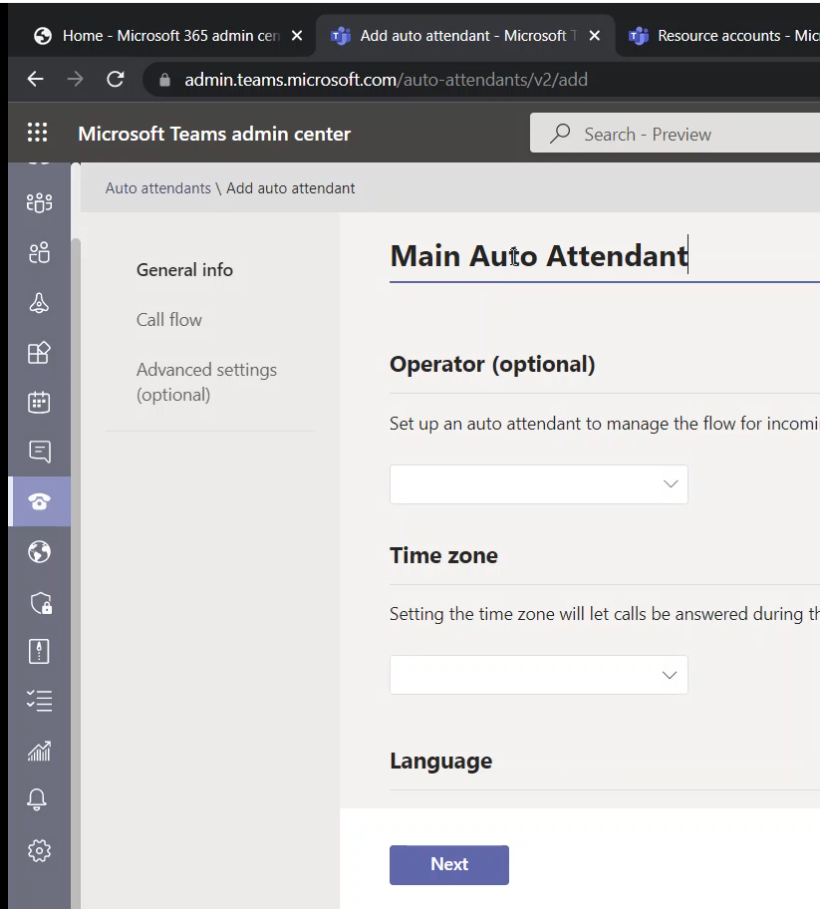
General Info Page
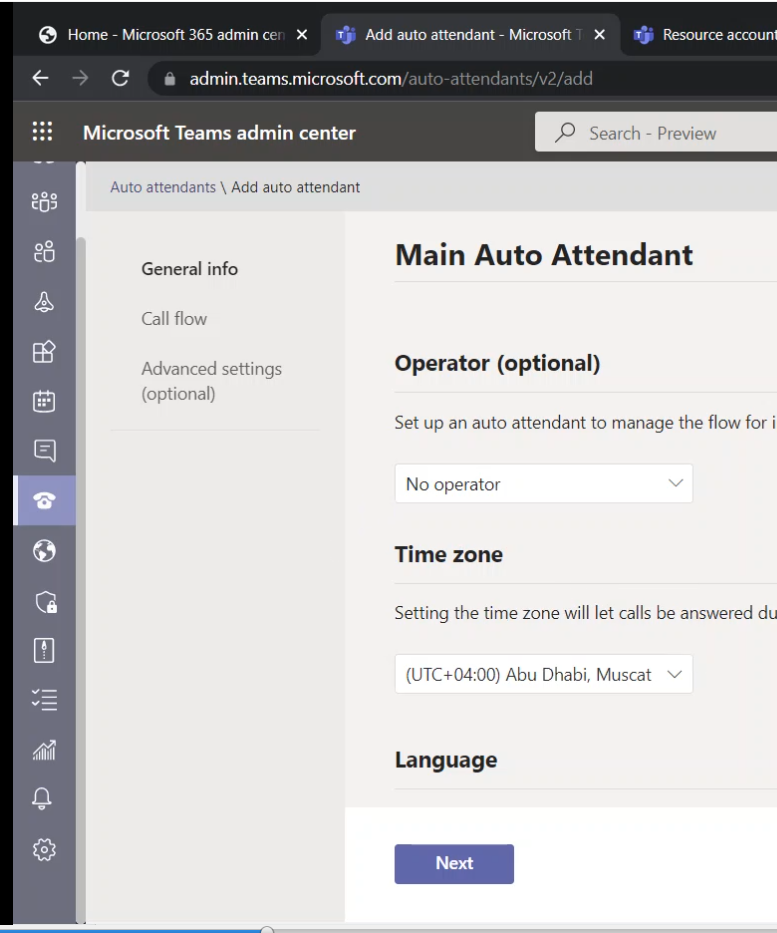
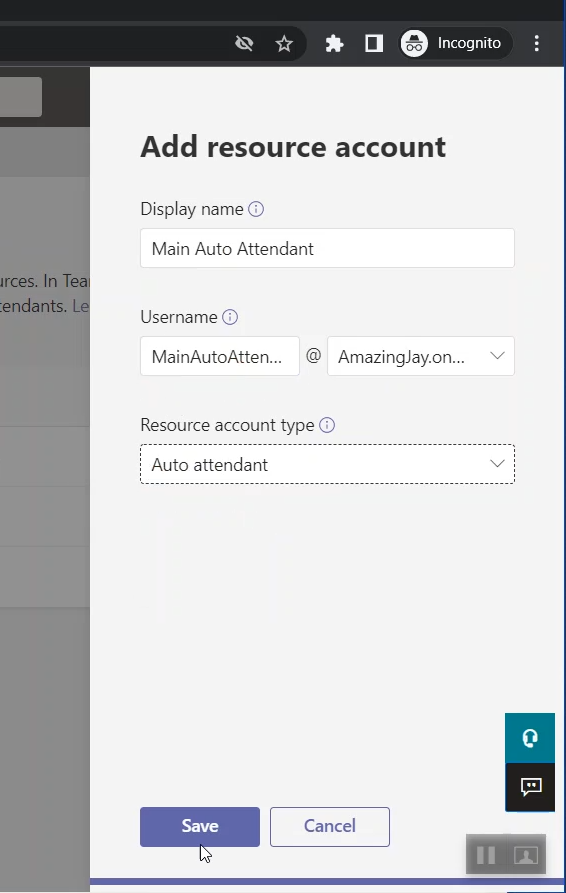
On the “General info page” Type the name of the Call Queue. For me, the name is “Main Auto Attendant” (there is no other Auto Attendant, I have just called it “Main” since it will be the first thing the PSTN call will be routed to)
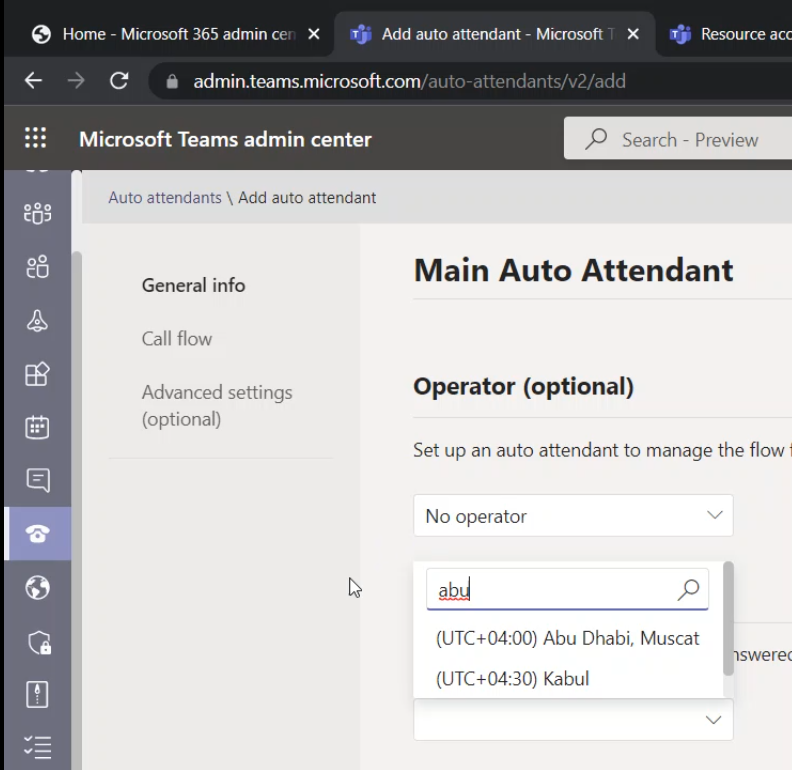
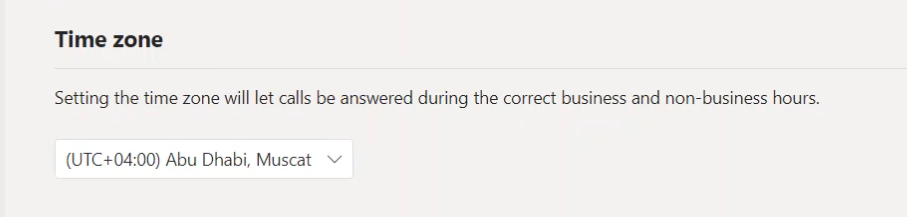
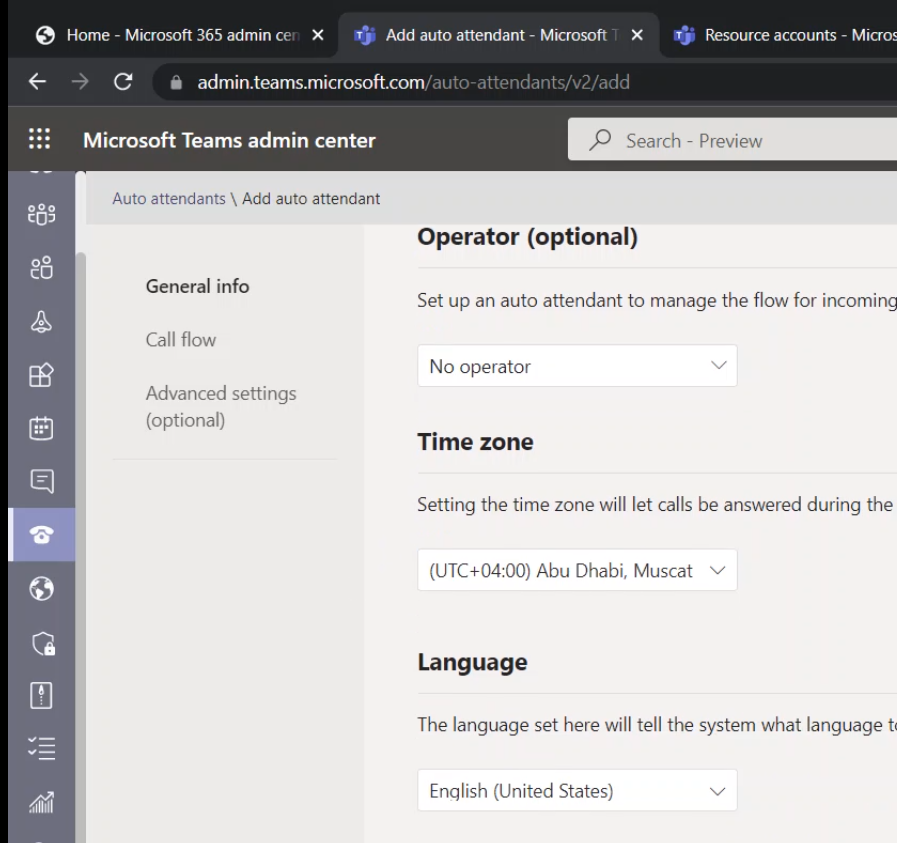
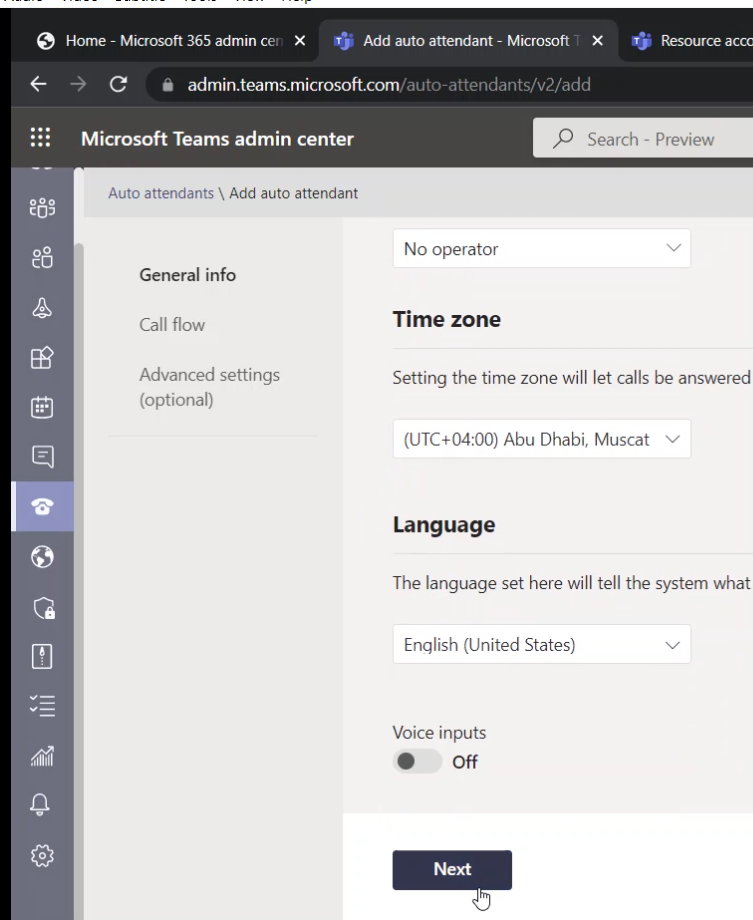
On this page, I have selected my time zone (This is useful for the “Set business hours” page on “Advanced settings”)
Scroll down until you reach “Language”. This is where you specify the language that will be used for the automatically generated voice messages. I have set my language to “English”
Click on the “Next” button
Call Flow Page
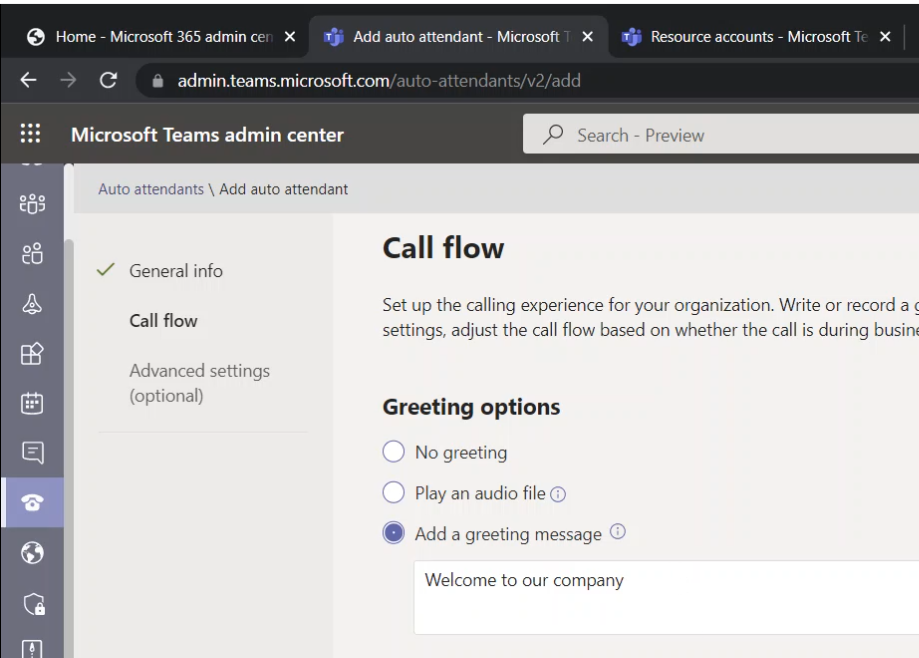
The next page is “Call Flow”
Under “Greeting options”, I have selected “Add a greeting message”. And I have typed a simple message “Welcome to our company”
When the call gets connected, the calling user will hear this greeting message
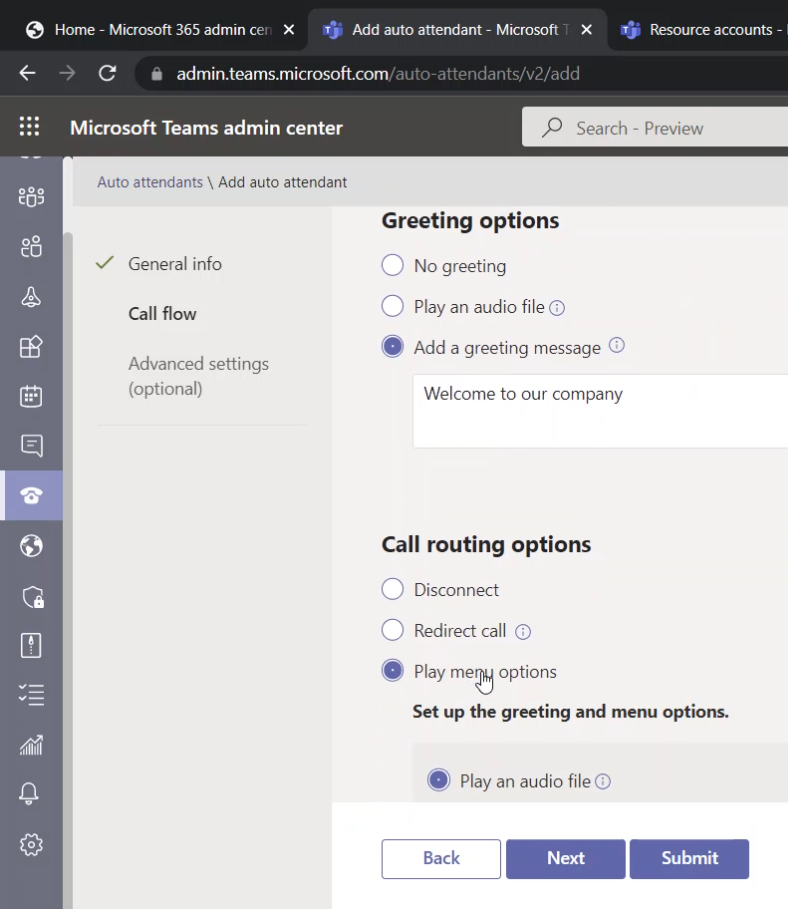
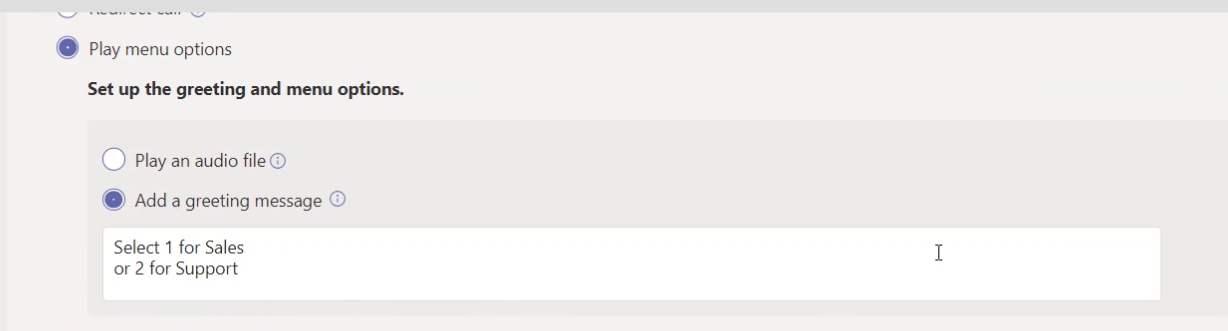
For “Call routing options”, scroll down to see the details and select “Play menu option” to put your voice menu options and actions
For my menu, I have added a greeting message (this message to inform the caller which phone key should be pressed)
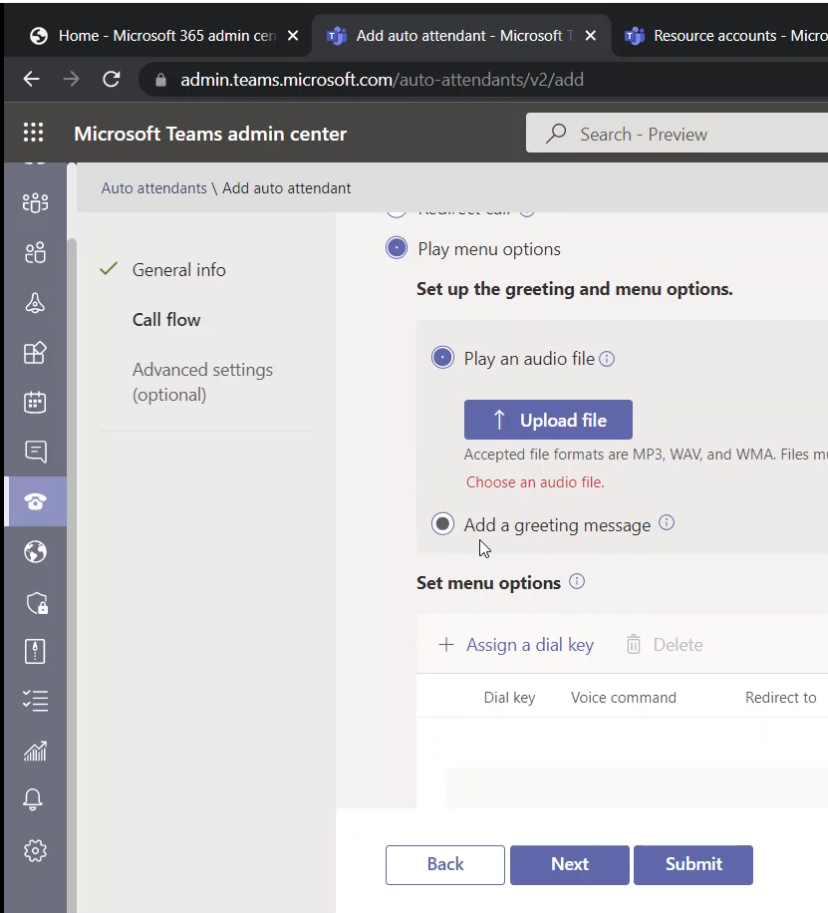
Below images show my “greeting message” which is “Select 1 for Sales or 2 for Support”
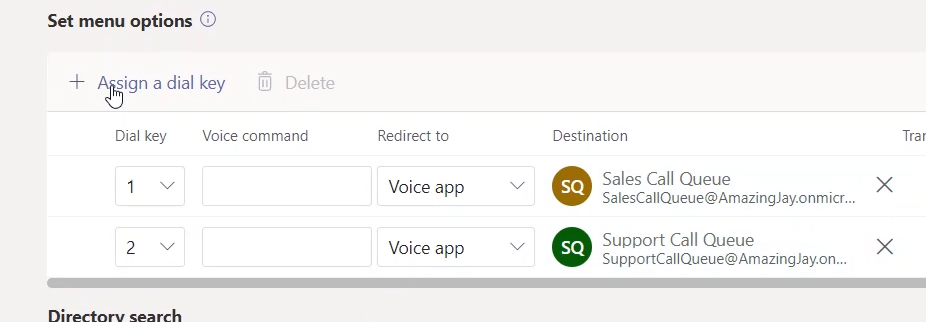
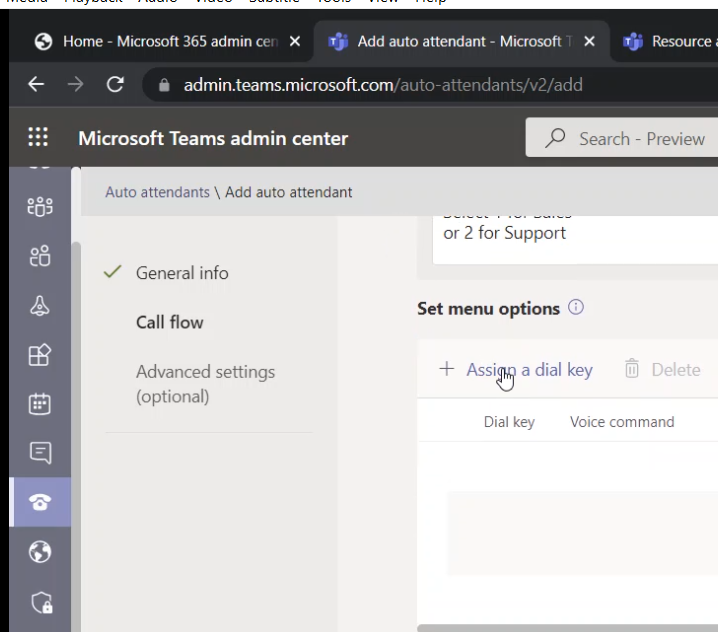
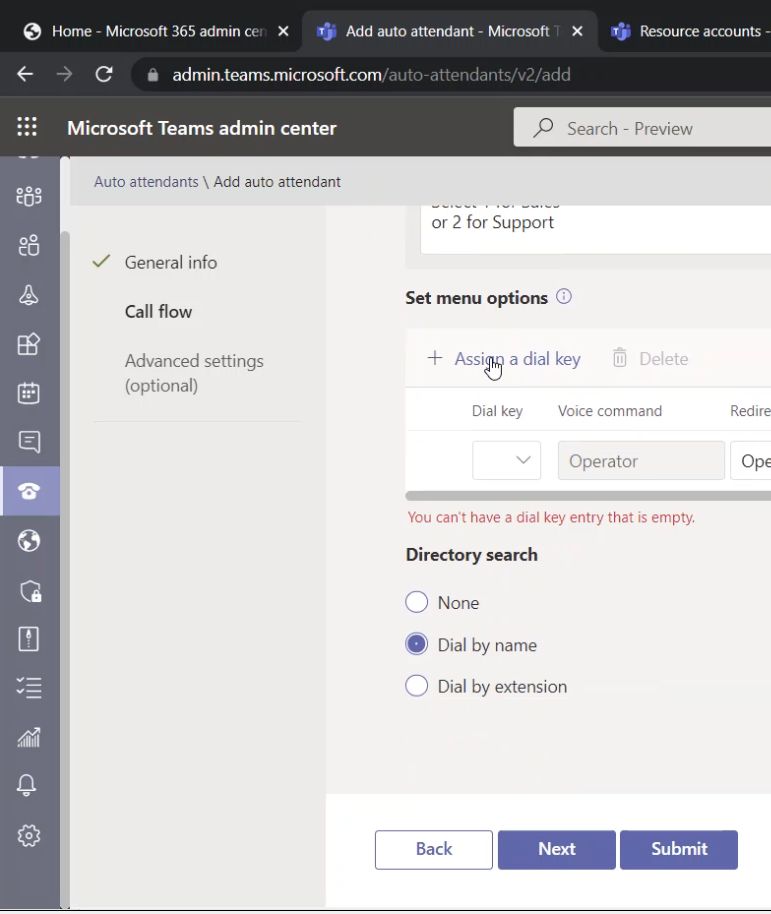
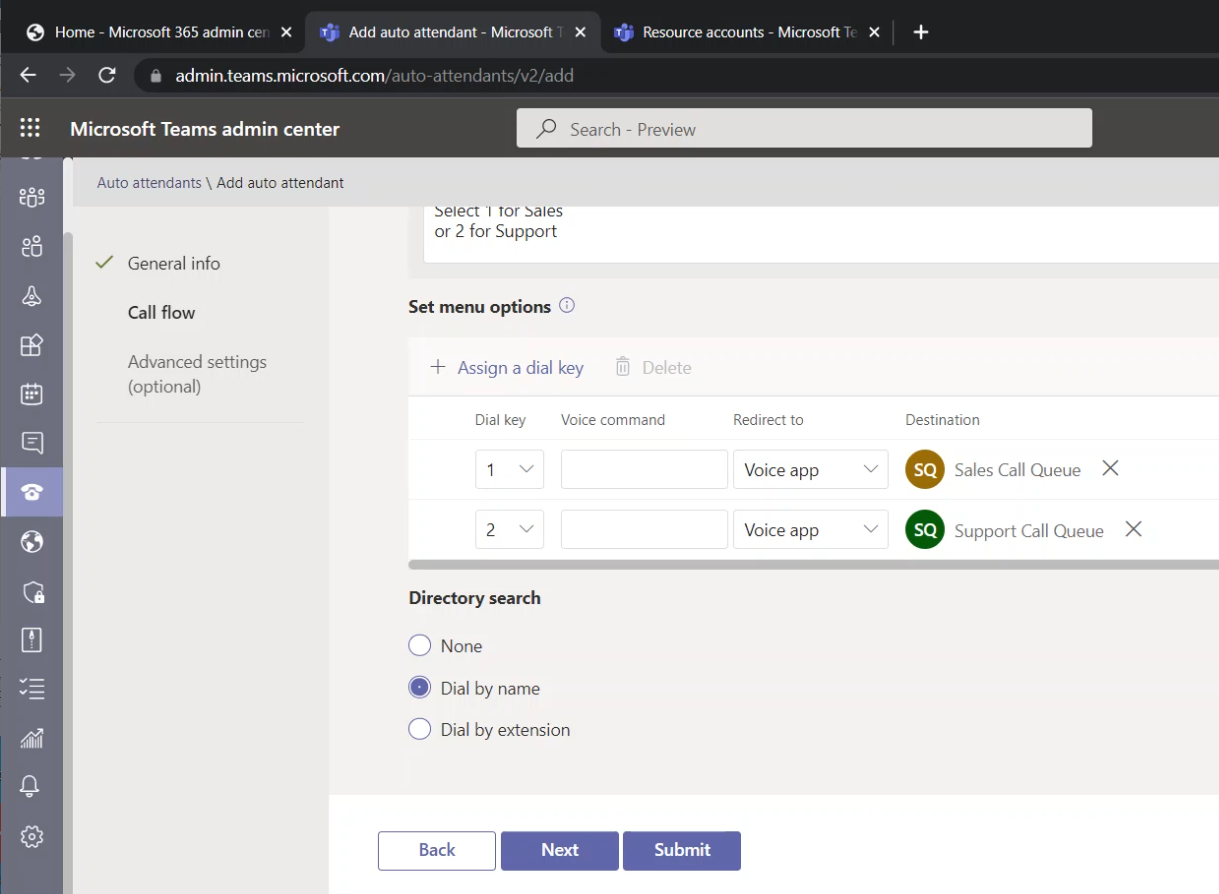
Under “Set menu options”, click on “Assign a dial key”
An empty menu entry will be added
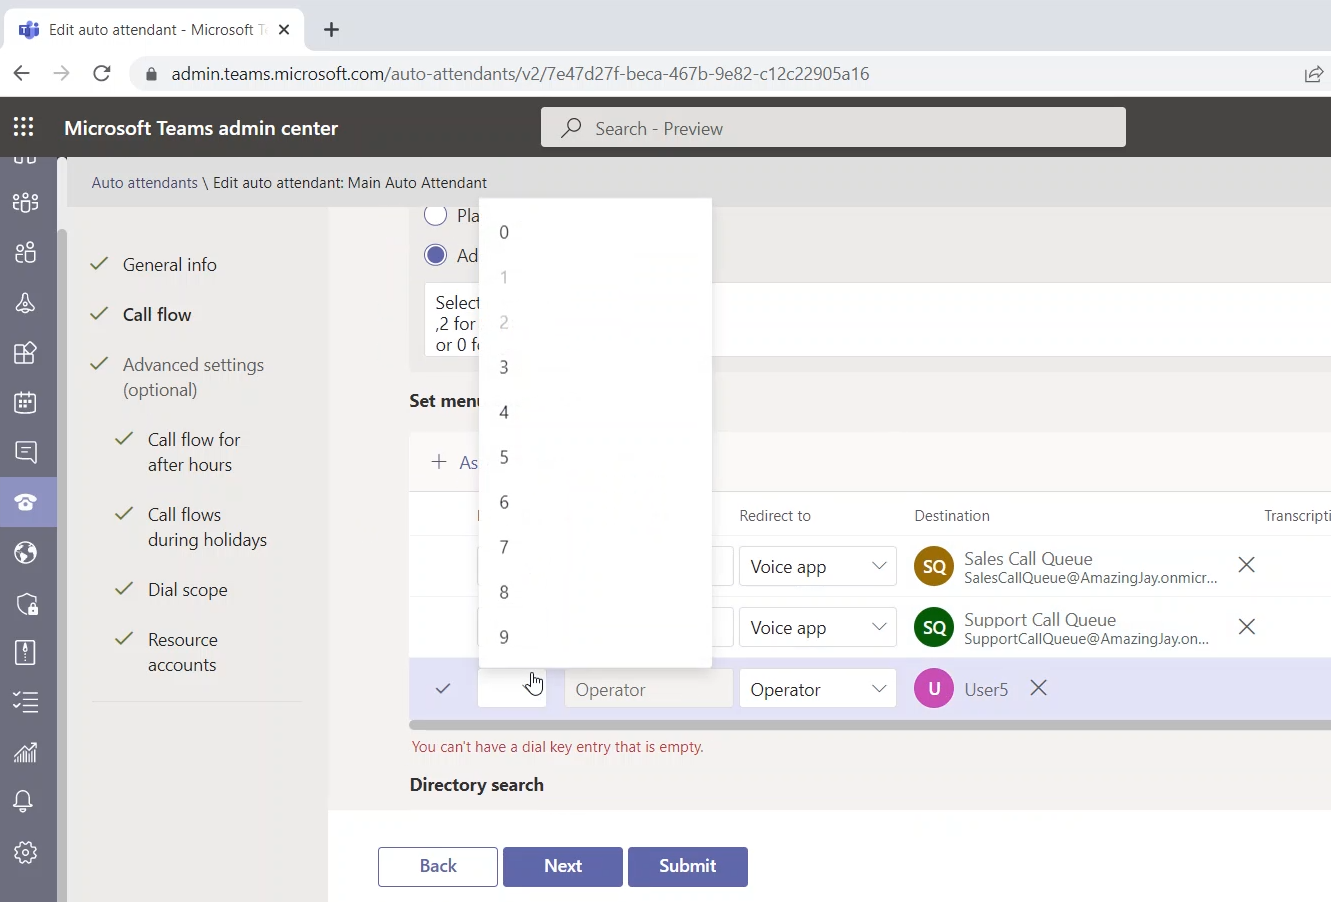
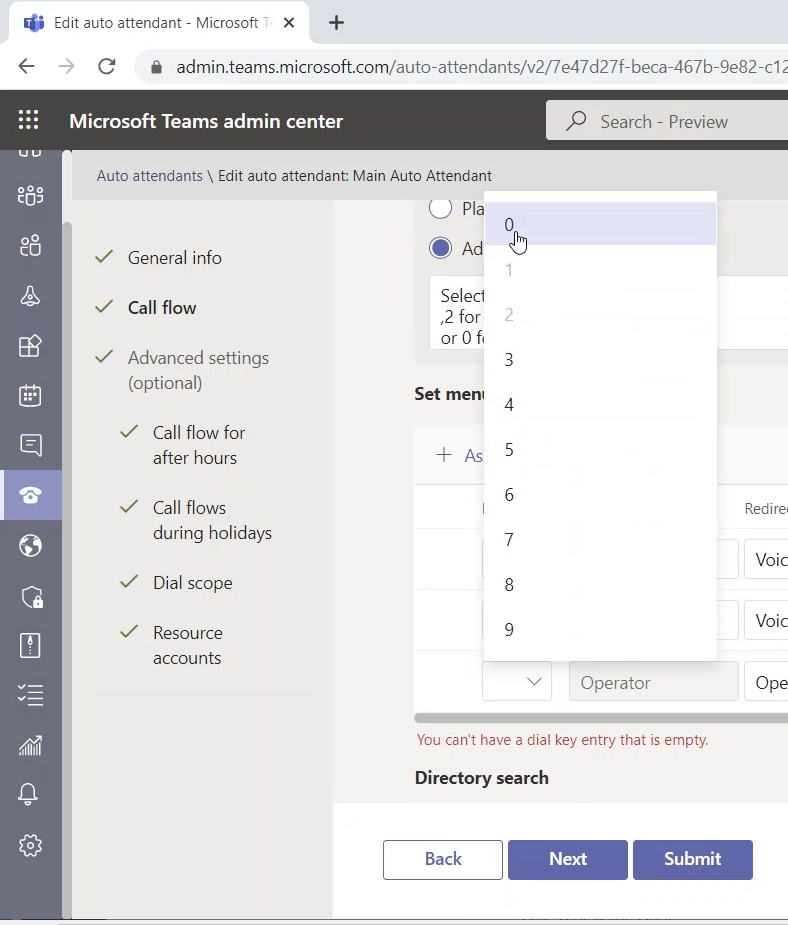
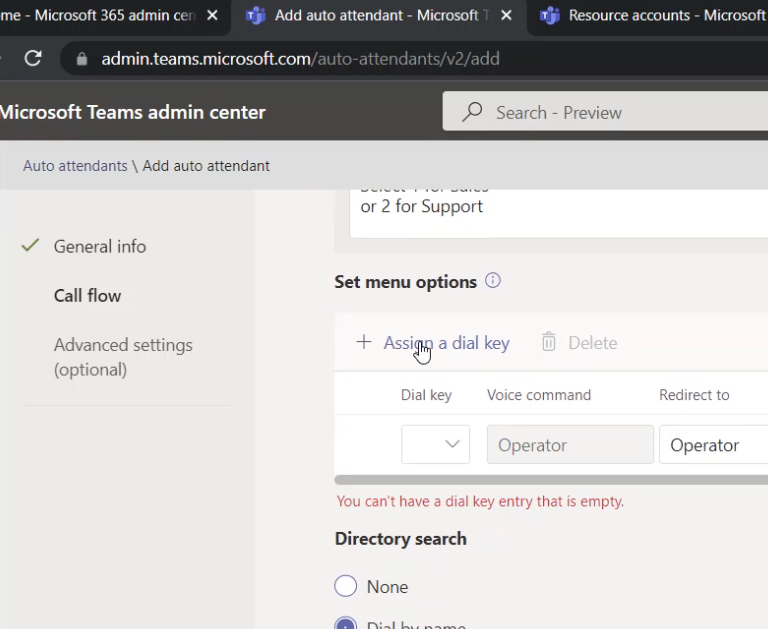
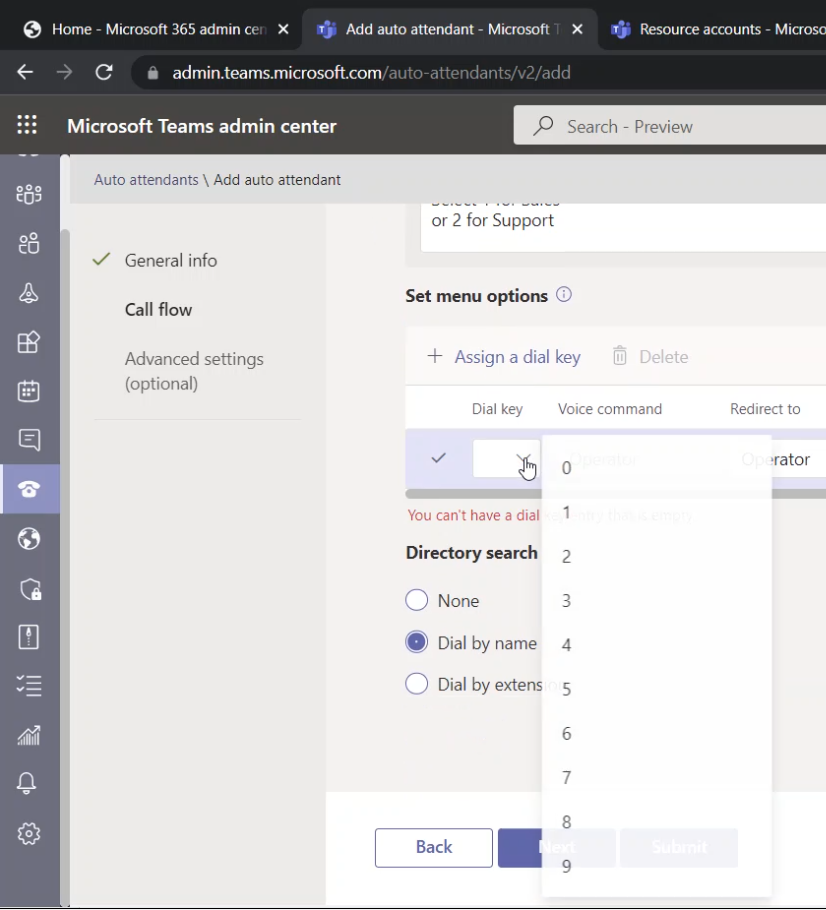
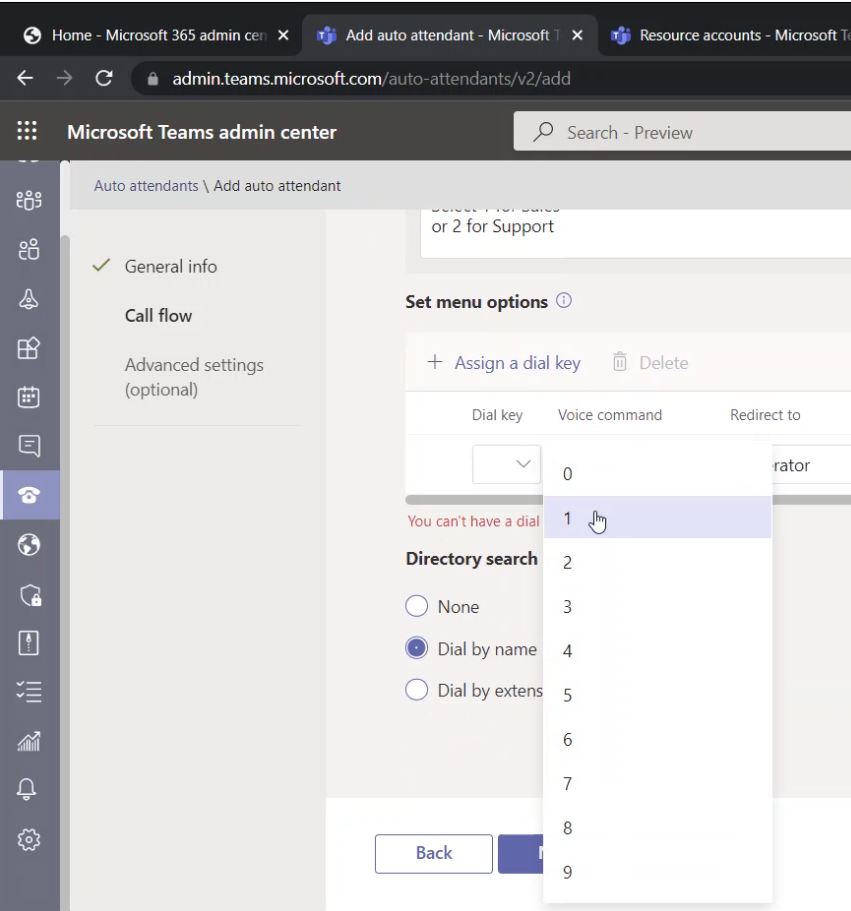
In the new menu entry/option, select the key the caller will click to select this menu option
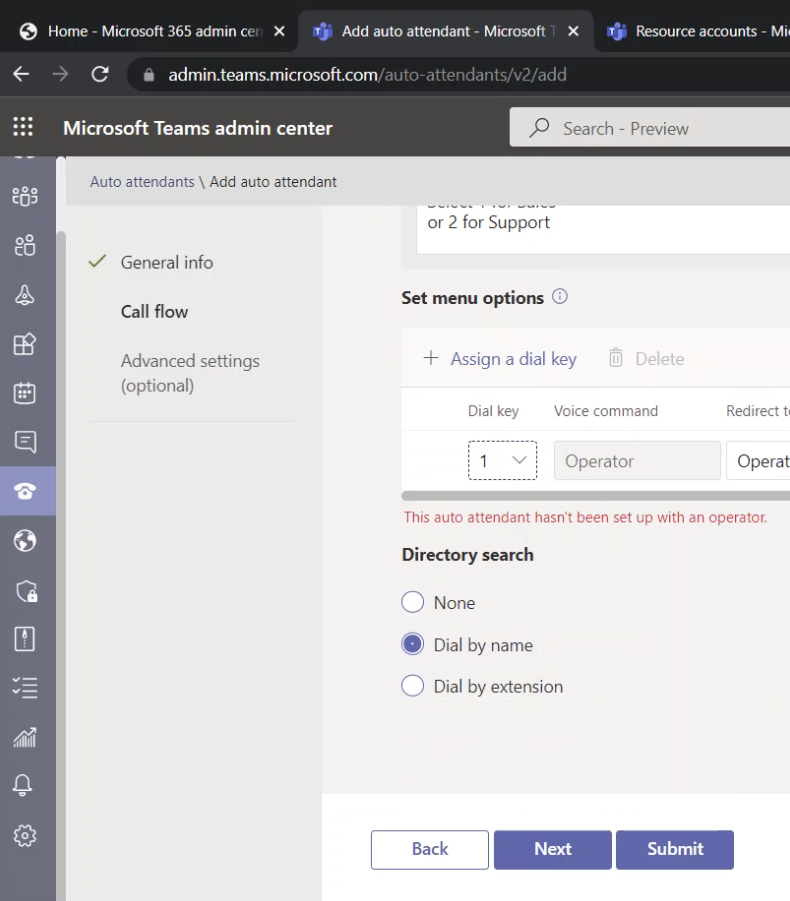
I am selecting 1 for the first entry
The following shows that key 1 is selected
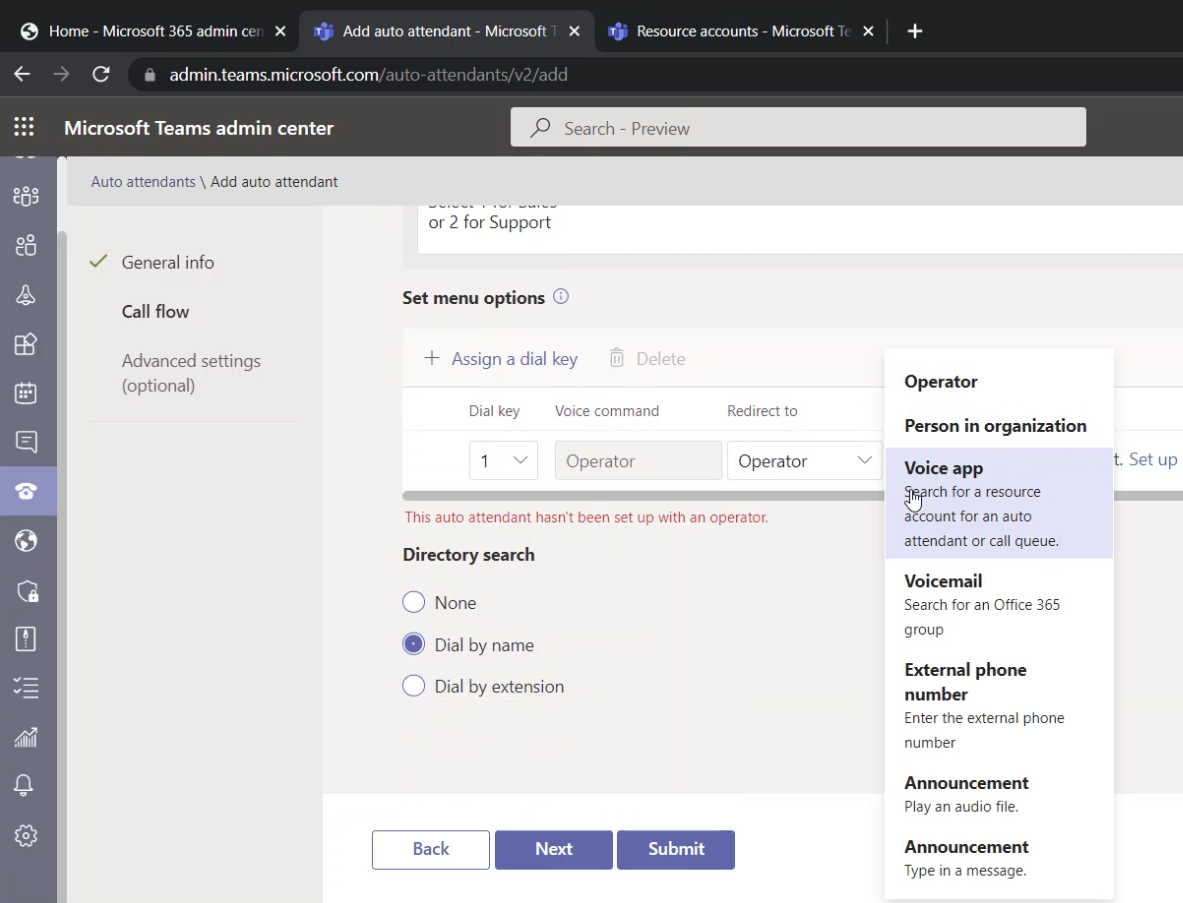
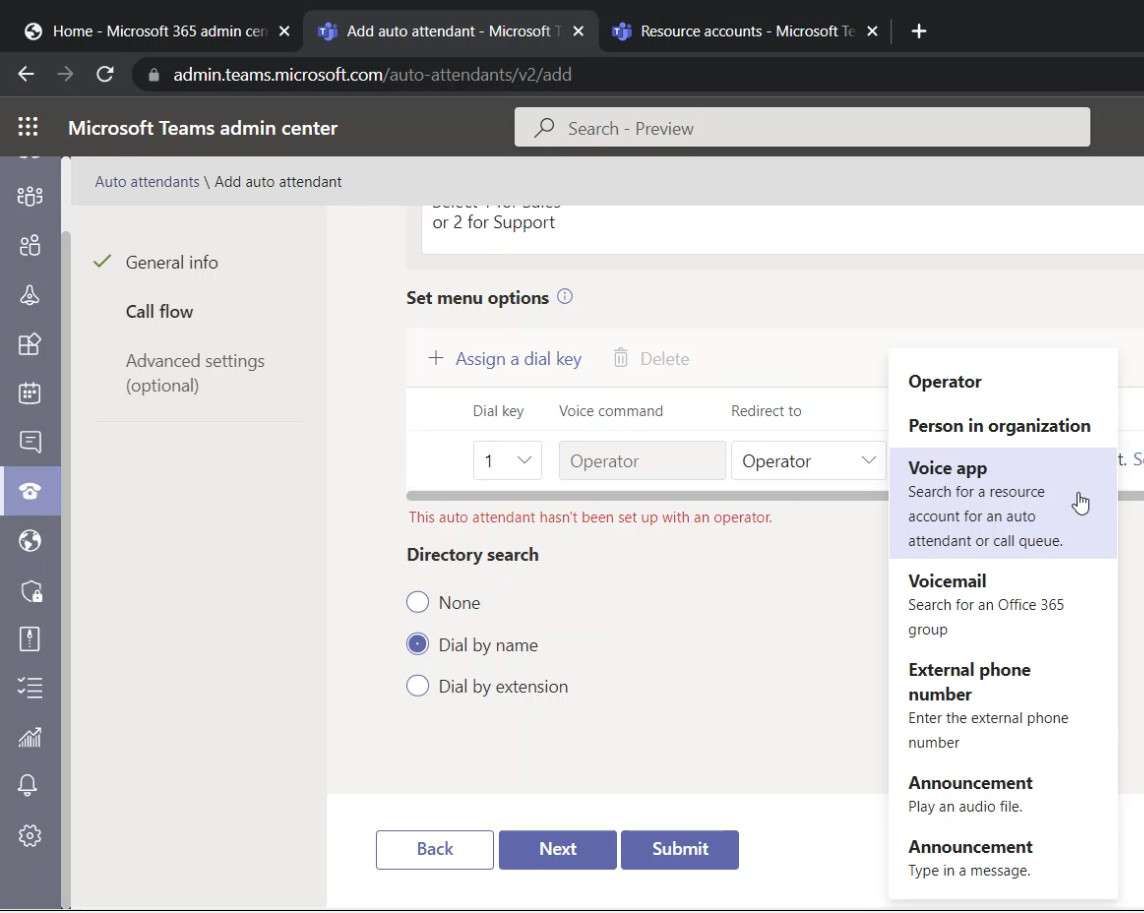
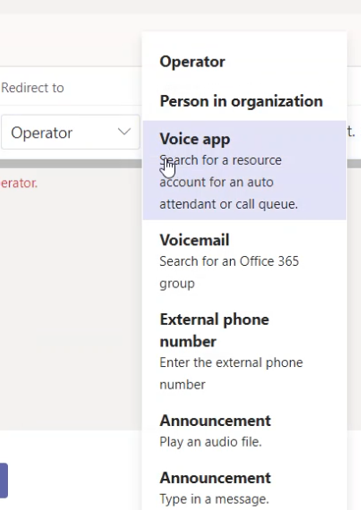
Click the menu for “Redirect to”
Select “Voice app” (since we want to redirect the call to the call queue that was created earlier)
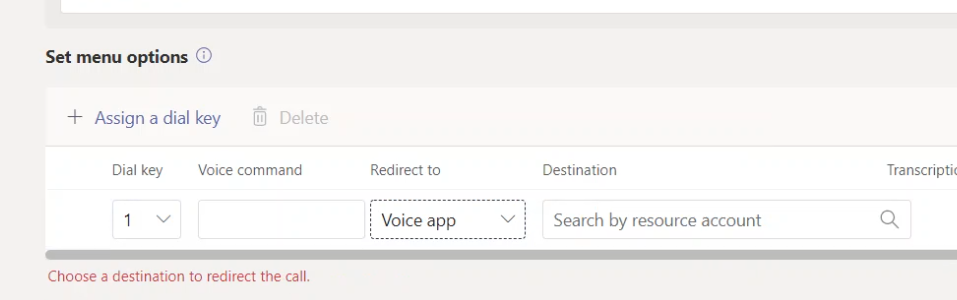
The following shows “Redirect to” is set to “Voice app” which means it will redirect the call to another Call Queue or Auto Attendant
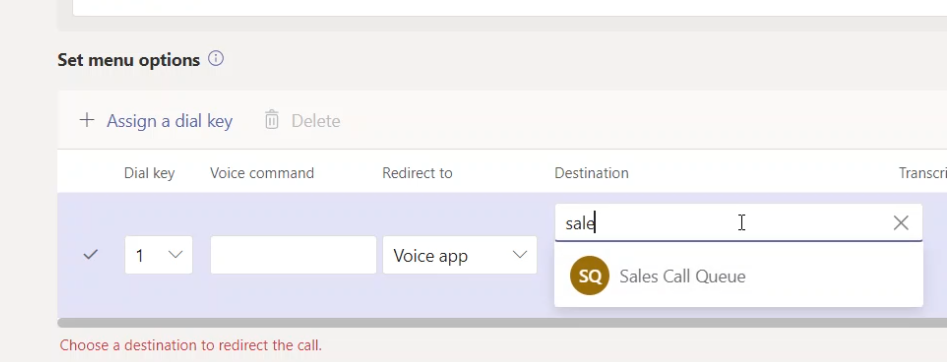
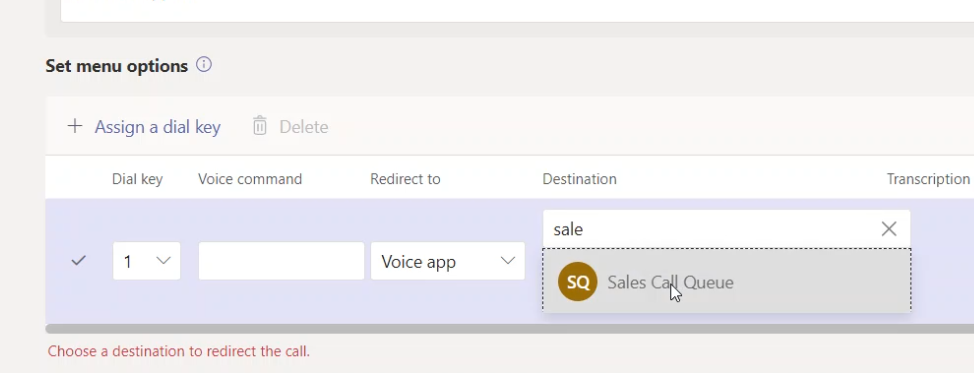
Under “Destination”, I am searching for the “Sales Call Queue” by typing the word “sale”
I am selecting the “Sales Call Queue” that I have created earlier
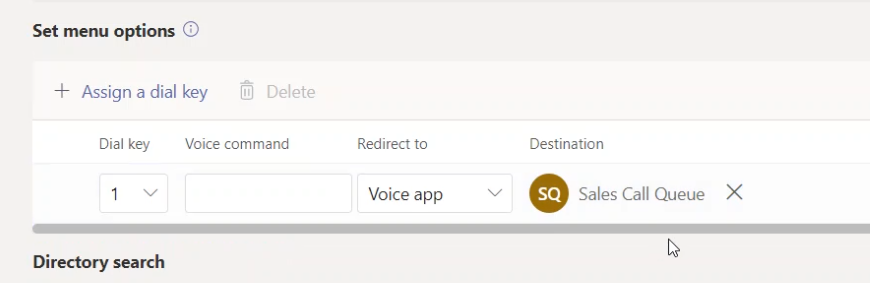
This menu entry/option is completed
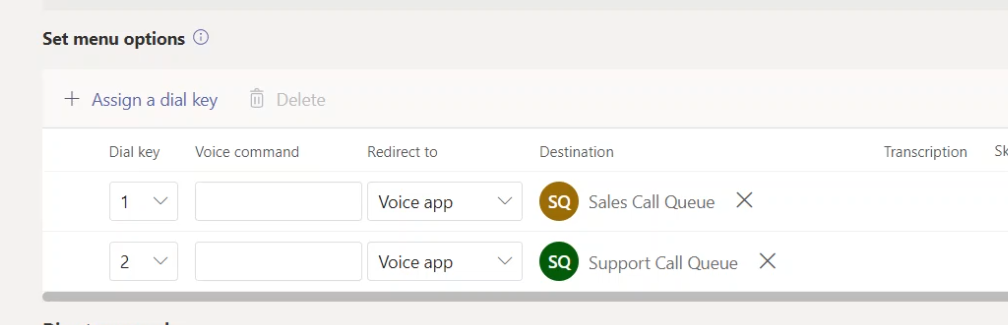
Using similar steps, I have added a menu entry/option for “Support Call Queue” when the caller clicks on “2” on his/her dial pad
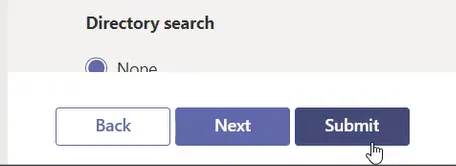
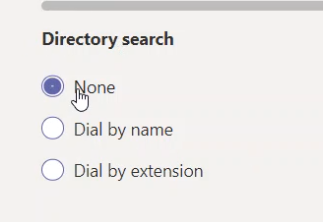
Under “Directory search”, I am selecting “None”. Since I don’t need the caller to call internal users of the organization
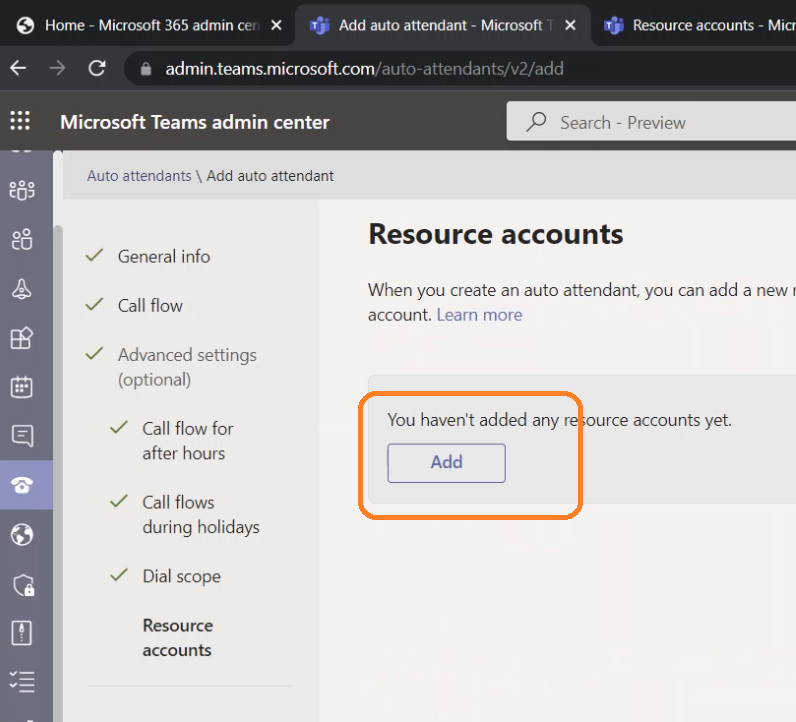
Adding a Resource Account to Our Auto Attendant
For simplicity, I am keeping “Advance setting (optional)” as default and I kept clicking next until I reached the “Resource account” page (the last page).
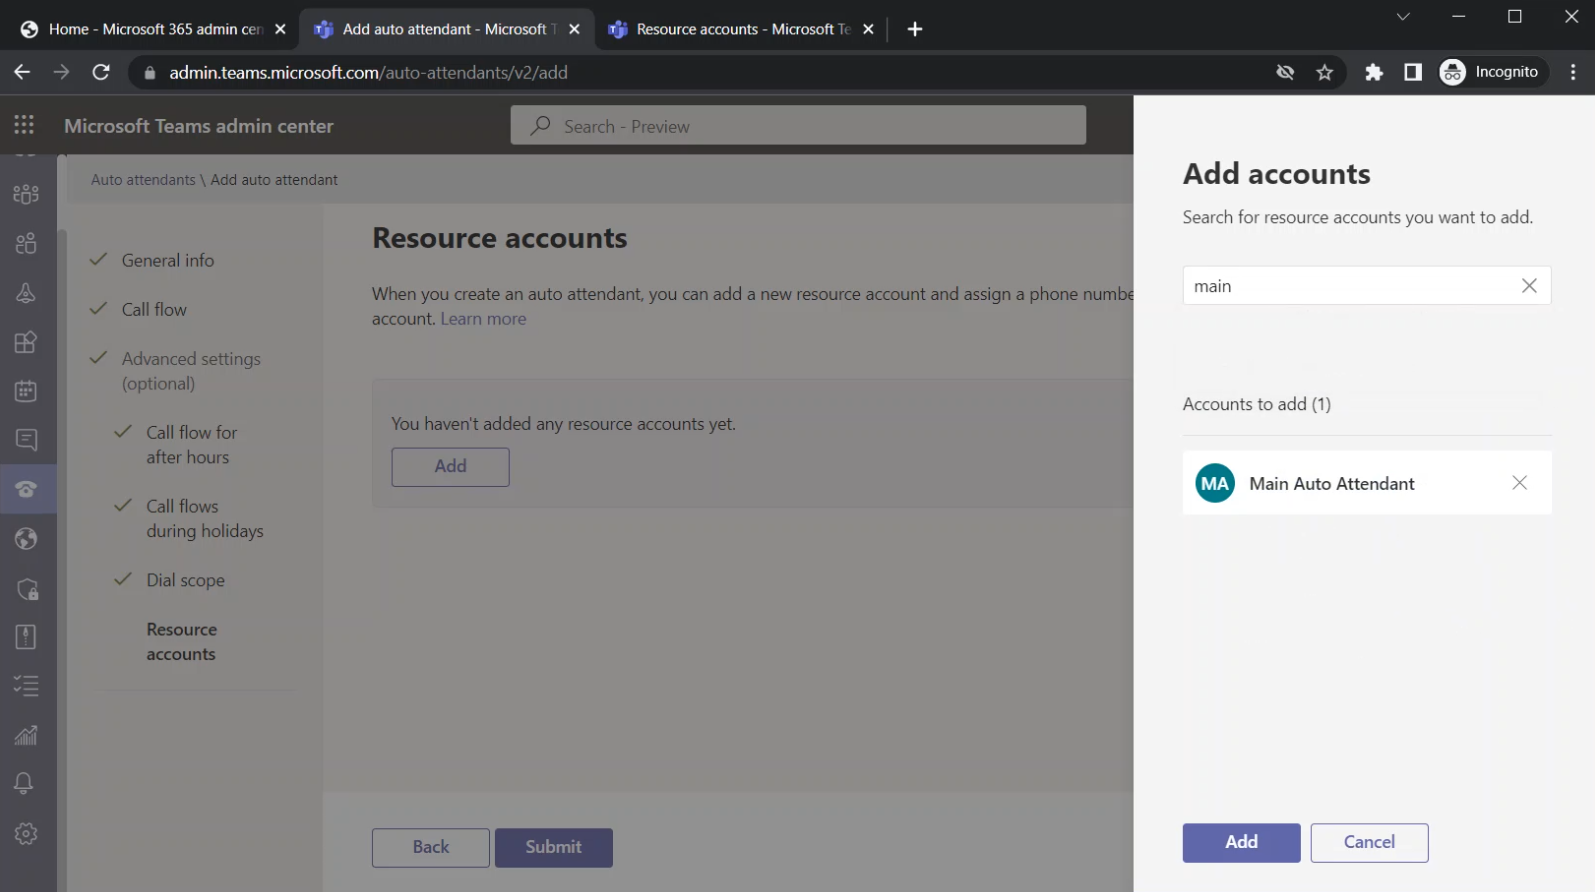
To add a Resource account, click on the “Add” button
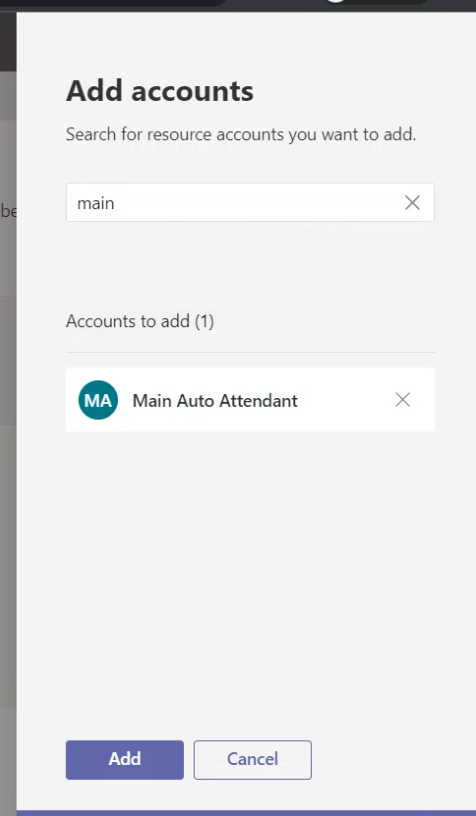
The “Add account” pane will appear on the right side, I searched and added the resource account for this auto attendant as the image below shows
Click on “Add” at the bottom of the pane
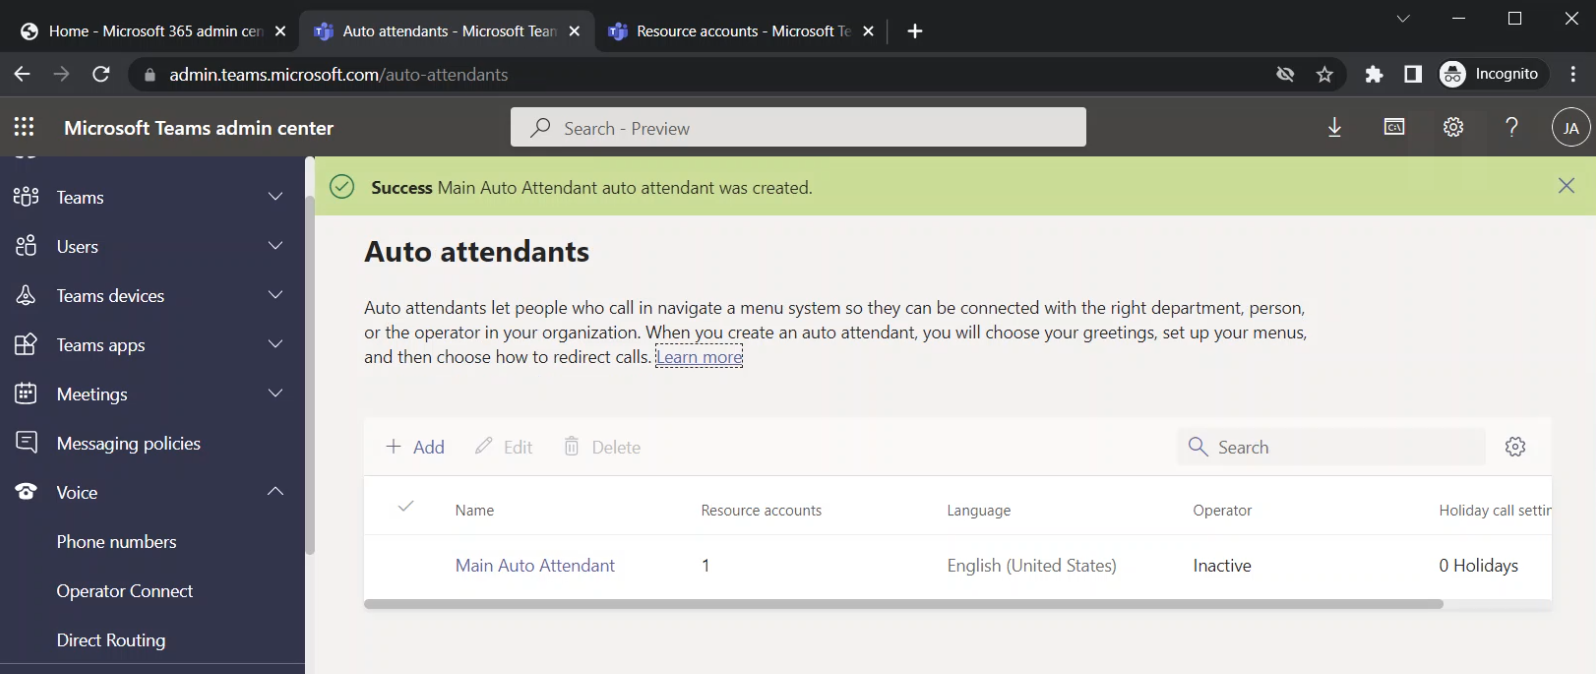
When you back to the “Resource accounts” page, you will see the resource account(s) that you have added
Submitting the changes
Click on the Submit button at the bottom of the Wizard to save the changes of the new auto attendant
The auto attendant will be created, and it will be listed on the main page “Auto attendants”
Each resource account requires a license to make it work with auto attendants and call queues. Instead of using a paid regular account, a special type of license named “Microsoft Teams Phone Resource Account” is created for this purpose and you can acquire it for free (explain in a previous article in this series)
The following steps show how to assign this license to the Resource Account (it is simply like assigning any other type of license)
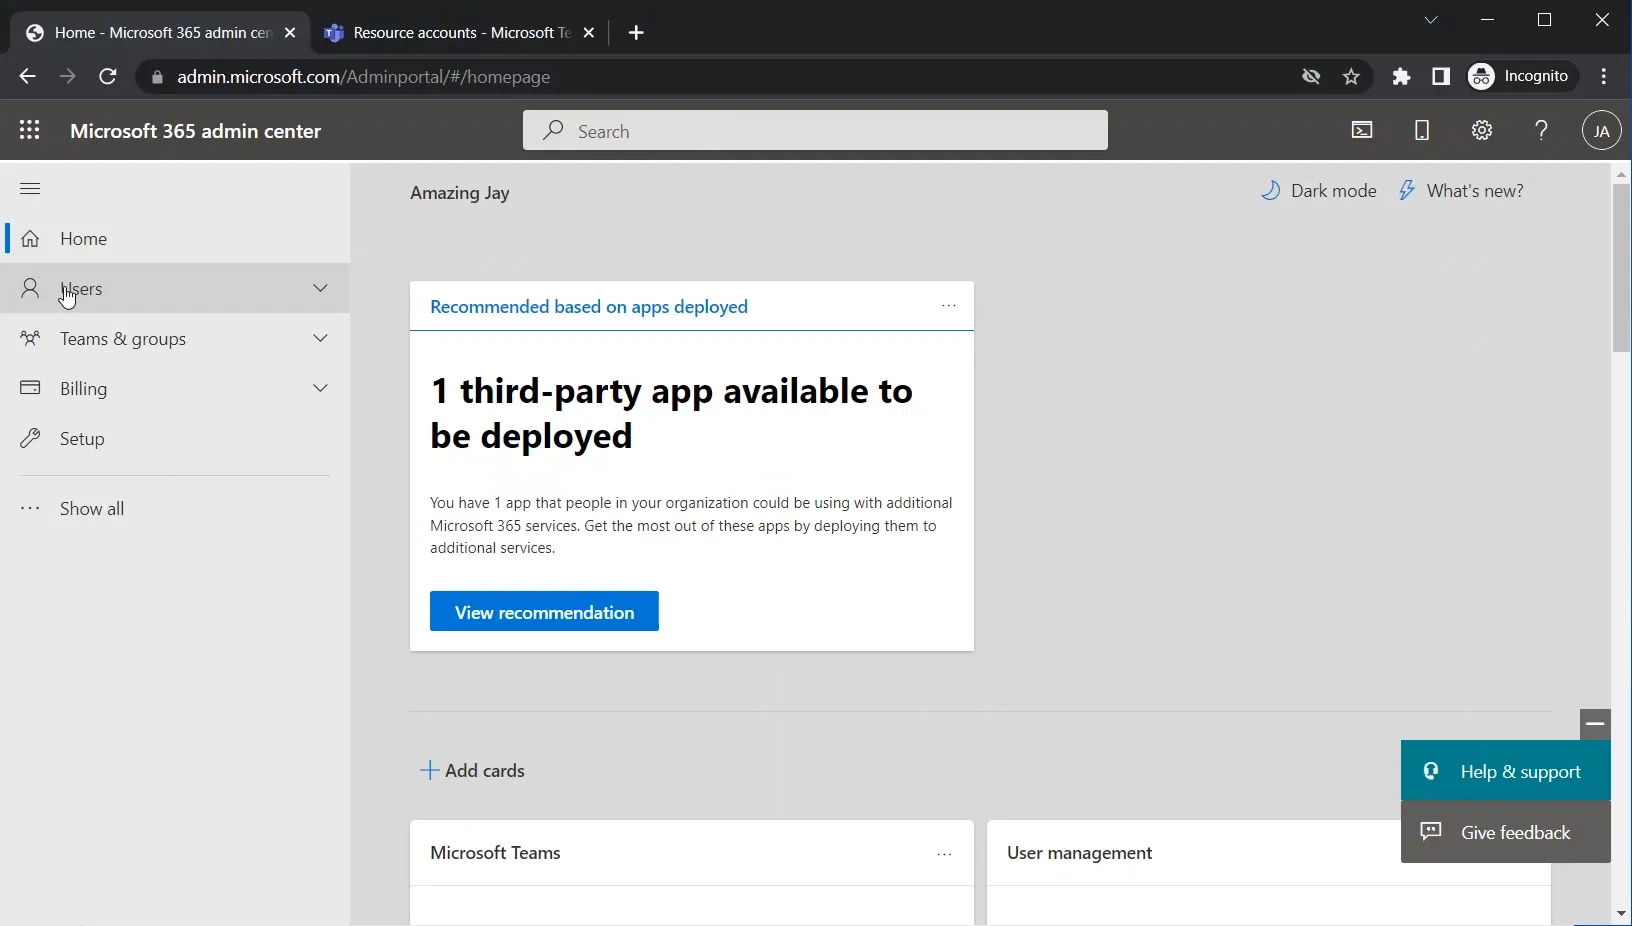
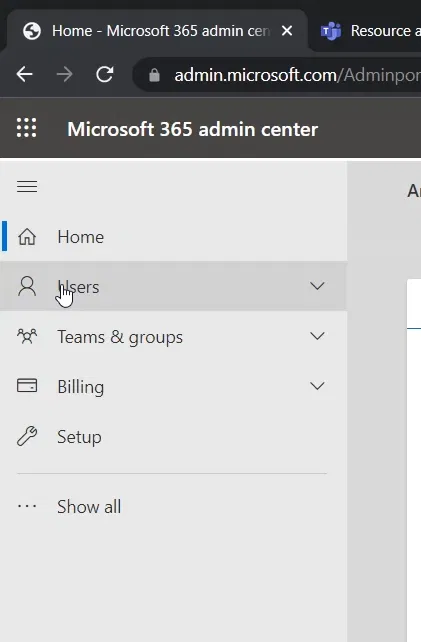
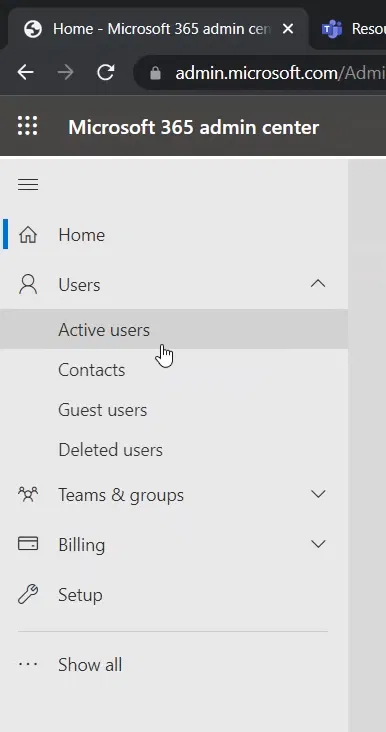
Go to the “Microsoft 365 admin center”
Expand “Users”
Select “Active users”
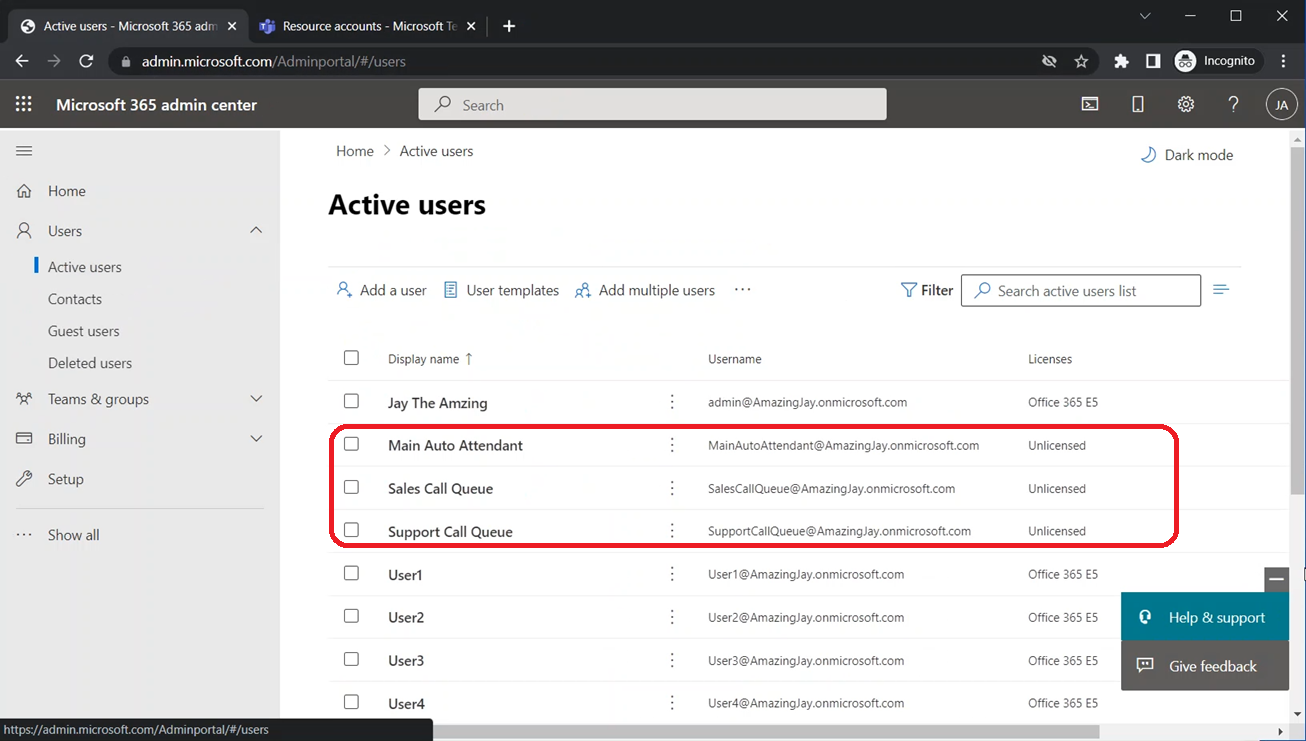
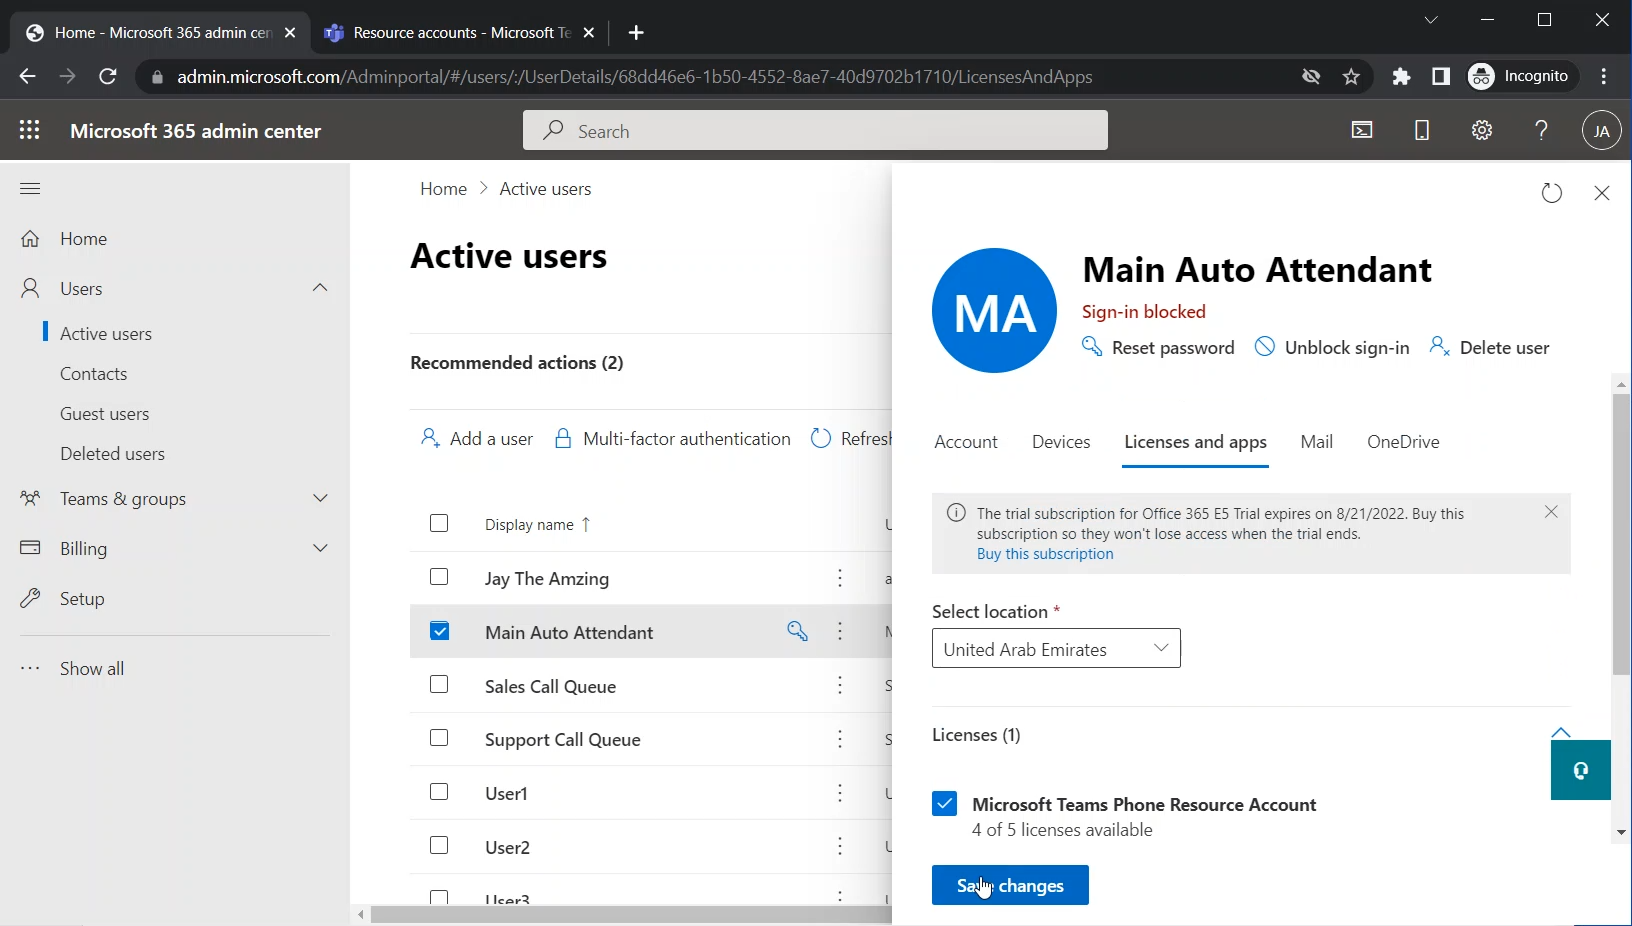
You will find the resource accounts that you have created in the “Teams Admin Center” listed here with the rest of the users. You might need to search the account under “Filter”
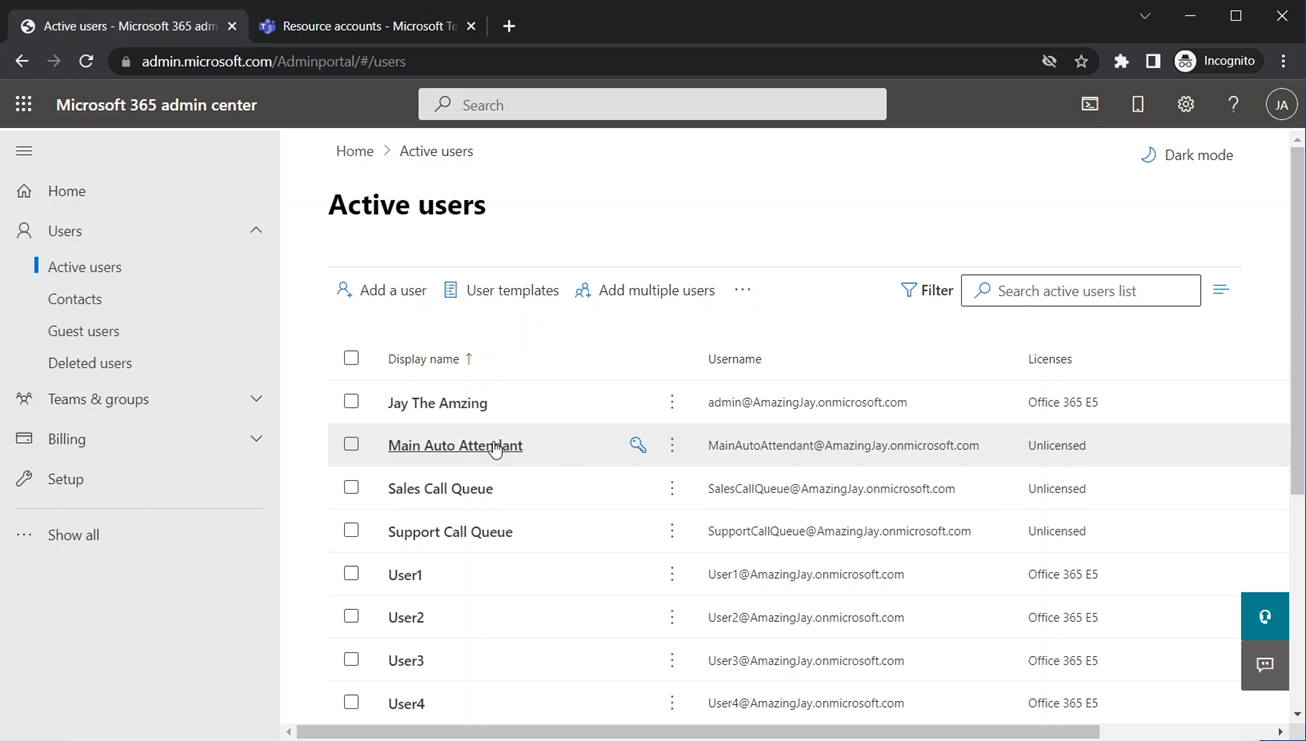
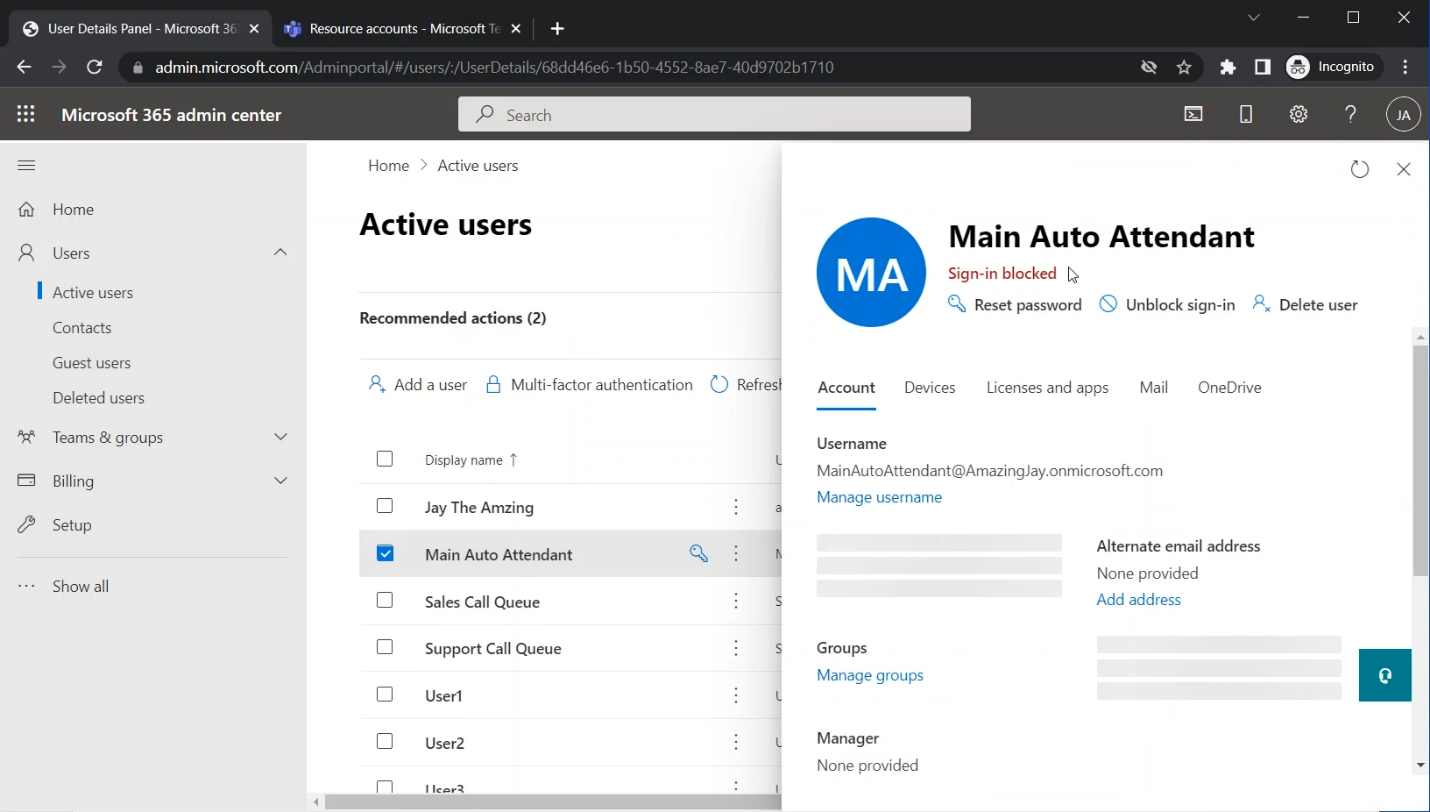
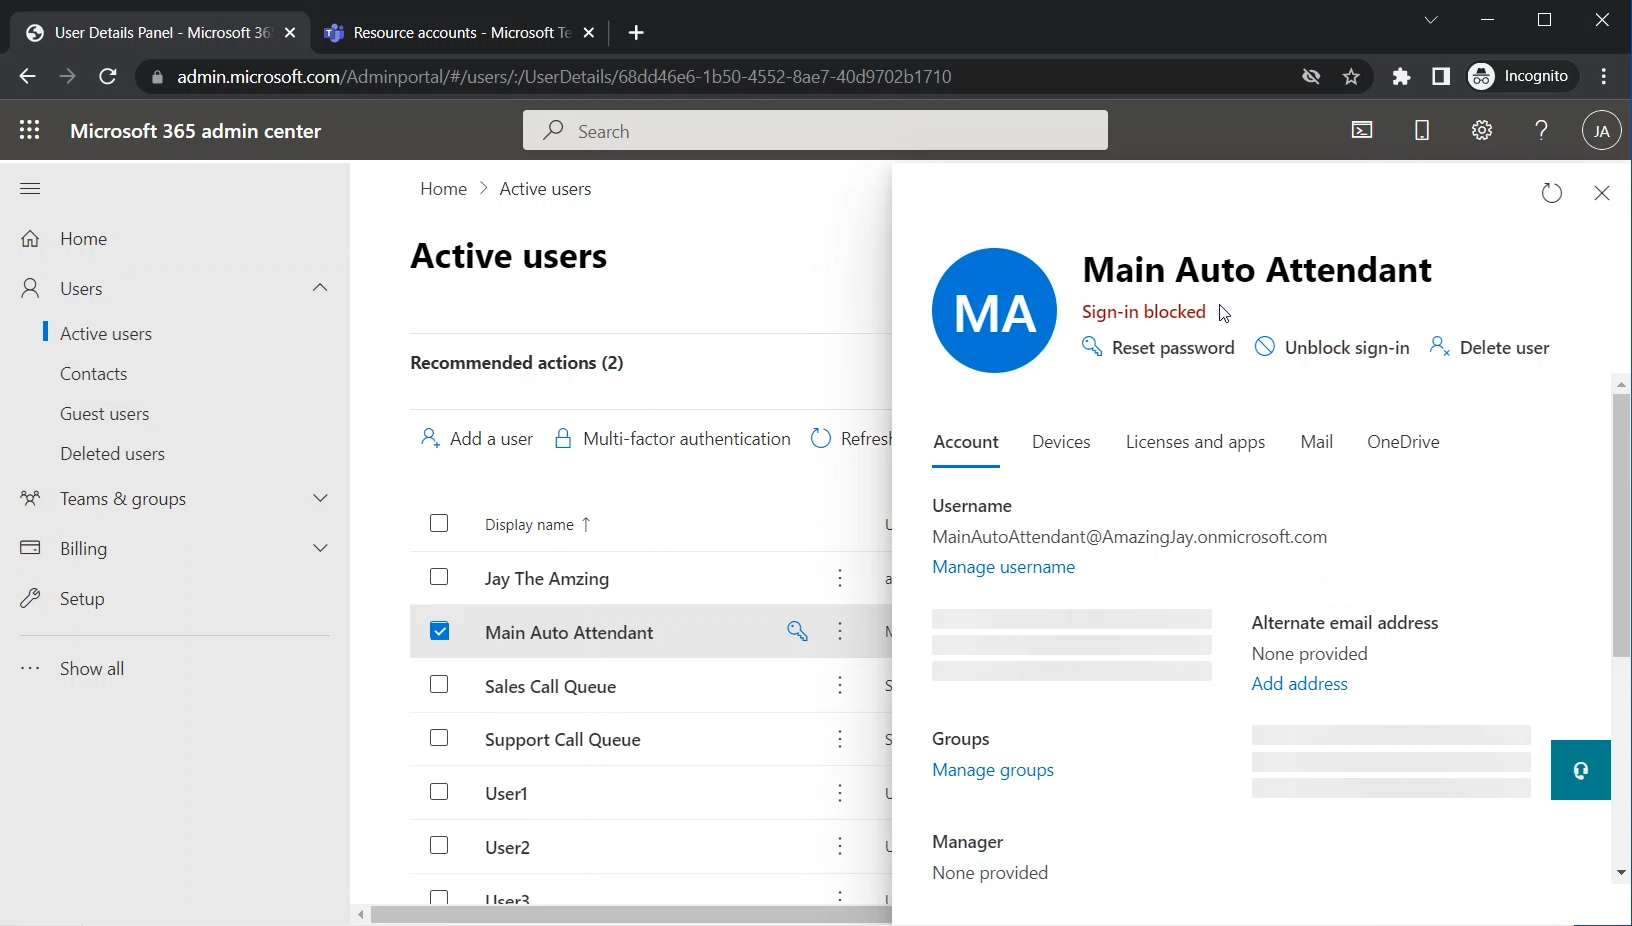
Click on the resource account
The pane that shows the detail pane of the account will appear on the right side
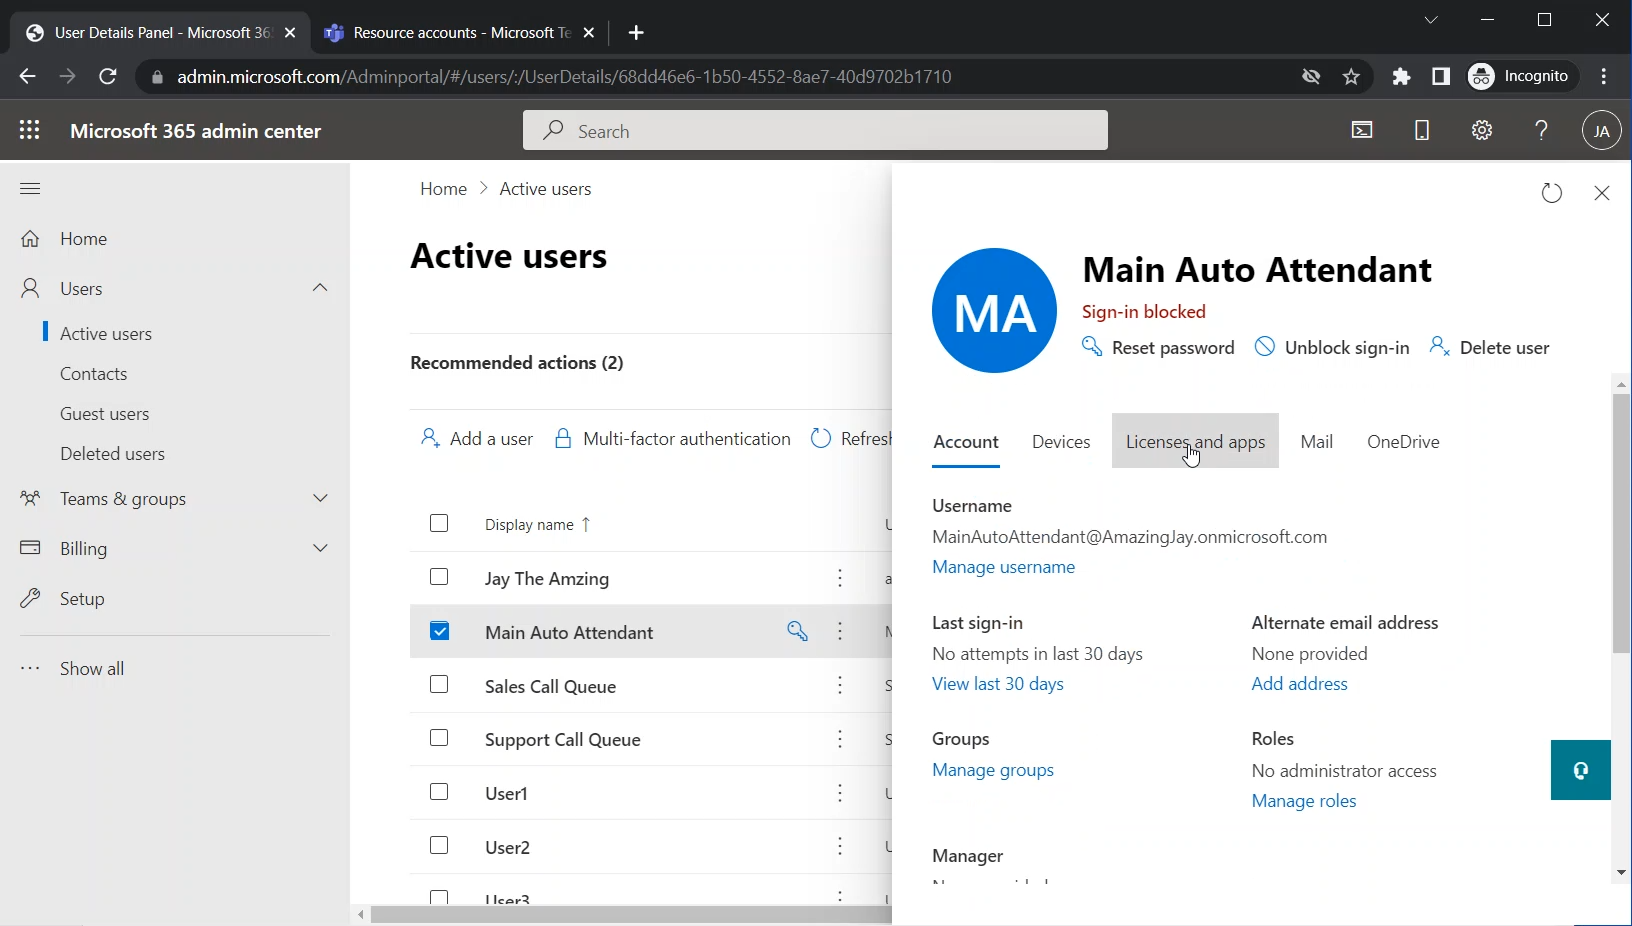
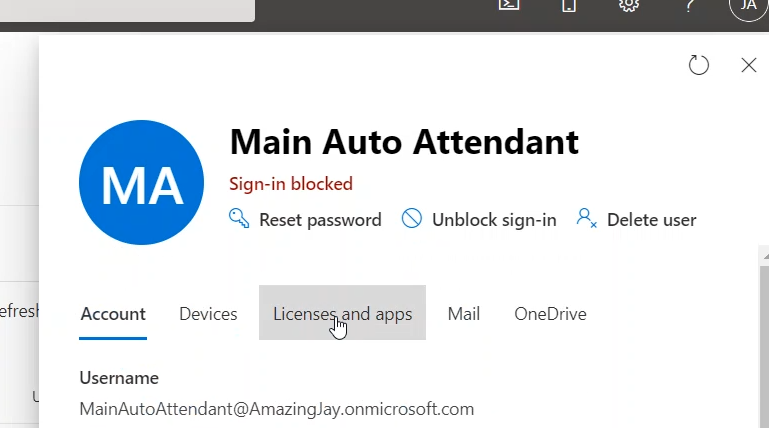
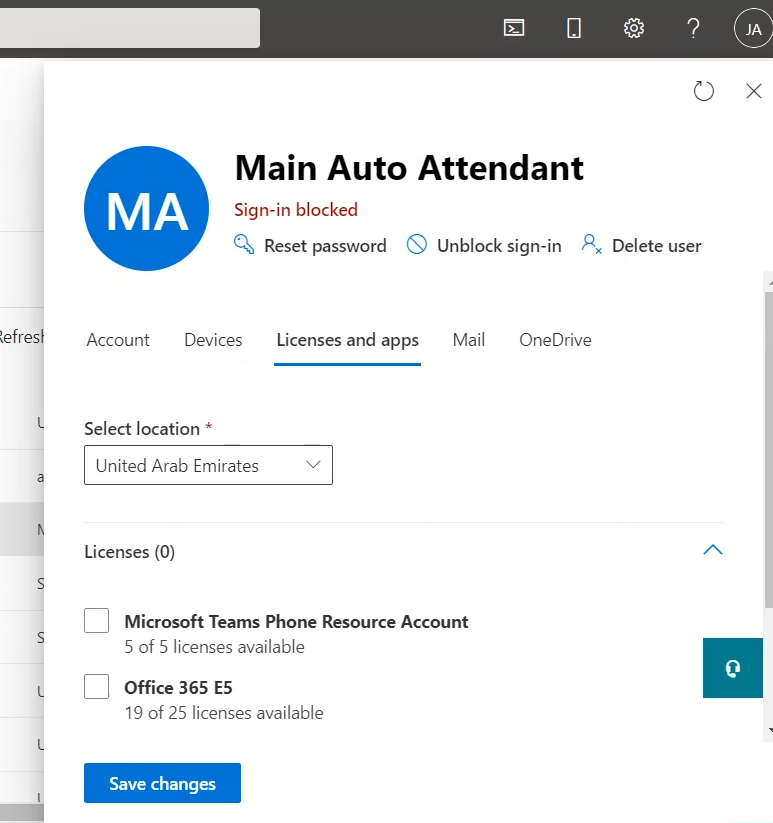
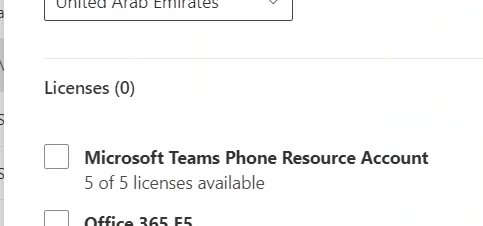
Click on the “License and apps” tab
The list of the licenses will be shown. Among these licenses, you will see the “Microsoft Teams Phone Resource Account” license (which we acquired in a previous step in this series)
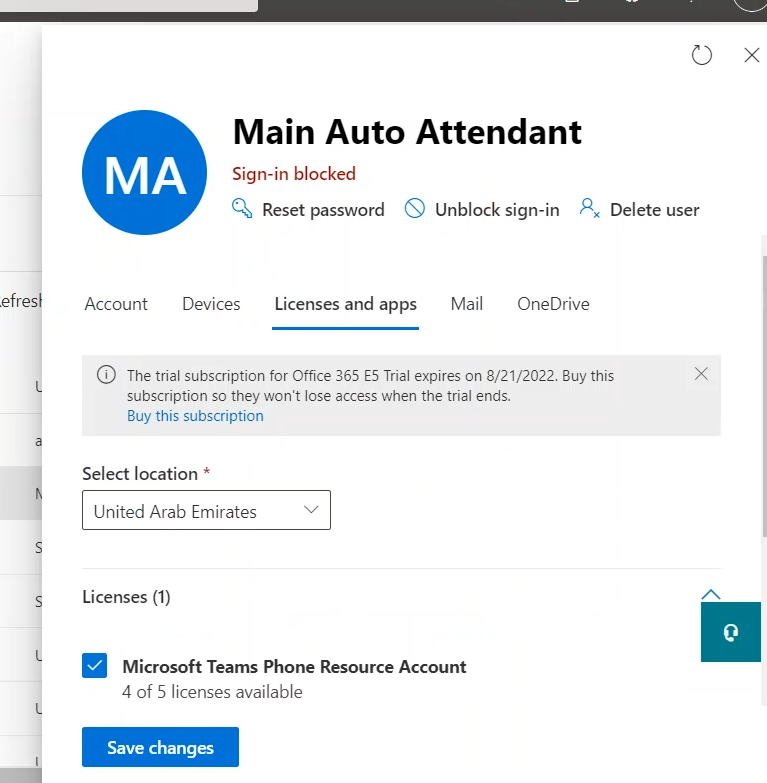
Select the “Microsoft Teams Phone Resource Account”
Each Auto Attendant and Call Queue requires a Resource Account.
Without a Resource Account, you will not be able to create an Auto Attendant or a Call Queue
You can assign a phone number to a Resource Account. When you call that number, you will reach the Auto Attendant and Call Queue associated with that Resource Account
You can create a Resource Account in Teams Admin Center
Resource Account will be listed in Microsoft 365 Admin Center like any other type of accounts
You assign the needed special license to the Resource Account using Microsoft 365 Admin Center the same way you assign a license to any regular account. The license name is “Microsoft Teams Phone Resource Account”
Creating a Resource Account for the “Sales Call Queue”
The following are the steps to create a resource account
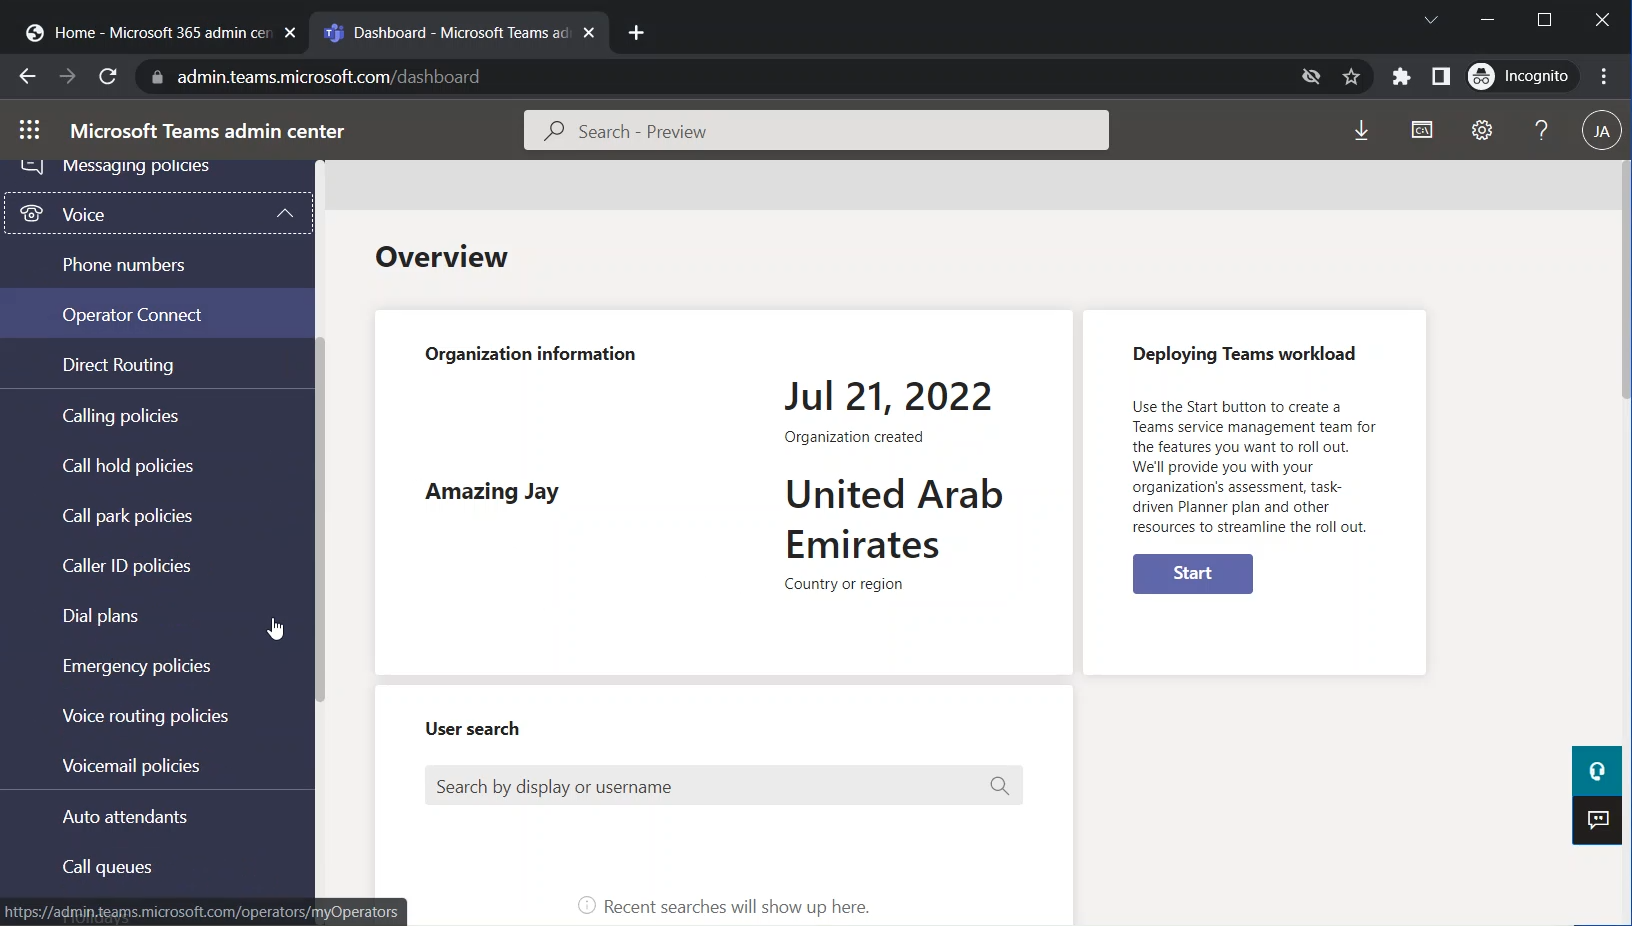
On Teams Admin Center, expand the “Voice” menu
Select “Resource accounts”
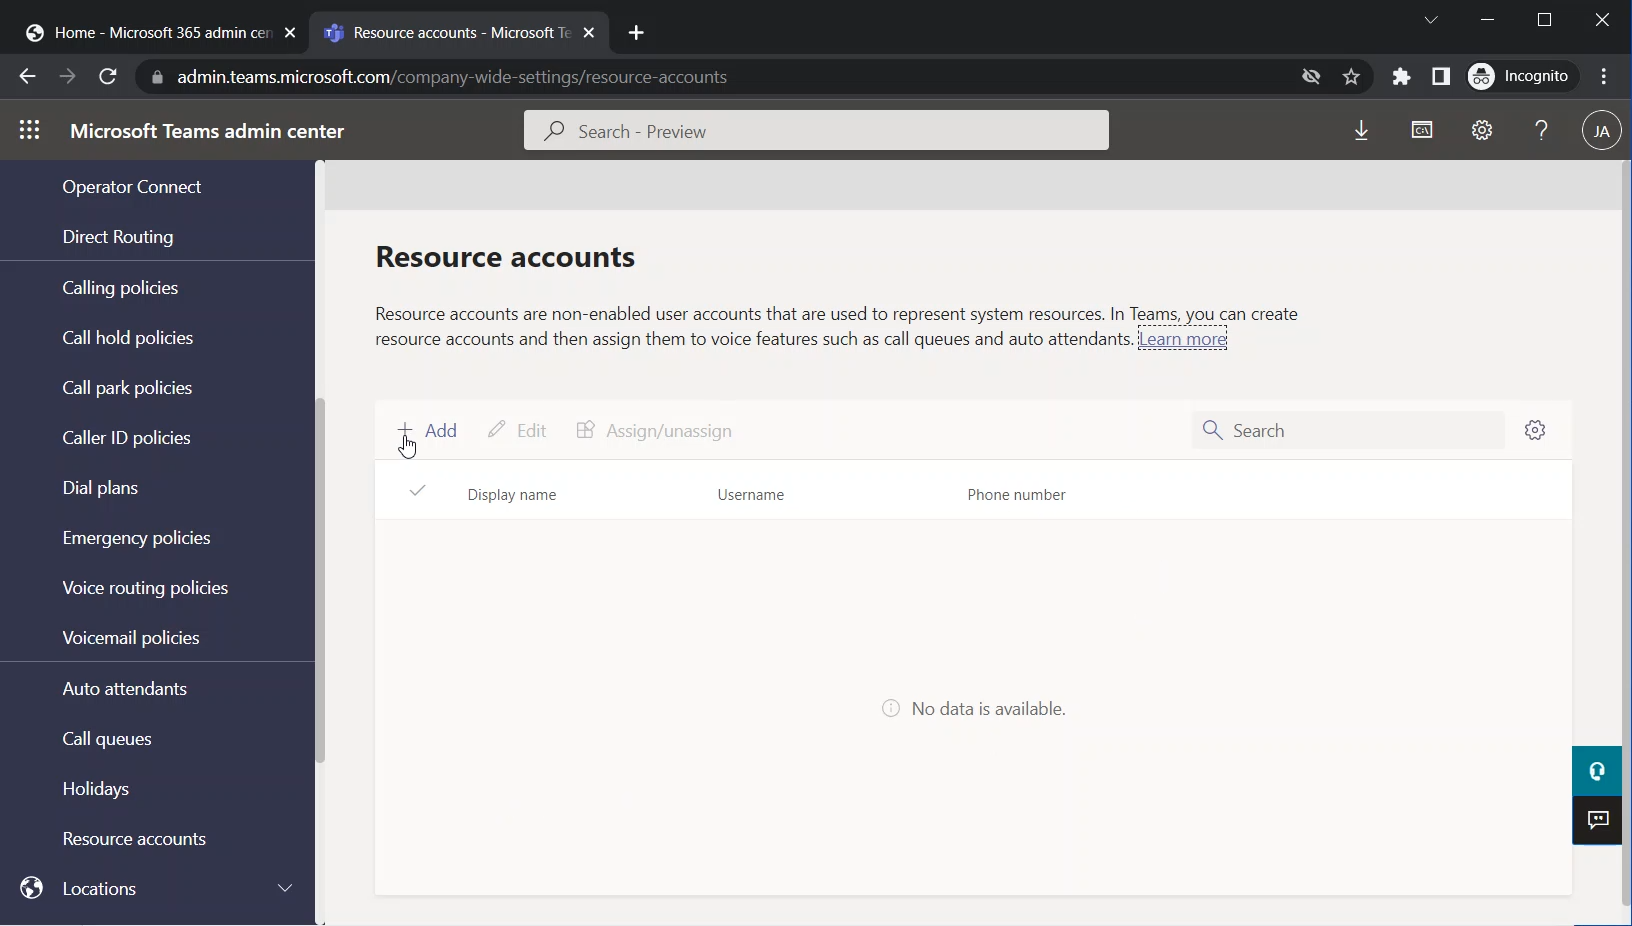
The “Resource accounts” page will appear
Click on Add
The “Add resource account” pane appears on the right side of the browser
The following image shows an empty “Add resource account” pane
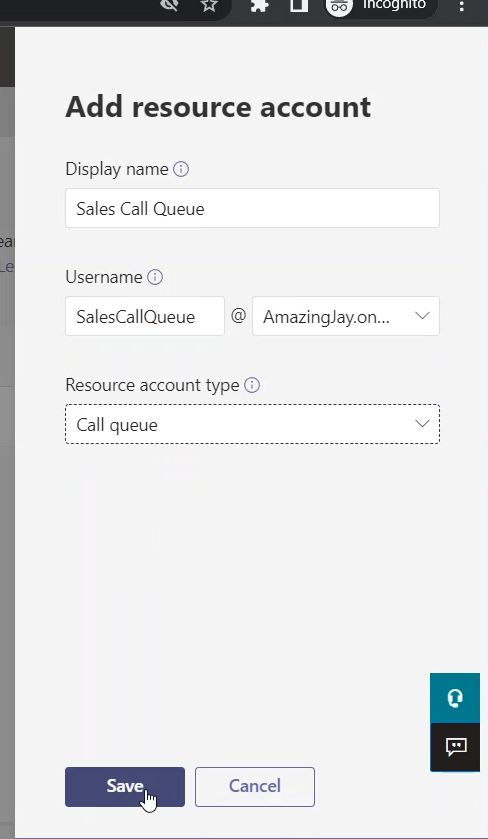
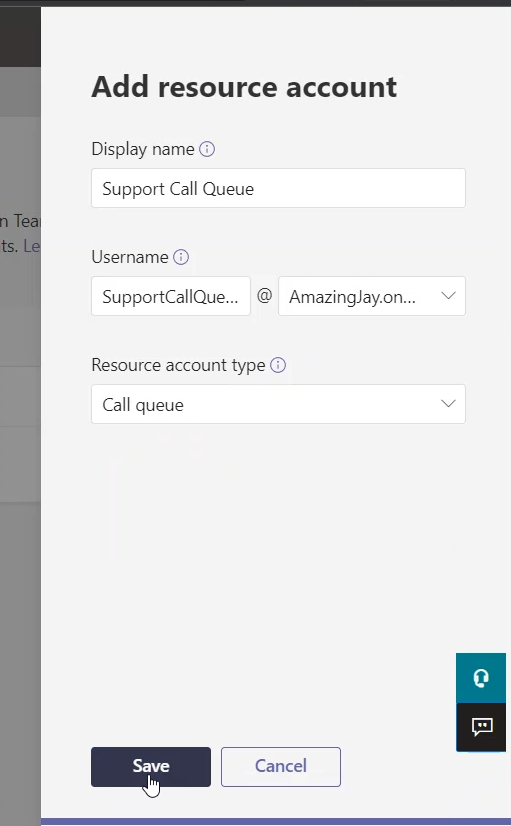
Fill in the following fields:
Display Name
The display name makes the account easier to be identified and also it will appear in the “Microsoft 365 Admin Center”
Username
And also type the Username. This username will appear in Microsoft 365 Admin Center where you can assign the “Microsoft Teams Phone Resource Account” license to it.
Resource account type
Here, you select if the account is going to be used for “Auto attendant” or for “Call queue”
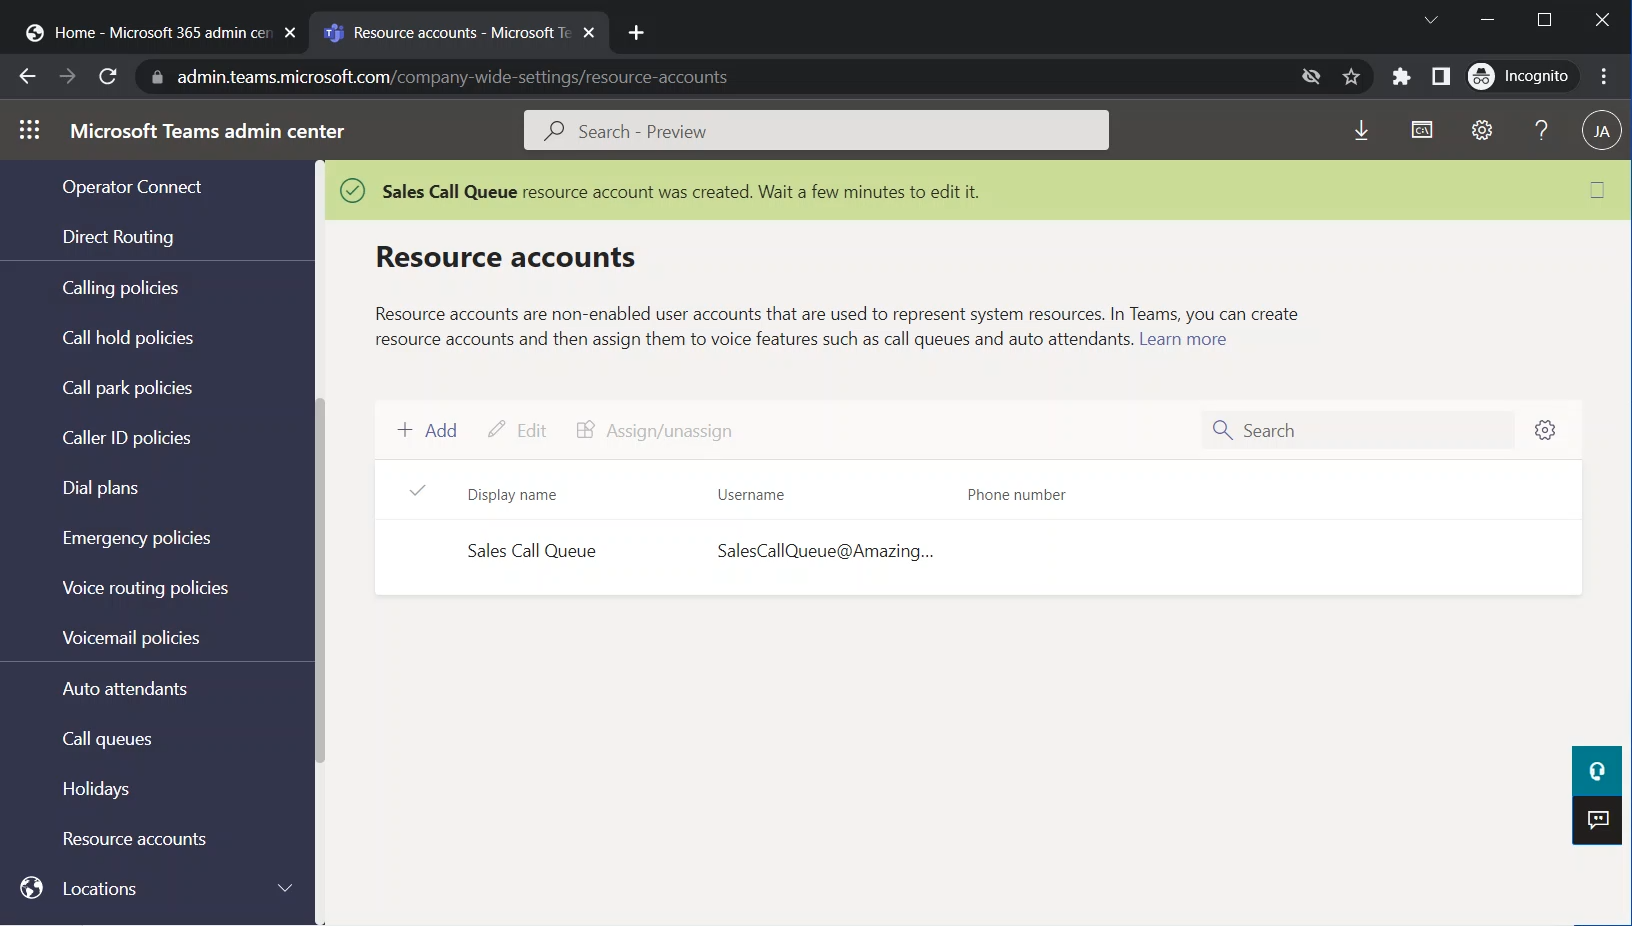
Click on Save to save the changes and close the “Add resource account” pane
The following image shows the “Sales Call Queue” on the main page of “Resource accounts”
Resource Account for “Support Call Queue”
In the same way, I am adding the resource account for the “Support Call Queue”
Resource Account for “Main Auto Attendant”
And also, I am adding the resource account for “Main Auto Attendant”
The Newly Created Accounts Listed Under The Resource Accounts Page
The following image shows all the 3 resource accounts that we are going to use
Each auto attendant or call queue always needs a resource account that is assigned to it.
To call an auto attendant or a call queue using PSTN, The Resource account should be assigned a Teams telephone number. This telephone number could be a Direct Routing number or it could be a Microsoft Phone number.
What Is Resource Account License
Each resource account requires a license to make it work with auto attendants or call queues. The name of this license is “Microsoft Teams Phone Resource Account license”. This license is free and costs nothing. It is intended to be used only for Resource Accounts. After acquiring this license, you can assign it to a resource account, and it will appear as Microsoft Teams Phone Resource Account under licenses.
The below steps show how to obtain this license
Obtaining The Resource Account License
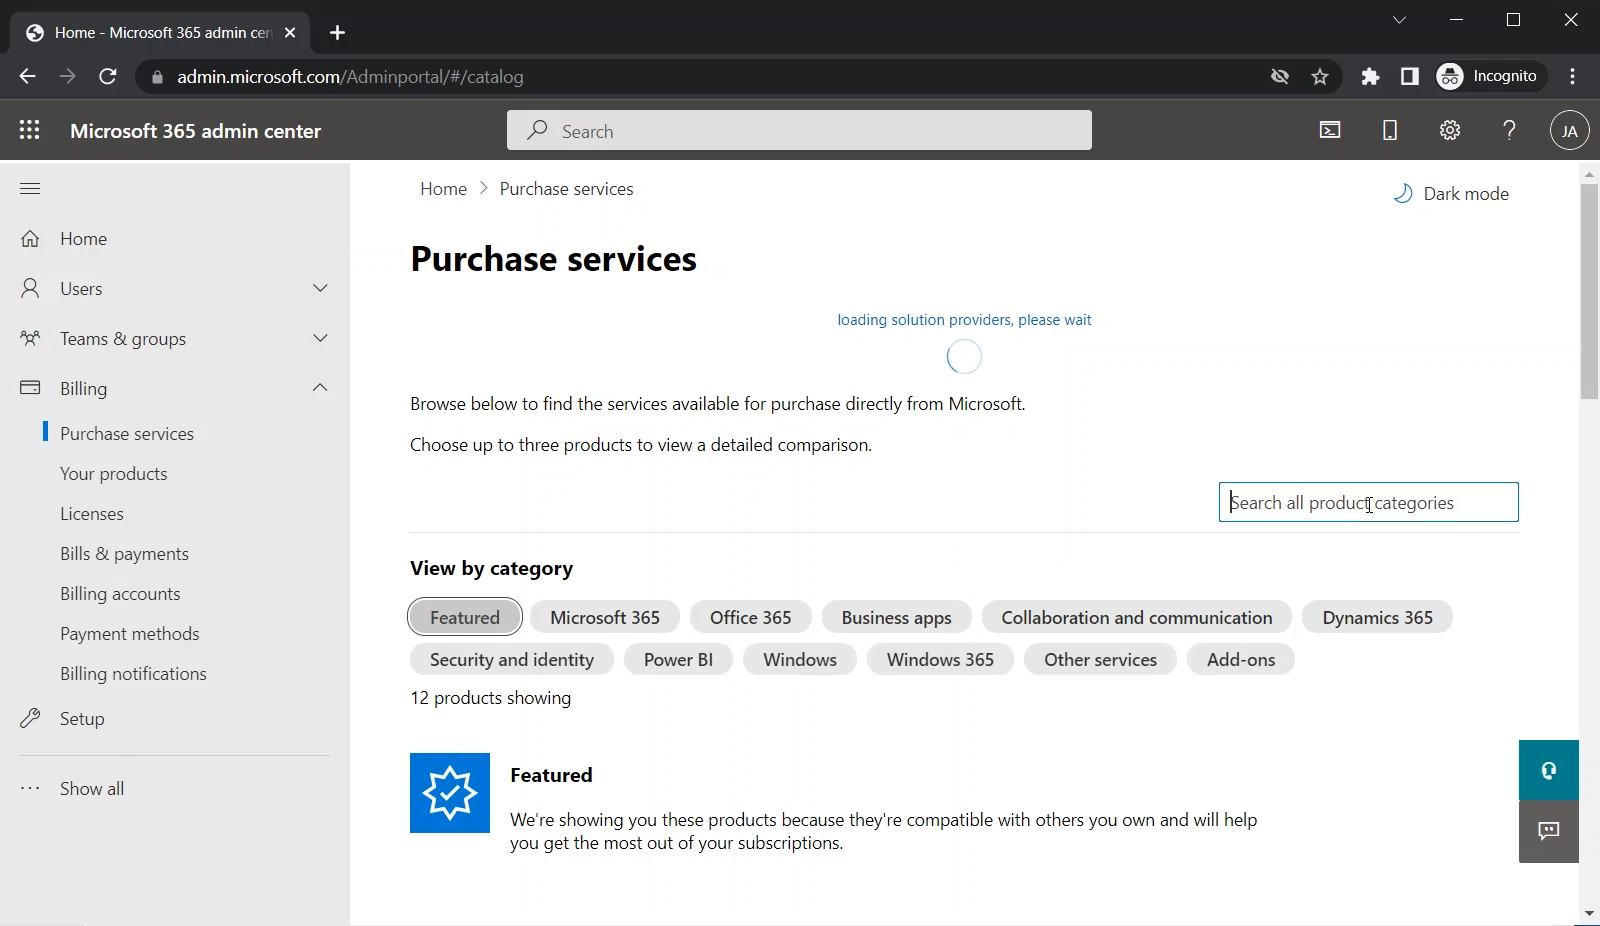
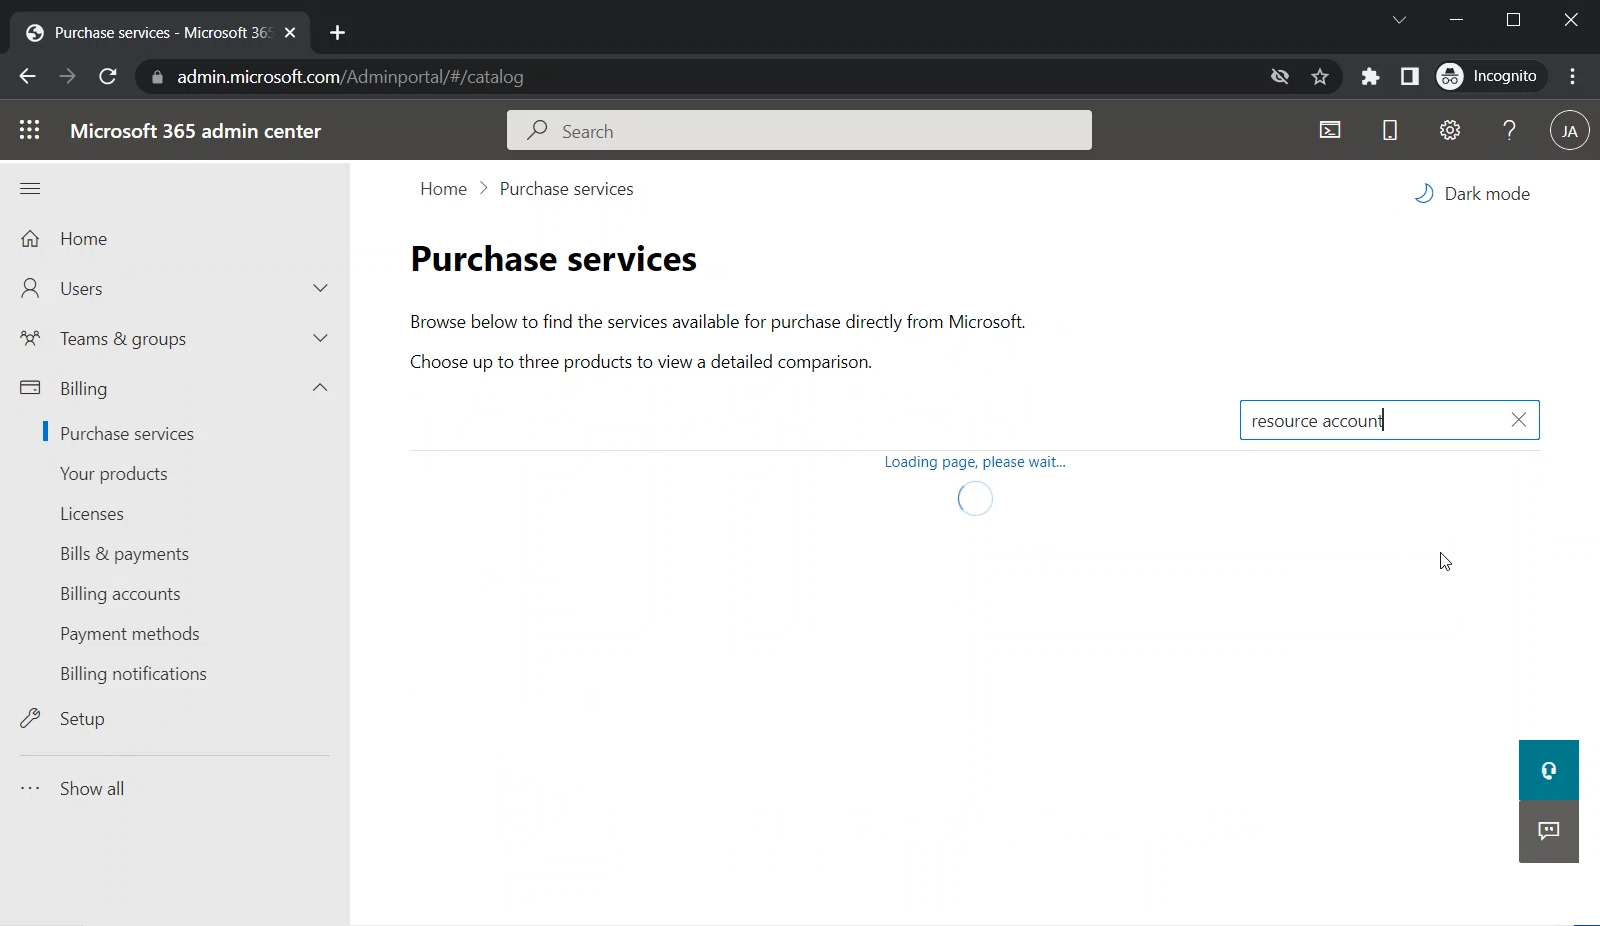
Open “Microsoft 365 admin center”
Go to
Microsoft 365 admin center > Billing > Purchase services
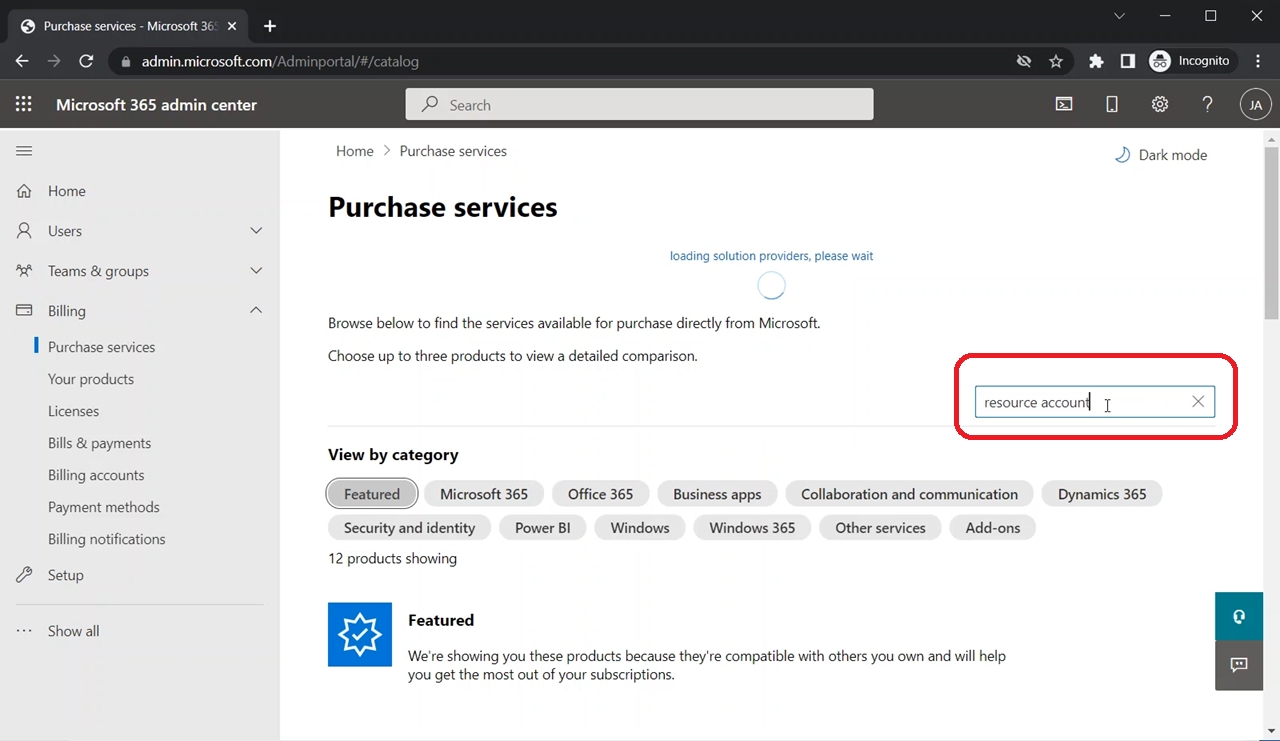
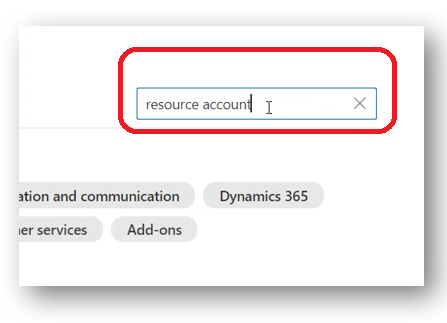
Under the “Search all products categories” box, search for “resource account”
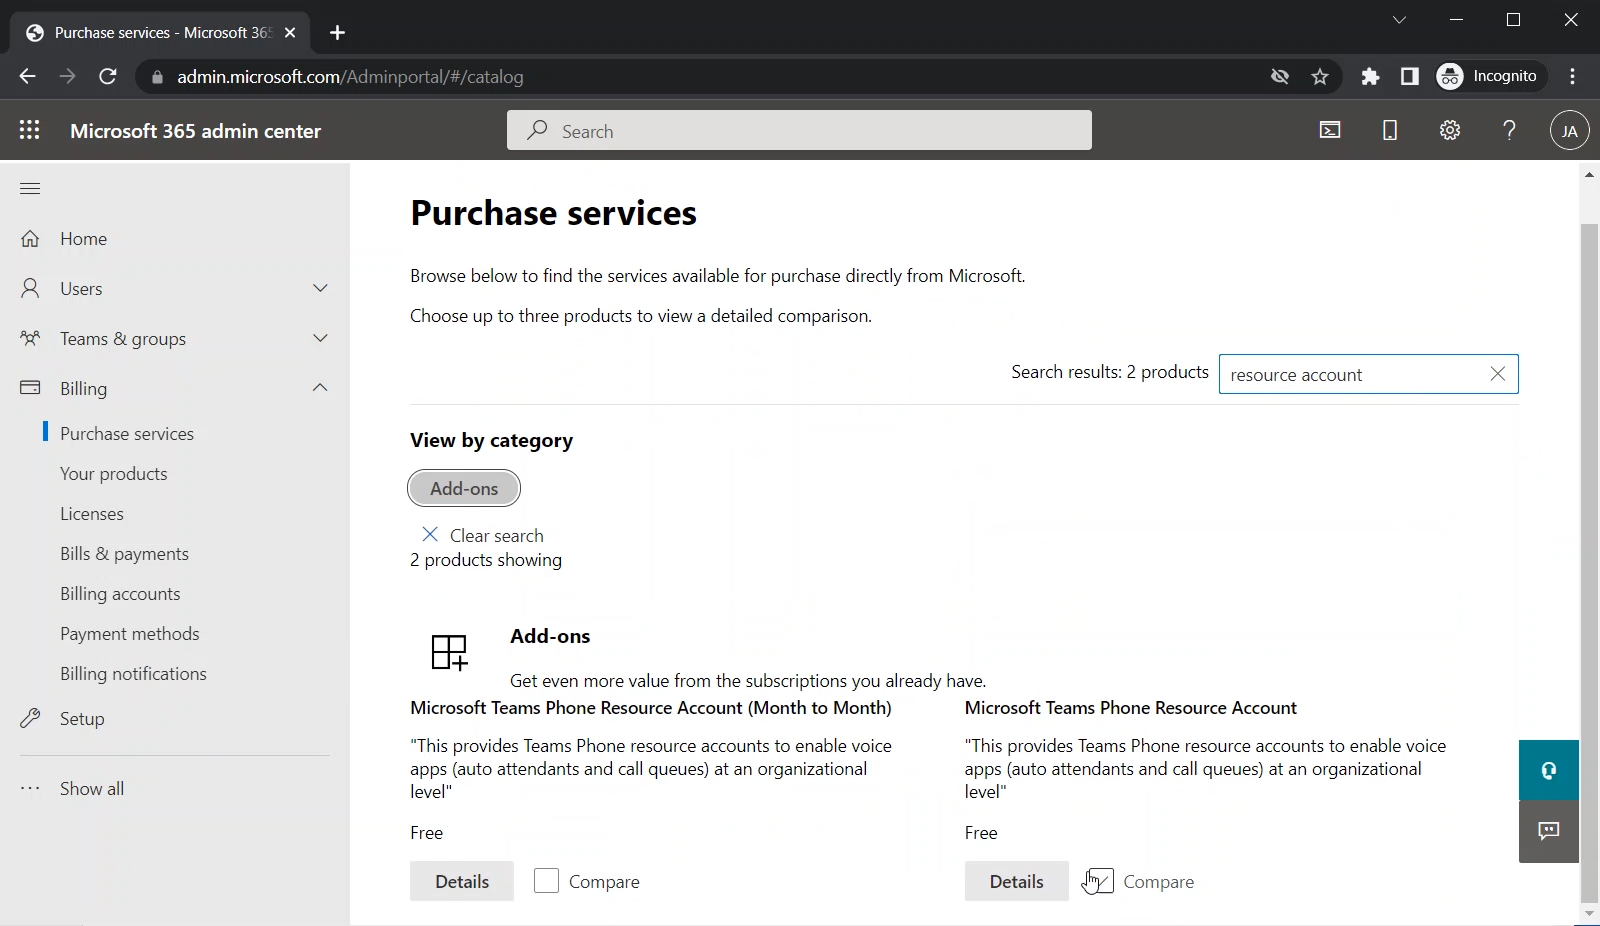
Wait for the results to appear
You will see “Microsoft Teams Phone Resource Account” among the results
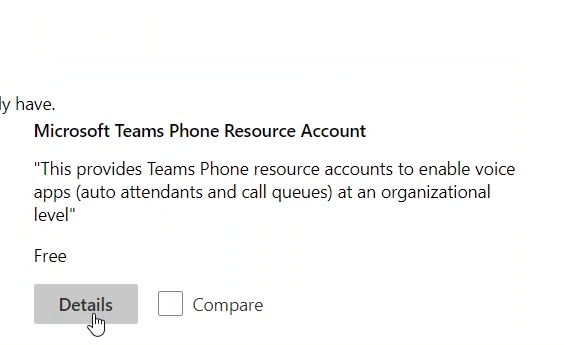
Click on the “Details” button of “Microsoft Teams Phone Resource Account”
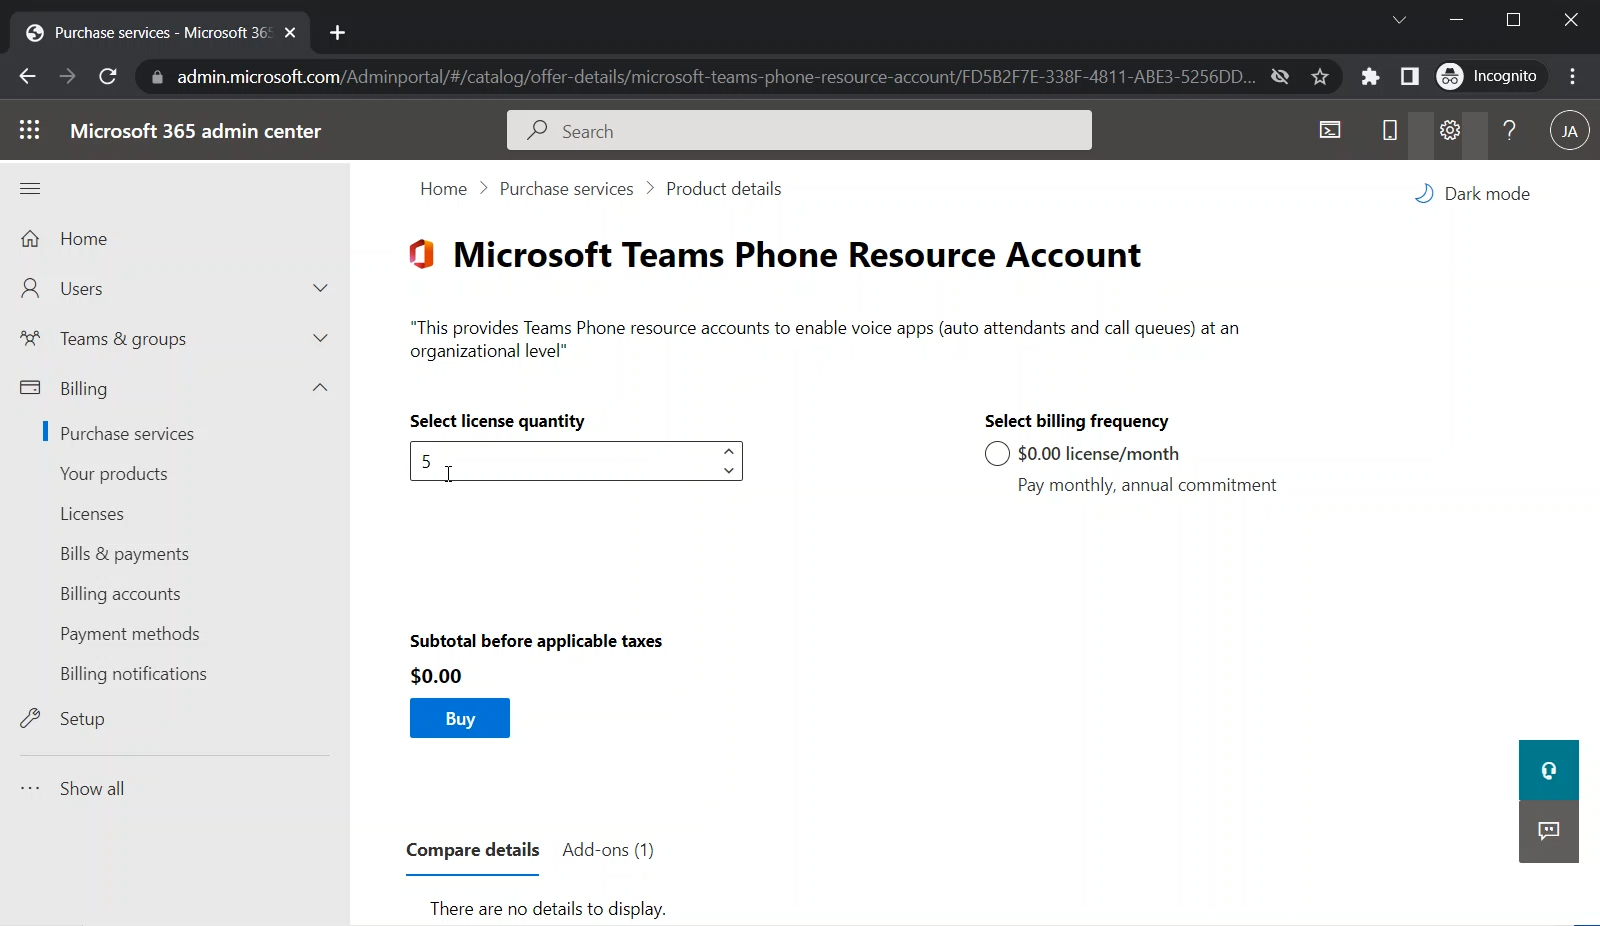
Under “Select license quantity”, put the number of licenses that you need (which is the number of your Resource Accounts that you are planning to have)
Notice that these licenses cost nothing
I have selected 5 under “Select license quantity”
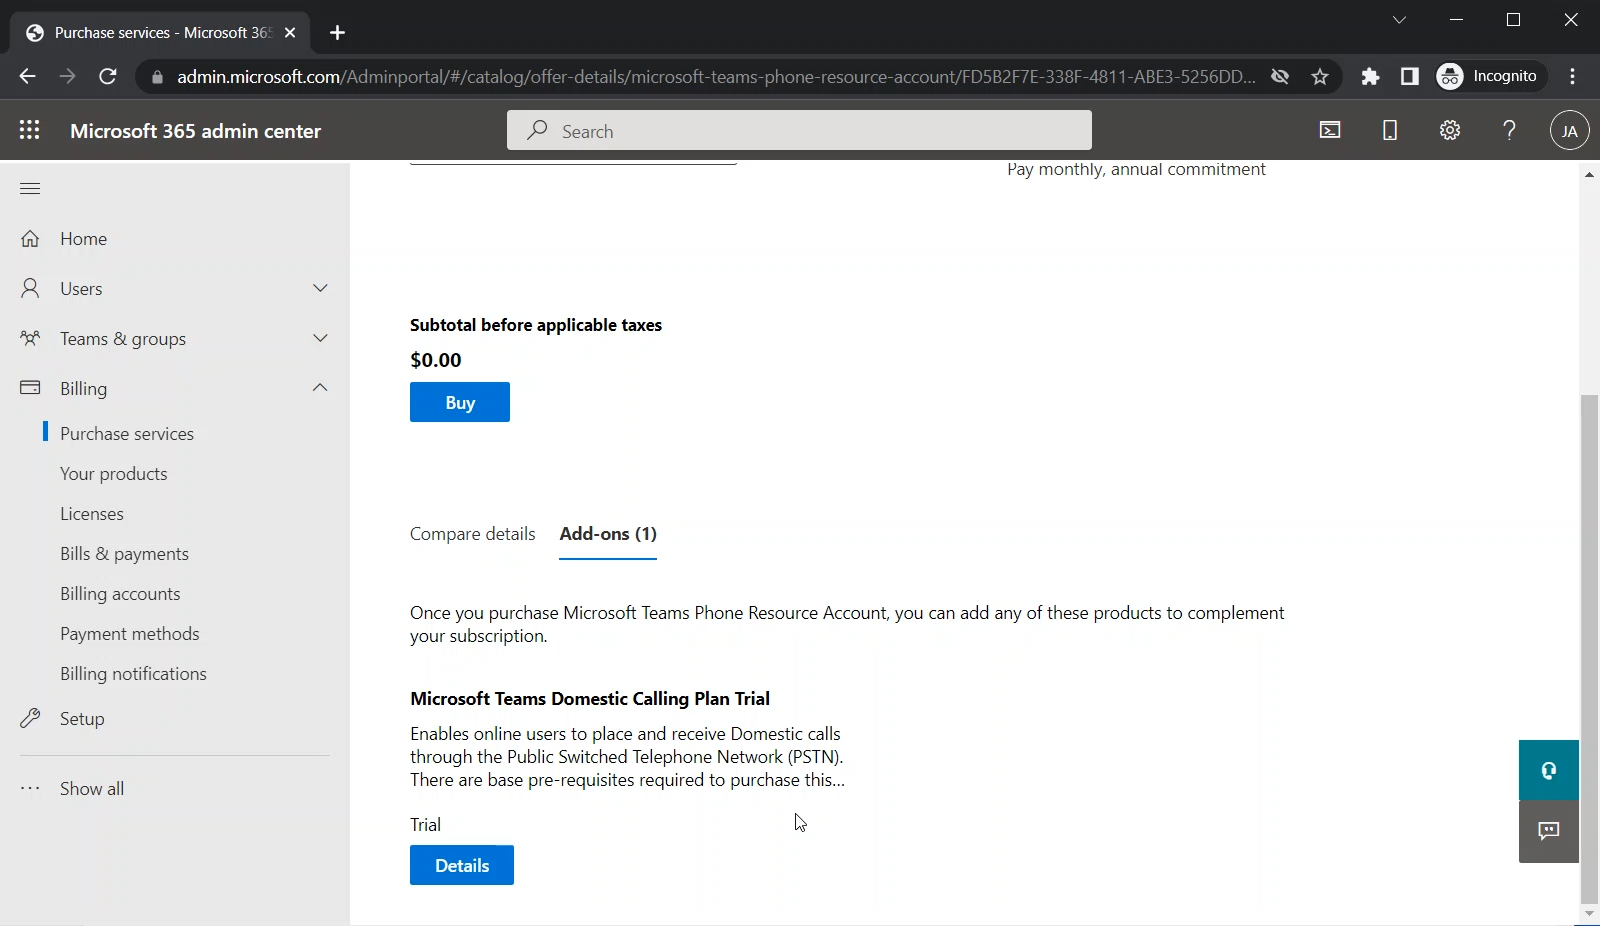
I am scrolling down to see more details as the image below shows
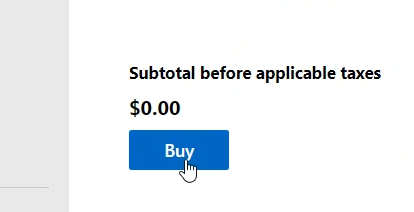
Click on the “Buy” button to acquire this special license
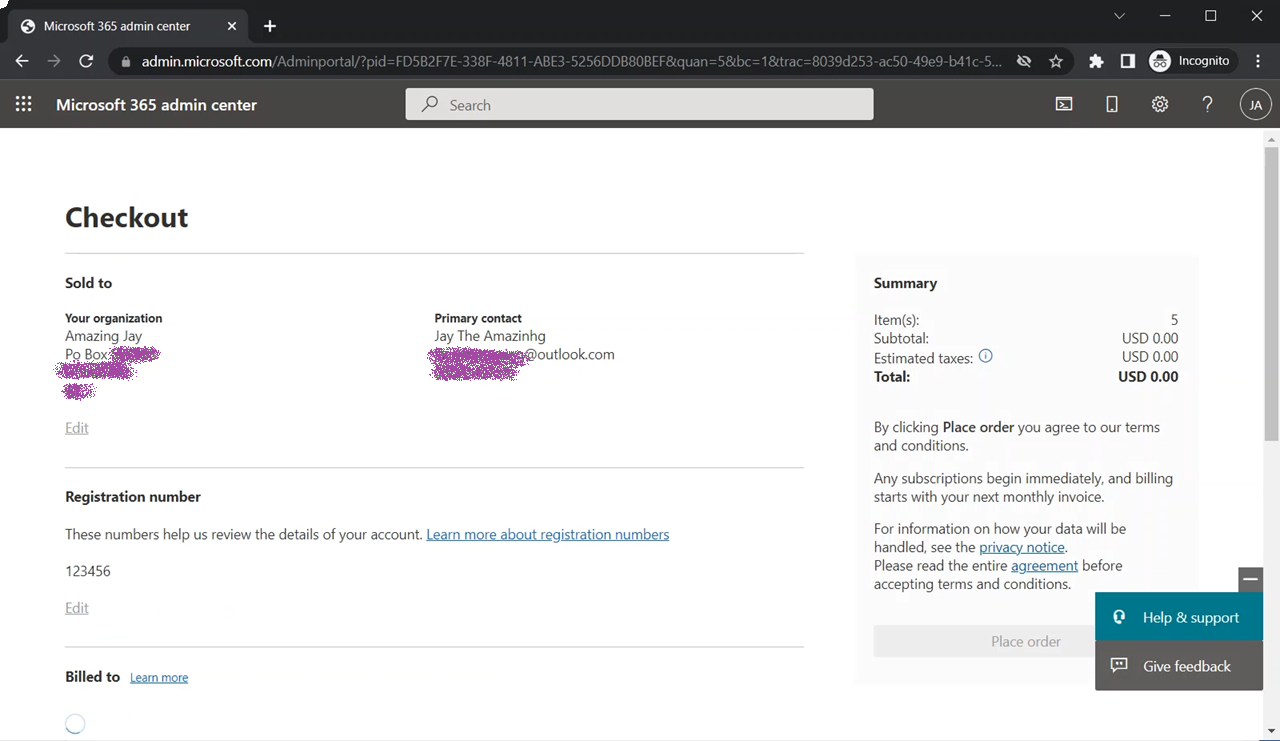
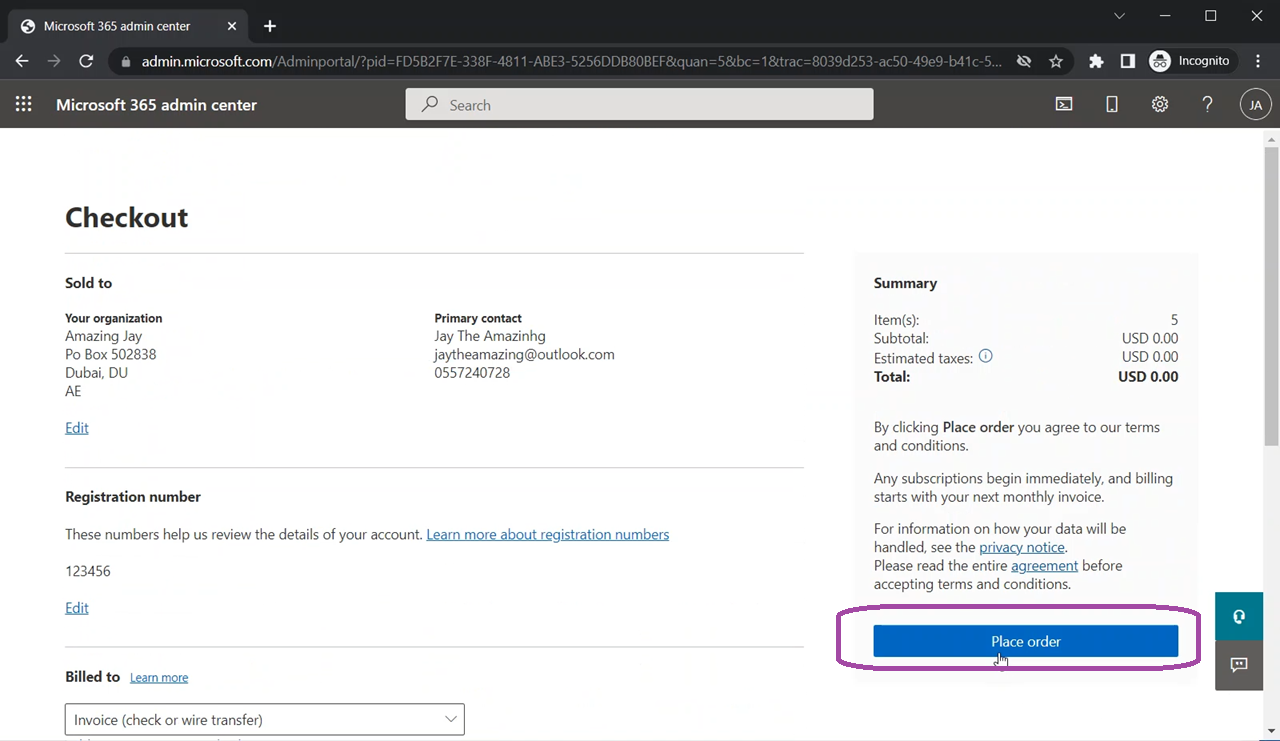
The Checkout page will appear
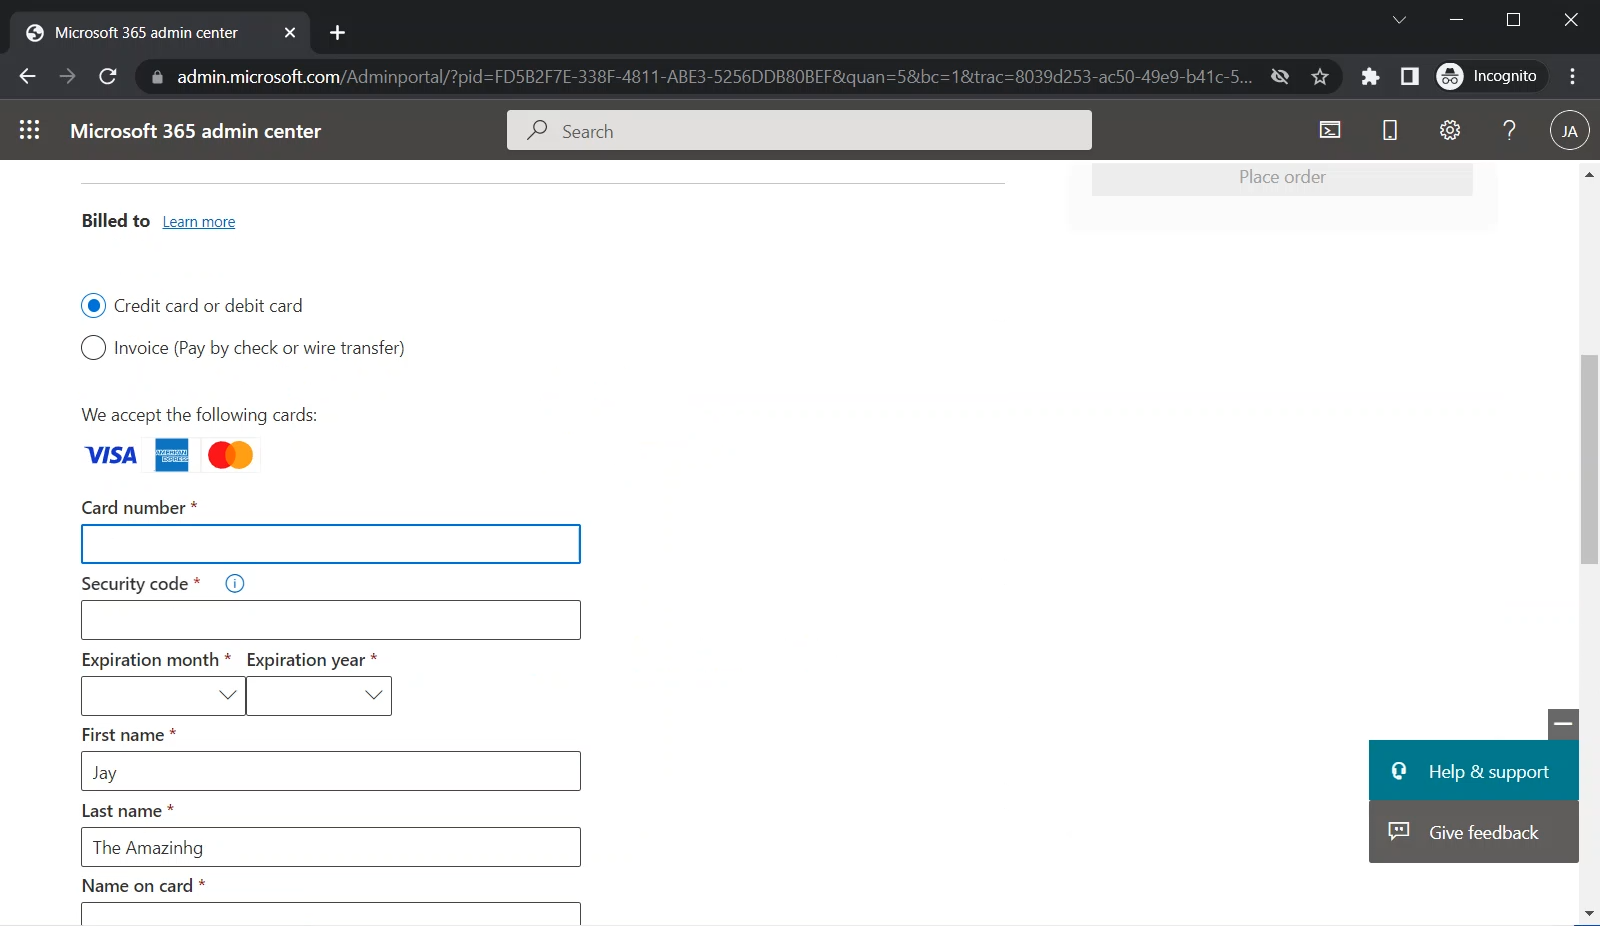
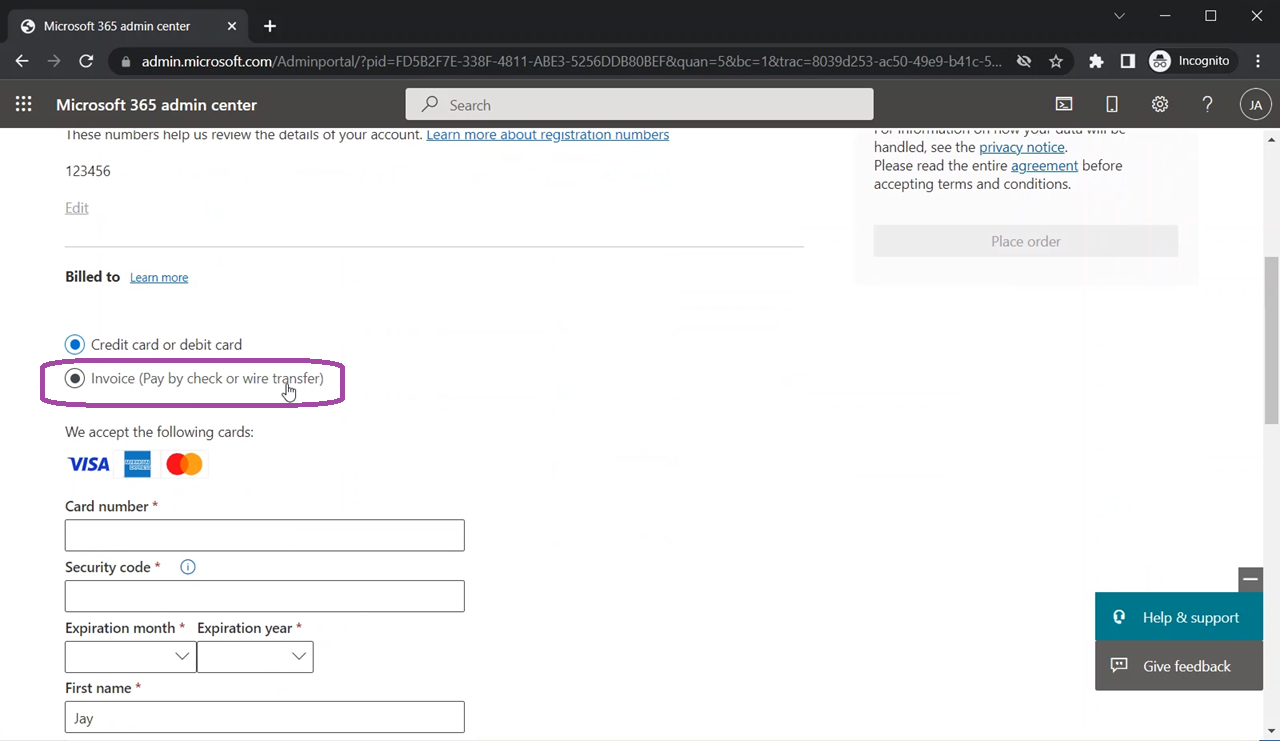
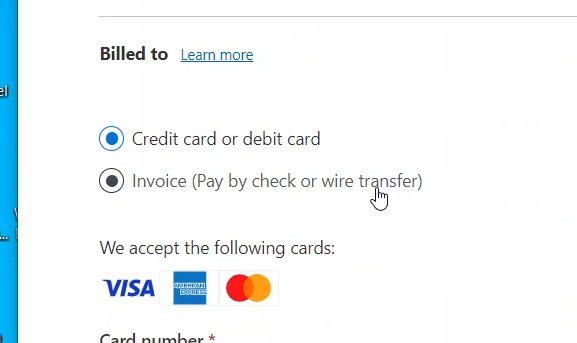
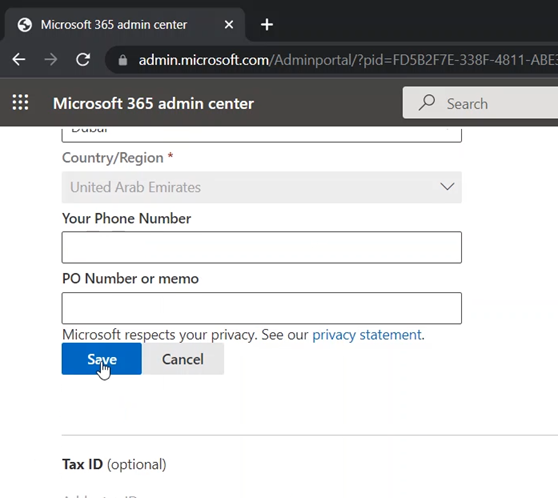
Scroll down to “Billed to”
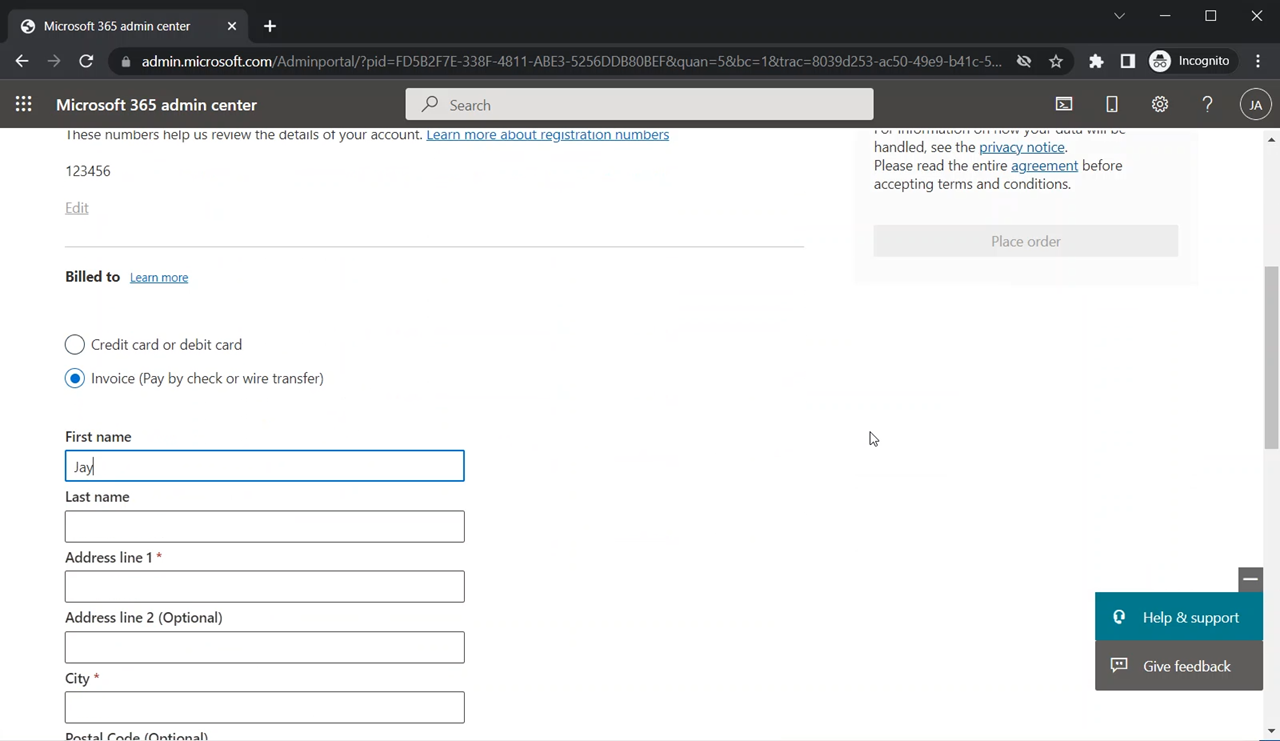
And select “Invoice” to avoid putting credit card information
Fill up the information (name and address)
Click on the “Save” button
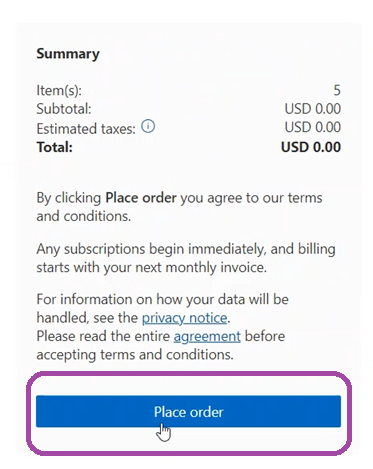
The Summary section will appear on the right side of the screen
Under Summary, click on the “Place Order” button
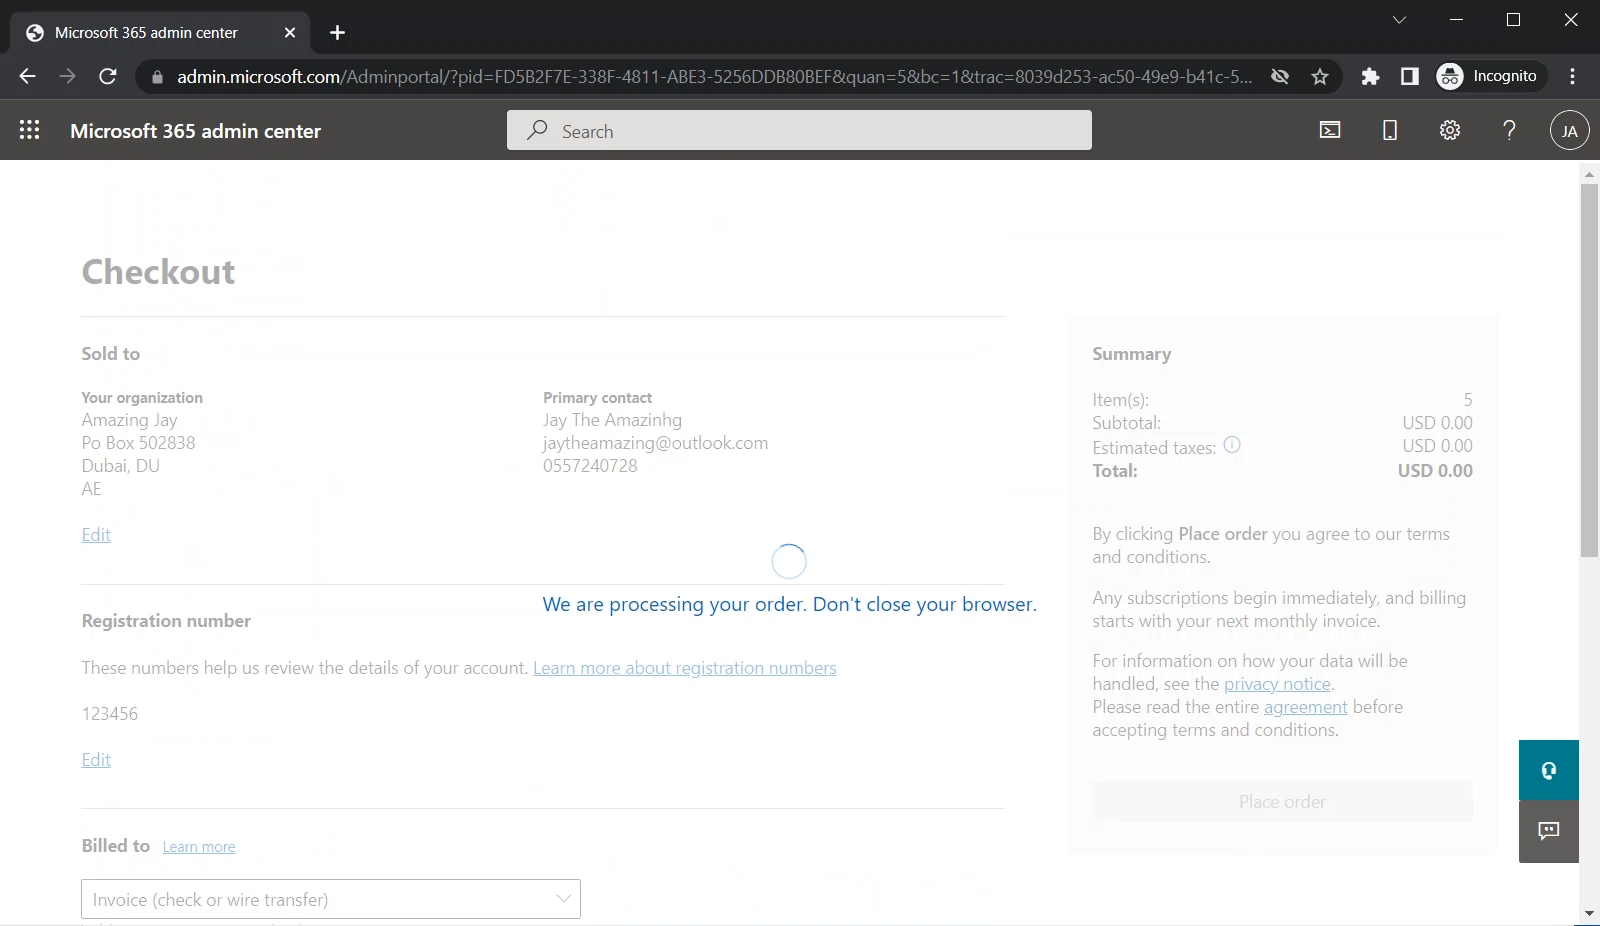
The order will be processed
When it is done, you will get the “You’re all set!” message
Now you can assign these licenses to your Resource Account