In this post, I will explain how to perform the Initial setup of Sonus (Ribbon) SBC 1000.
Connect your computer to the second Ethernet port of SBC 1000 and wait until the it finishes booting up (about 5 minutes) and make sure that you have got an IP address from the range 192.168.192.2. The SBC is providing a temporary DHCP to give your PC an IP address for easier config. This DHCP will not be enabled after completing the Initial Setup

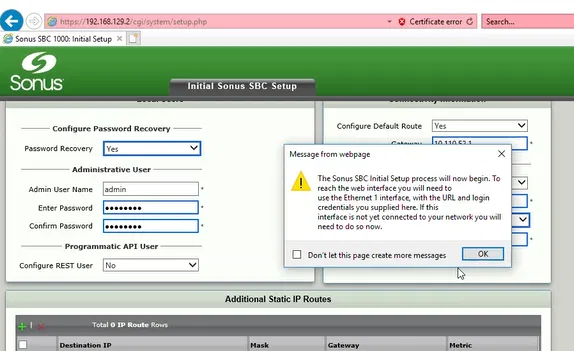
The following two pictures shows a typical configuration. The changed options are marked with thicker rectangles (the web interface automatically adds these rectangles)


The IP address you have provided will be used for the Ethernet Interface number 1 in the front panel
In the above configuration, we have also configured the IP address of the Ethernet Interface number 2 to be same as the one used during the initial configuration. This would help us to access the gateway on Ethernet Interface 2 with its default IP in case we have a problem with the first interface or we have forgot its IP.
Note that we select the option “Don Not Launch” for the “Easy Setup”
Click on OK

Click on OK on the Dialog Box

Connect the first Ethernet interface to the network (if you have not already done that)
Enter the IP address of the gateway in the browser, it will show the following page only the first time you connect to the gateway on this browser using this address

Click on Enter, it will take you to the logon screen

Enter the User ID and the Password you have supplied during the initial setup and click on Login

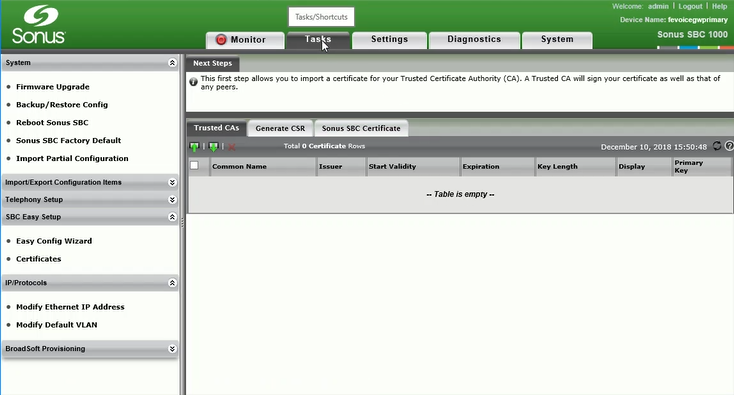
You will be taken to Tasks Page/Tab, unless you have selected to Launch Easy Setup in the initial setup step