Some customers already have an SBC that is configured to work with Skype for Business server and they want to configure the same SBC with Teams Direct Routing. Usually, they need to keep both configurations running for some time while they are migrating the users to Teams. From experience, this would create two issues that need to be addressed.
Issue 1:
Integrating SBC with Teams Direct Routing requires having a new Public Certificate. And that also requires is to change the name of the SBC device to match the name in the certificate.
The issue is that installing such a certificate and changing the name of the SBC will break the integration with Skype for Business Server.
To overcome this, we need to redefine the SBC as a new PSTN Gateway inside the Topology of Skype for Business and configure the routes.
Issue 2:
The internal Teams’ clients need to communicate with the public IP address of the SBC, so a DNS record of type A needs to be added to the internal DNS. This record will resolve the new name of the SBC to the public IP.
Skype Front End needs to communicate with the internal IP (not the public IP) of the SBC (unless you are ready to do the modification and the complexities inside your network to allow Skype Front End to communicate with the Public IP).
The issue is that when the Skype Front End server queries the DNS, it will get the public IP address of the SBC instead of the internal IP.
To overcome this, an entry can be added inside the Hosts file of the Front End server. That entry resolves the new name of the SBC to the internal IP address of the SBC (the “hosts” file has higher precedence than DNS records)
Usually, I do the following steps (in order) before preparing the SBC to be integrated with Teams Direct Routing:
- Install the new Public Certificate (from this moment, the downtime will start)
- Change the name of the SBC
- Inside the Skype Front End server, an entry inside the host file will be added. That entry points to the Internal IP address of the SBC
- Define the new name of the SBC as a new PSTN Gateway inside Skype Topology and publish the topology (this will also create a new trunk inside the Skype environment)
- Modify each of the Skype voice routes to make it use the trunk with the new name of SBC instead of the trunk with the old name of SBC
- Restart the Mediation service (this would end the downtime if all the settings are correct)
- Verify that the Skype PSTN calls are going through
After that, you can delete the old name of the SBC from Skype Topology
Illustration of Skype for Business Part
The below steps illustrate Skype for Business server part
Adding Hosts File Entry
On the Front End server of Skype of Business, run Notepad as an administrator
Open Hosts file (it is located inside c:\windows\system32\drivers\etc)
Add host the entry that points the new name of SBC to the private IP address of the SBC

Defining The SBC New Name Inside The Skype Topology
You need to define the SBC again as a PSTN gateway inside the Skype for Business Topology
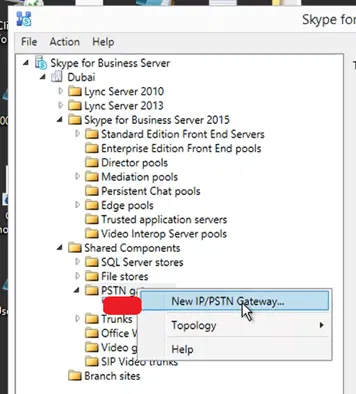
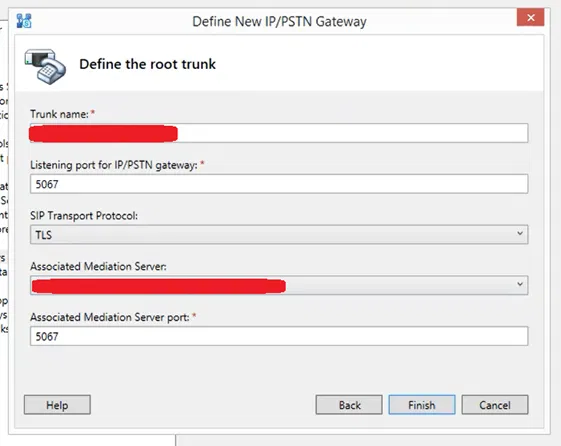
Follow the wizard to complete the definition of PSTN Gateway
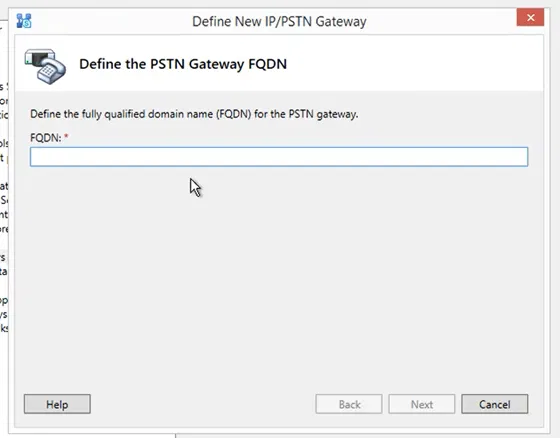
Make sure that parameters are similar to the old definition of the SBC
After completing the definition, you can see a new PSTN gateway with the new name of the SBC is defined as well as a new trunk

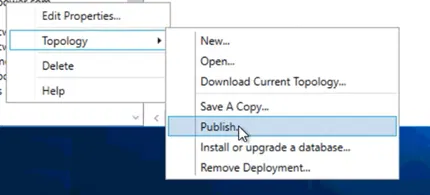
Don’t for get to publish the topology
Changing Skype Voice Routes to Use the New Name Of The SBC
Note that, you need to schedule a downtime for this operation
On Skye for Business Control Panel, go to Voice Routing > Route tab
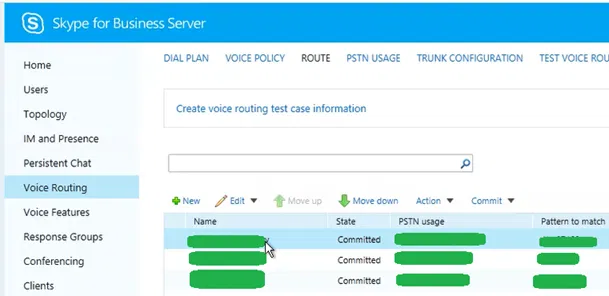
The properties page of that “Route” is opened.
Open a route that uses the old name of the SBC as “Associated trunk”.
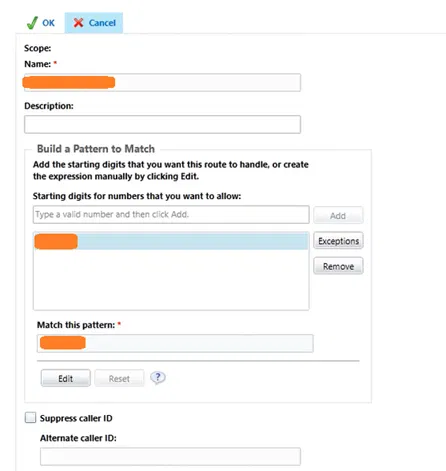
Under Associated trunks, click on Add

Select the Trunk that has the new name of the SBC and click on OK

You will get back to the “Route” properties page
Under Associated trunks, select the old name of the SBC and click on Remove

Make sure that under Associated trunks, only the new name of the SBC is listed

“Route” properties page, click on OK

You will get back to the “Route” tab and you will see the “State” of the modified route is set to “Uncommuted”

Do the above steps for each of the routes that use the old name of the SBC as “Associated trunk”
The following image shows that all the modified routes as “Uncommitted”

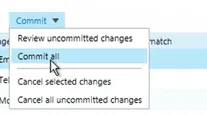
After modifying all the routes, select “Commit” > “Commit all”


Restarting Mediation Service
After committing the changes, you need to restart the Mediation service
