Month: March 2021

Changing Ribbon the Name of SBC 1000 / SBC 2000 / SBC SWe Lite (SBC Edge) after Doing Microsoft Team Integration

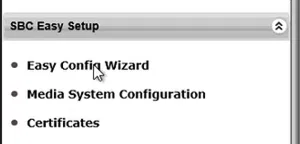
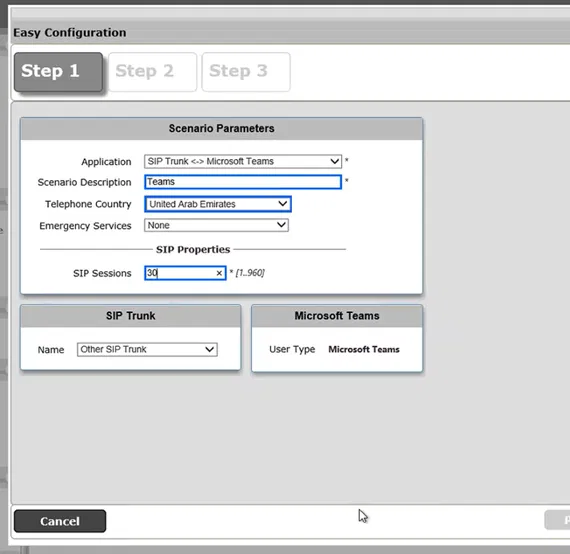
After running the “Easy Config Wizard” to integrate the SBC with Teams Direct Routing, the customer informed me that they need to use another name for the SBC

So, I have done the following steps

  • Installed a new certificate that contains a subject name that is equal to the new name of the SBC
  • Register the new name of the SBC using the PowerShell command New-CsOnlinePSTNGateway
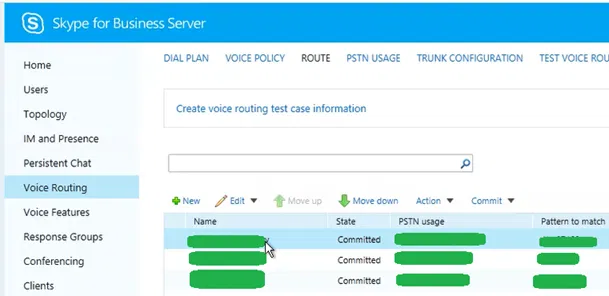
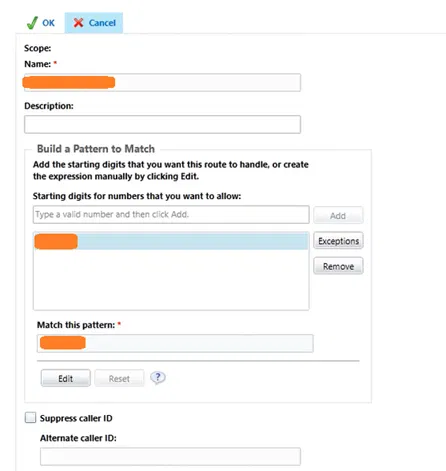
  • Changed all the voice routing policies to use the new
  • Unregistered the old name of the SBC using Remove-CsOnlinePSTNGateway
  • Changed the name of the SBC using the web interface under Settings tab > System > “Node-Level Settings

After that I noticed that the calls are failing and when I checked Teams Admin Center, I noticed that there is a warning next to the new name of SBC under Voice > Direct Routing

If clicked the warning, and I got the details below

The title of the warning was “No SIP Option warning” and the body of the warning was

The Session Border Controller exists in our database (your administrator created it using the command New-CSOnlinePSTNGateway). But we have difficulties determining SIP Options status. Please check in 15 minutes

Although there are other reasons for this warning, I guessed that the reason was that the SBC is still communicating with Office 365 servers with its old name and that would cause the TLS to fail

I have tried the steps under the section Changing Host Profile Settings below and that fixed the issue.

But first, here are the steps for changing the name of the SBC under “Node-Level Settings

Changing the Name of the SBC

In case, you haven’t changed the name of the SBC under “Node-Level Settings“, here are the steps

On the web interface, click on the Settings tab, expand System and click on Node-Level Settings

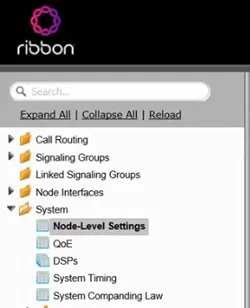
The Node-Level Settings are shown

Under Host Information, type the new Host Name and Domain Name if needed
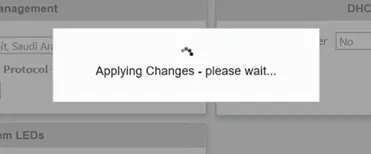
Click on Apply

Changing Host Profile Settings

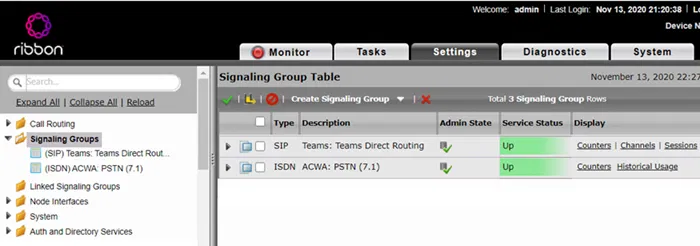
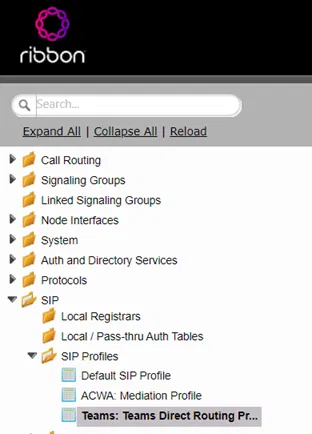
Go to Settings Tab > SIP > SIP Profiles and select the SIP Profile that is used for Teams Direct Routing integration

Usually, you have used “Easy Config Wizard” to create the integration with Teams, so the name of the SIP Profile is “Scenario_Name: Teams Direct Routing Profile”

In my case the Scenario Name I have used during the running “Easy Config Wizard” was Teams, that is why the name of the SIP profile is “Teams: Teams Direct Routing Profile” as shown in the image below

The following is what the SIP Profile for Teams Direct Routing would look like

Scroll Down to “SDP Customization”

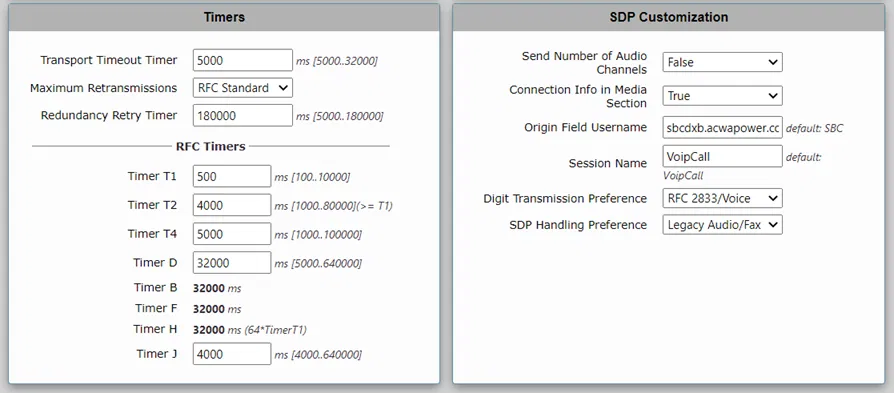
Change “Origin Field Username” to the new name of the SBC and click apply

With this, your SBC will communicate to Office 365 / Teams server using the new name

Note:

  • Don’t forget to register the new name of SBC using the PowerShell command New-CsOnlinePSTNGateway
  • Don’t forget to install a certificate that uses the new name

Error While Trying to Move A User to Teams Saying That the User Has Not Been Assigned “Audio Confronting License”

I have tried to move a user from Skype for Business to MS Teams using the Control Panel of Skype for Business. But I got the error shown in the image below

I expanded the message to see the full text of the error

The error is saying:

Move-Csuser :: HostedMisrat ion fault: Error=(511), Description=(The user could not be moved because he or she is enabled for dial-in conferencing on-premises, but has not been an assigned an Audio Conferencing license in Office 365. Users must be licensed before they can be moved to Teams or Skype for Business Online).

This indicates that the user dial-in conferencing on Skype for Business while the user on Office 365 has no Audio Conferencing licensing assigned to it

Solution

The text of the error is saying that you can use the “BypassAudioConferencingCheck” switch

Since I want to use the Control Panel user interface instead of trying the “BypassAudioConferencingCheck” switch using PowerShell

I have created a new Conferencing Policy and cleared the check box “Enable PSTN dial-in conferencing”

After that, I assigned the new conferencing policy to the user

Then, I tired to move the user.

The user successfully moved to MS Teams.

Before Integrating Teams Direct Routing with An SBC That Is Already Integrated with Skype For Business.

Some customers already have an SBC that is configured to work with Skype for Business server and they want to configure the same SBC with Teams Direct Routing. Usually, they need to keep both configurations running for some time while they are migrating the users to Teams. From experience, this would create two issues that need to be addressed.

Issue 1:

Integrating SBC with Teams Direct Routing requires having a new Public Certificate. And that also requires is to change the name of the SBC device to match the name in the certificate.

The issue is that installing such a certificate and changing the name of the SBC will break the integration with Skype for Business Server.

To overcome this, we need to redefine the SBC as a new PSTN Gateway inside the Topology of Skype for Business and configure the routes.

Issue 2:

The internal Teams’ clients need to communicate with the public IP address of the SBC, so a DNS record of type A needs to be added to the internal DNS. This record will resolve the new name of the SBC to the public IP.

Skype Front End needs to communicate with the internal IP (not the public IP) of the SBC (unless you are ready to do the modification and the complexities inside your network to allow Skype Front End to communicate with the Public IP).

The issue is that when the Skype Front End server queries the DNS, it will get the public IP address of the SBC instead of the internal IP.

To overcome this, an entry can be added inside the Hosts file of the Front End server. That entry resolves the new name of the SBC to the internal IP address of the SBC (the “hosts” file has higher precedence than DNS records)

Usually, I do the following steps (in order) before preparing the SBC to be integrated with Teams Direct Routing:

  • Install the new Public Certificate (from this moment, the downtime will start)
  • Change the name of the SBC
  • Inside the Skype Front End server, an entry inside the host file will be added. That entry points to the Internal IP address of the SBC
  • Define the new name of the SBC as a new PSTN Gateway inside Skype Topology and publish the topology (this will also create a new trunk inside the Skype environment)
  • Modify each of the Skype voice routes to make it use the trunk with the new name of SBC instead of the trunk with the old name of SBC
  • Restart the Mediation service (this would end the downtime if all the settings are correct)
  • Verify that the Skype PSTN calls are going through

After that, you can delete the old name of the SBC from Skype Topology

Illustration of Skype for Business Part

The below steps illustrate Skype for Business server part

Adding Hosts File Entry

On the Front End server of Skype of Business, run Notepad as an administrator

Open Hosts file (it is located inside c:\windows\system32\drivers\etc)

Add host the entry that points the new name of SBC to the private IP address of the SBC

Defining The SBC New Name Inside The Skype Topology

You need to define the SBC again as a PSTN gateway inside the Skype for Business Topology

Follow the wizard to complete the definition of PSTN Gateway

Make sure that parameters are similar to the old definition of the SBC

After completing the definition, you can see a new PSTN gateway with the new name of the SBC is defined as well as a new trunk

Don’t for get to publish the topology

Changing Skype Voice Routes to Use the New Name Of The SBC

Note that, you need to schedule a downtime for this operation

On Skye for Business Control Panel, go to Voice Routing > Route tab

The properties page of that “Route” is opened.

Open a route that uses the old name of the SBC as “Associated trunk”.

Under Associated trunks, click on Add

Select the Trunk that has the new name of the SBC and click on OK

You will get back to the “Route” properties page

Under Associated trunks, select the old name of the SBC and click on Remove

Make sure that under Associated trunks, only the new name of the SBC is listed

“Route” properties page, click on OK

You will get back to the “Route” tab and you will see the “State” of the modified route is set to “Uncommuted”

Do the above steps for each of the routes that use the old name of the SBC as “Associated trunk”

The following image shows that all the modified routes as “Uncommitted”

After modifying all the routes, select “Commit” > “Commit all”

Restarting Mediation Service

After committing the changes, you need to restart the Mediation service

Teams External Access – Allowing and Disallowing Communicating with Other Domains

You can manage to allow or block communication of your Teams users with other Teams or Skype for Business (online or on-premise) domains by accessing

Teams Admin Center > Org-wide settings > External access

Although it is clearly written on the top of the page, some might not notice it.

As it says, all domains are allowed to be communicated with by default.

Simply, when you add a domain (as allowed) to the list, all the other domains will be blocked and any domain you need to communicate with you have to add to the list as allowed.

And when you add a domain to the list as blocked, it means only this domain is blocked and all other domains will be allowed.

This would simplify the configuration and there is less need to have a mix of allowed and blocked domains although it is possible to have such a mixed list.

Issue of “Dial Pad doesn’t appear” in Teams

After you step Teams Direct Routing and enable a user, when that user logs on to Teams, he/she will notice that the dial pad is missing (the dial pad is used to dial a PSTN number)

Usually, it takes 1 hour or more, and in some cases, up to 24 hours for the Dial Pad to appear after you have configured the user correctly:

Based on my experience, the following are possible reasons that make the dial pad disappear:

  • The ports for SBC are not opened correctly
  • One-to-one NATing is not implanted (In case you using NATing for the SBC)
  • Baltimore CA is not trusted by the SBC
  • Not using a supported public certificate provider
  • The user is not enabled correctly for telephony (check below for enabling a user)

To enable telephony for a specific user use commands like the following:

Set-CsUser -Identity user1@example.com -OnPremLineURI “tel:+xxxxxxxxxxxxx;ext=xxxx” -EnterpriseVoiceEnabled $true -HostedVoiceMail $true

Grant-CsOnlineVoiceRoutingPolicy -PolicyName “Online_Voice_Routing_Policy_Name” -Identity user1@example.com

Grant-CsTeamsCallingPolicy -PolicyName AllowCalling -Identity user1@example.com

Grant-CsTenantDialPlan -Identity user1@example.com -PolicyName Tenant_Dial_Plan_Name

Grant-CsTeamsUpgradePolicy -PolicyName UpgradeToTeams -Identity user1@example.com (although it might work without this command)

Also, at any point you change Online Voice Routing Policy for a user, the dial pad disappears for a while

In short, the dial pad will appear if all the settings are correct, and you have waited enough time

The following image shows the dial pad

Ribbon SBC 1000 / SBC 2000 – Running Easy Config Wizard – Teams Direct Routing

The easiest way to configure Ribbon SBC to support Teams Direct Routing is using Easy Config Wizard of the Web Interface

The following steps are showing how to do that

Before running the wizard, it is always recommended to:

  • Take a backup of the SBC device. This is needed to revert back to previous the previous configuration. Especially if the device is used in a production environment
  • Upgrade the firmware to the latest version. The newer version will always contain bug fixes and also might contain improvements in the easy config wizard and other web interface elements

Teams Direct Routing with SIP Trunking

The following steps show how to configure Teams Direct Routing on the device with SIP Trunking (if you are connecting to PSTN using a SIP Trunk supplied by your telephony provider).

On the web interface, got to Tasks Tab.


On the left pane, under SBC Easy Setup, select Easy Config Wizard


The Easy Config Wizard starts as shown below


Step 1

Select the Application (the scenario of the template that is going to be used between two sides of the configuration).

In my case, I have selected SIP Trunk <-> Microsoft Teams which connects SIP Trunk with Teams Direct Routing

Under Scenario Description, type the name of the Scenario. This name will be used as a prefix to all the components that are going to be created by the wizard

Here I am using Teams as the name of the Scenario. You can for example use the name of the company

Unser Telephone Country, I am selecting the country where this setup is implemented

Since I have selected SIP Trunk in “Application”, I need to specify the number of SIP Session

Then click Next


Step 2

 In Step 2, you specify the details of what are going to be two Signaling Groups.

The first part in my case is SIP Trunk (it could be PRI if you selected that under “Application” in Step 1)

`

I am specifying the IP/FQDN of my SIP Server (SIP Trunking), Protocol (TCP or UDP), and port used

I am also disabling the option for “Secondary Border Element Server” as my SIP Trunk has only one SIP Server

These configurations will be used in the first Signaling Group


In the second part of Step 2, which is going to be the second signaling group, specify the information of your Teams Direct Routing connection

In my case, I am select Ethernet 3 and its IP for my Direct Routing Connection


Also, I am enabling the option for NAT Traversal, which allows me to connect my connection behind a NAT firewall (in the old firmware version, the only option is to have a direct internet connection with real IP)


 This will enable a box to specify the public IP address of the direct routing connection (that is NATed to my Ethernet 3)


 I am setting the option “Apply ACL” to True, which allows basic Access Control List to the incoming and outgoing ports

You might not need to enable this option in case you are depending on your company firewall to control the ports are allowed

The list of the required ports is added automatically if you enable ACL


 If you select “Apply ACL” a warning message pops up telling you that you will lose the connection to the web interface (only if you are using this connection to access the web interface)


 The following is how my settings appear before clicking next


 Click next after filling the parameters of Step 2 and want to proceed to Step 3


Step 3

In step 3, you will have a summary of the setting of the two previous steps before applying them.

If you decided to change any of these settings, you can click back if you want to do any changes


You can scroll down if some settings are hidden


 In my case, scrolling down will show us that it is using TLS and port 5061


 Click on Finish to apply the settings that was mentioned in the wizard.


 When you click Finish, a message indicating that the SBC will be configured with the settings mentioned in the Wizard


 Click on OK to apply these settings.


 A message indicating that the configurations are being applied


 When the configuration is completed, a message will appear indicating that


 The Web Interface will be refreshed automatically to reflect the new changes


The Resulting Signaling Groups

The following shows how the result on the Monitor tab after running the above steps (the resulting Signaling Groups are inside the red box)


If you are configuring Teams Direct Routing with ISDN

The previous steps showed how to have Teams Direct Routing connected with SIP Trunk

If you are going to connect Teams with ISDN (instead of SIP Trunk), the following are the changes in Step 1 and Step 2 to use ISDN (

Note that these options are available if you are using a physical SBC device and you have these types of ports available on these devices

On step 1, select the application (scenario) ISDN PSTN <-> Microsoft Teams


And on step 2, for the first part, the wizard will give you the option to configure some parameters of ISDN

Port Type, you could select T1 or E1. I am selecting E1 (as this is what is available in my country)

Under DS1 section, select the ISDN port you want to use (you have options based on the ports available on your device)

On the switch Variant, I kept it as Euro ISDN (the configuration in your country might be different)

For ISDN Number Translation, if you select Translate Extension, it will configure basic numbers manipulations (Translation Tables) based on the “Telephone Country” you have selected in Step 1

In my case, I am selecting Passthrough Untranslated and later I modified Translation Tables to do the number manipulations that I want


The remaining parts of the wizard are the same as the application SIP Trunk <-> Microsoft Teams that is mentioned above

The following shows the signaling group resulting from applying the above steps Teams Direct Routing with ISDN